Sophisticated Photo-real Salon Stripes Nails - Stripes nail art - featuring nail art, red - nail art inspiration and design ideas
Sophisticated Photo-real Salon Stripes Nails
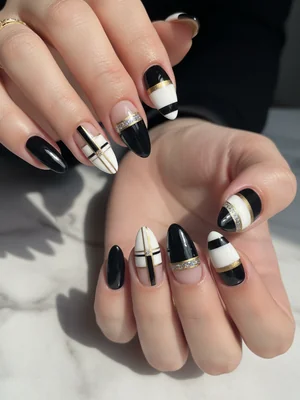
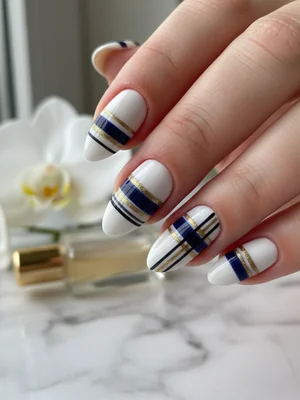
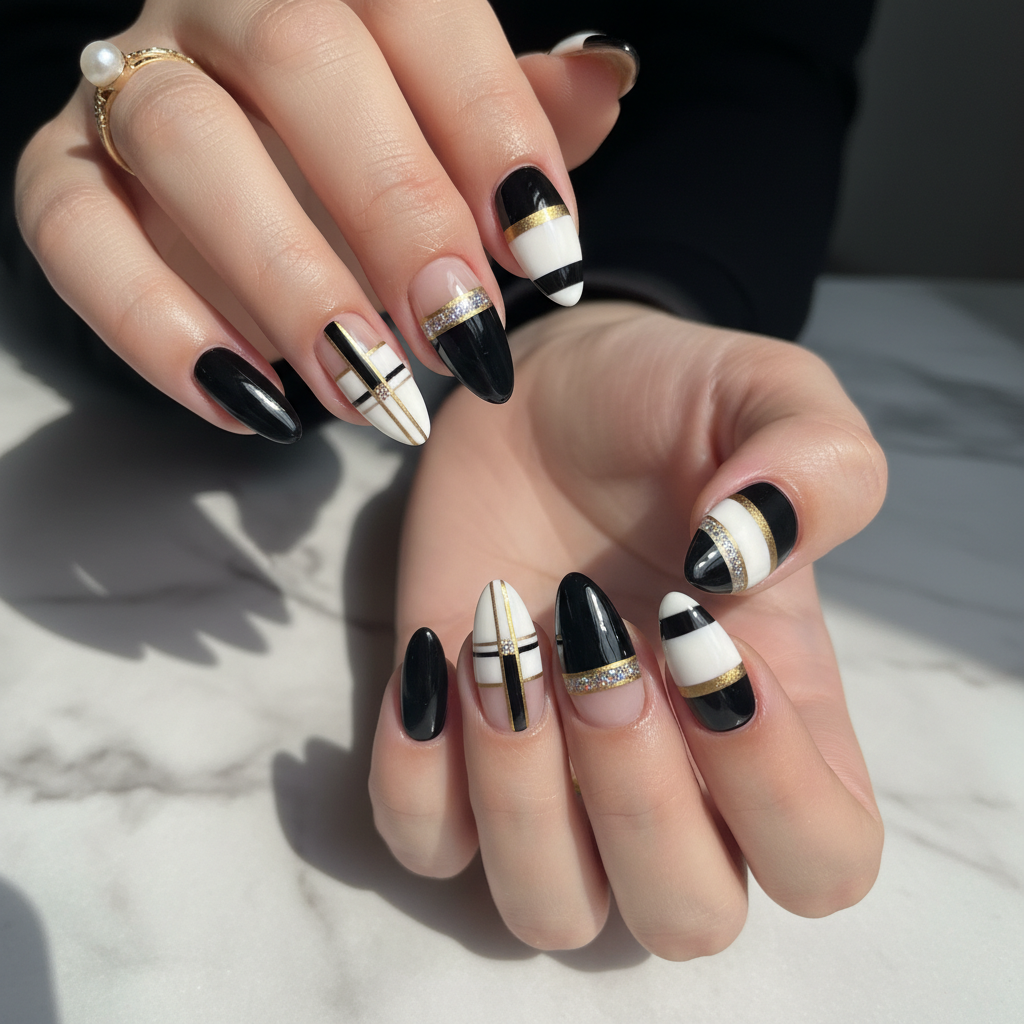
Sophisticated Photo-Real Salon Stripes Nail Art Design Guide
Dive into the world of unparalleled precision with our Sophisticated Photo-Real Salon Stripes nail art design. This look features ultra-crisp, perfectly parallel lines executed with professional salon quality, offering a high-gloss finish that mimics a flawless photograph. Elevate your manicure with this elegant and meticulously crafted stripe masterpiece.
- Fine Detail Nail Art Brushes (000 or liner)
- High-Pigment Gel Polishes (Base & Stripe Colors)
- Ultra-Gloss No-Wipe Top Coat
- LED/UV Curing Lamp
- Nail Cleanser/Wipe Solution
- Thin Striping Tape (optional, for guidance)
- **Prep & Base:** Prep nails, apply base coat, and cure. Apply two thin coats of your chosen base color (e.g., nude or white), curing each layer thoroughly.
- **Map & Paint Stripes:** Using striping tape as a guide or a steady hand with a fine detail brush, meticulously paint thin, parallel stripes with your contrasting color (e.g., black). Focus on creating perfectly crisp, straight lines.
- **Layer & Cure:** If using striping tape, carefully remove it immediately after painting each stripe. Cure the striped layer fully under the LED/UV lamp. Apply a second, even thinner layer of the stripe color if needed for full opacity, then cure again.
- **Seal with High-Gloss:** Apply a generous, self-leveling layer of ultra-gloss top coat over the entire design, ensuring every stripe is encased and the surface is perfectly smooth. Cap the free edge.
- **Final Cure & Shine:** Cure the top coat thoroughly under the lamp according to product instructions. Wipe off any tacky layer with a nail cleanser for a brilliant, salon-perfect 'photo-real' shine.
Expert Tip
For truly photo-real results with sophisticated stripes, load your fine detail brush sparingly with polish and drag it in one fluid, confident motion across the nail. Practice on a nail tip first to perfect your pressure and speed, ensuring each line is razor-sharp and consistent.
Similar Styles
Beautiful Photo-real Salon Stripes Nails
Stripes inspired nail art with beautiful, photo-real finish and professional salon quality

Beautiful Photo-real Salon Stripes Nails
Stripes inspired nail art with beautiful, photo-real finish and professional salon quality

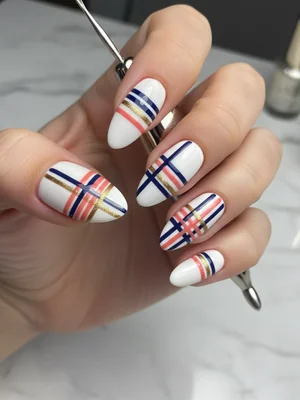
Gorgeous Photo-real Salon Stripes Nails
Stripes inspired nail art with gorgeous, photo-real finish and professional salon quality
Gorgeous Photo-real Salon Stripes Nails
Stripes inspired nail art with gorgeous, photo-real finish and professional salon quality
Beautiful Photo-real Salon Stripes Nails
Stripes inspired nail art with beautiful, photo-real finish and professional salon quality
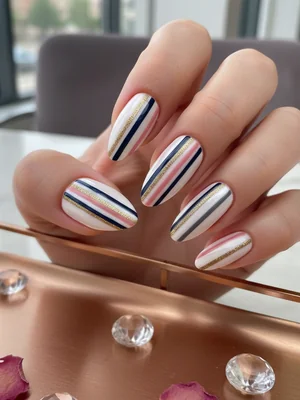
Stunning Photo-real Salon Stripes Nails
Stripes inspired nail art with stunning, photo-real finish and professional salon quality
Stunning Photo-real Salon Stripes Nails
Stripes inspired nail art with stunning, photo-real finish and professional salon quality

Gorgeous Photo-real Salon Stripes Nails
Stripes inspired nail art with gorgeous, photo-real finish and professional salon quality
Sophisticated Photo-real Salon Stripes Nails
Stripes inspired nail art with sophisticated, photo-real finish and professional salon quality

Stunning Photo-real Salon Stripes Nails
Stripes inspired nail art with stunning, photo-real finish and professional salon quality
Sophisticated Photo-real Salon Stripes Nails
Stripes inspired nail art with sophisticated, photo-real finish and professional salon quality

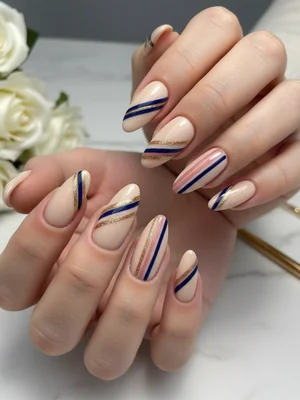
Photo-real Salon Stripes Nails
Stripes inspired nail art with elegant, photo-real finish and professional salon quality
Explore Similar Designs
Techniques Used
Perfect For
Nail Shapes
Frequently Asked Questions
Can I achieve this 'photo-real' look at home?
While challenging, with consistent practice and the right fine-liner brushes or striping tape, you can certainly get close. For truly professional and perfectly photo-real results, a salon visit is highly recommended.
What's the best way to ensure super crisp, sophisticated lines?
The key lies in using high-quality, opaque gel polishes, a very fine detail brush with minimal polish, and steady, confident strokes. Striping tape can also be an invaluable tool for guiding perfectly straight lines.
How long do photo-real striped nails typically last?
With proper gel application, meticulous care, and a quality top coat, this sophisticated design can beautifully last for 2-3 weeks without chipping or significant fading.
Are these stripes easily customizable?
Absolutely! You can tailor the width, number, direction (vertical, horizontal, diagonal), and color palette of the stripes to perfectly suit your personal style, all while maintaining the core photo-real aesthetic.
Is gel polish essential for this design, or can I use regular polish?
While regular polish can be used, gel polish is highly recommended for its superior opacity, crisp edges, self-leveling properties, and exceptional longevity, all of which are crucial for achieving the 'photo-real' salon quality of this sophisticated design.
Aftercare Tips
- ✓Allow your gel top coat to fully harden for at least a few hours before exposing nails to excessive water or pressure.
- ✓Moisturize hands and cuticles regularly to keep the nail bed healthy, which helps extend the life and beauty of your sophisticated manicure.
- ✓Use non-acetone nail polish remover for any touch-ups on the nail plate to avoid dulling the gel top coat's shine.
Safe Removal
- 1.Gently buff the top layer of the gel polish with a coarse file to break the top coat's seal.
- 2.Soak cotton pads in 100% acetone, place them on each nail, and wrap tightly with foil for 10-15 minutes.
- 3.Gently push off the softened gel with an orange wood stick, being careful not to scrape or damage the natural nail plate.