Sophisticated Photo-real Salon Stripes Nails - Stripes nail art - featuring nail art, red - nail art inspiration and design ideas
Sophisticated Photo-real Salon Stripes Nails
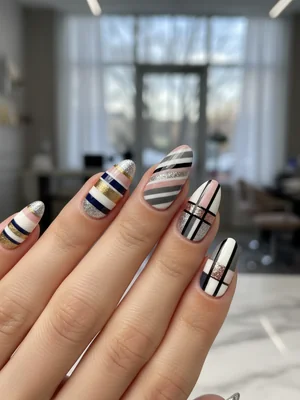
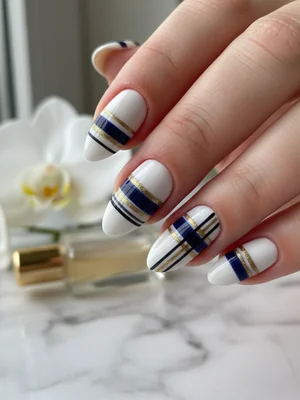
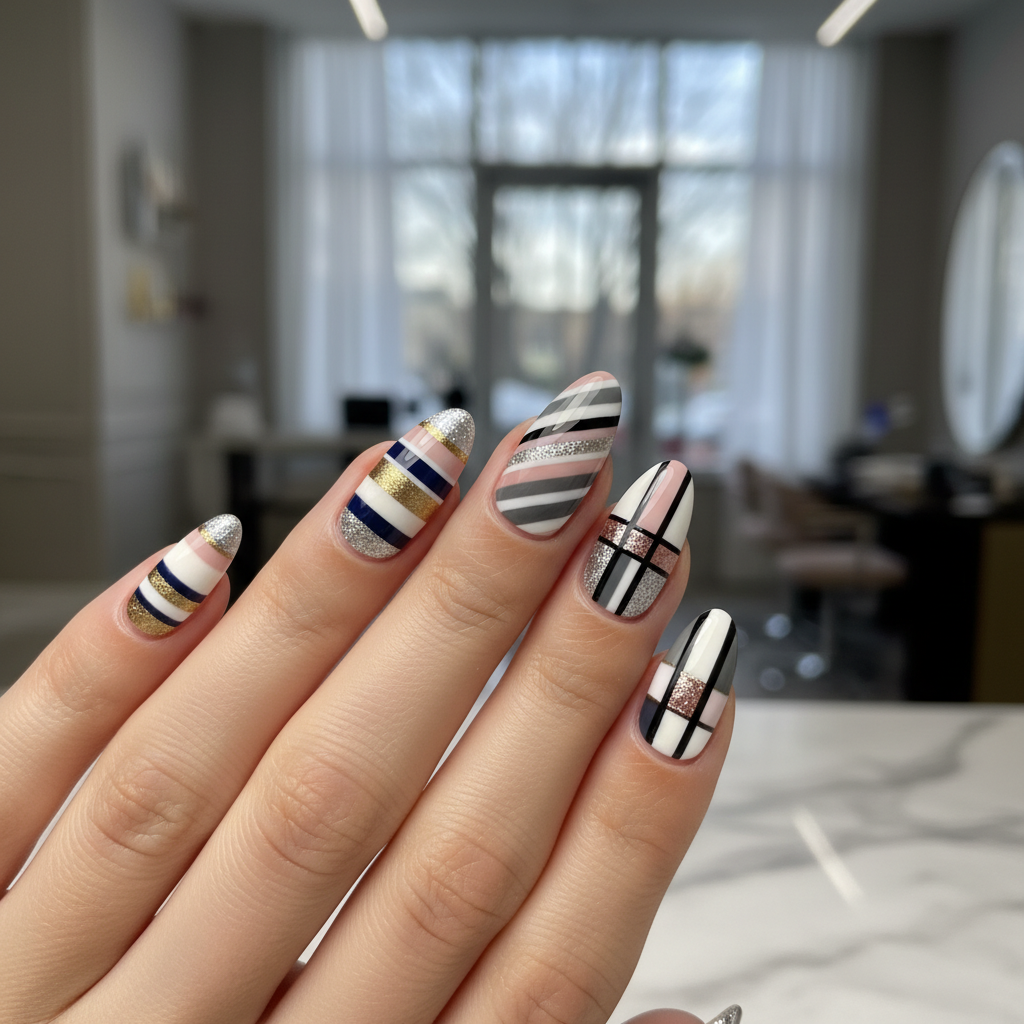
Sophisticated Photo-Real Salon Stripes Nail Art Design
Elevate your manicure with our Sophisticated Photo-Real Salon Stripes design. This look features incredibly crisp, ultra-fine stripes, meticulously applied for a flawless, high-definition finish that truly mimics salon professionalism. Perfect for a refined statement that speaks volumes about your style.
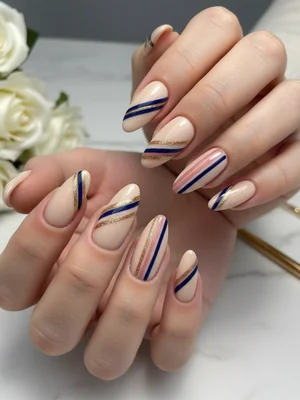
- Gel base coat
- Nude gel polish (or similar neutral base)
- Black striping gel/polish
- Metallic gold striping gel/polish
- Ultra-fine detail nail art brush (000 or shorter)
- High-gloss non-wipe gel top coat
- UV/LED Curing Lamp
- Begin with thorough nail prep: clean, file, buff, and dehydrate. Apply a thin layer of gel base coat and cure.
- Apply two thin, even coats of your chosen nude gel polish, curing fully after each layer.
- Using an ultra-fine detail brush and black striping gel, carefully draw perfectly straight, thin horizontal or vertical stripes across the nail. Ensure even spacing and consistent line thickness. Cure thoroughly.
- For added sophistication, use metallic gold striping gel to add a finer accent stripe parallel to some of the black stripes, or on alternating nails. Cure each stripe set meticulously.
- Finish with a high-gloss, non-wipe top coat, ensuring you cap the free edge. Cure for the recommended time to achieve that photo-real, durable shine.
Expert Tip
Achieving photo-real stripes demands a very steady hand and a high-quality, very fine liner brush. Practice your line work on a nail tip first, and ensure your gel polish consistency is perfect—not too thick, not too thin—for flawless, crisp definition. Anchor your pinky finger for stability!
Similar Styles
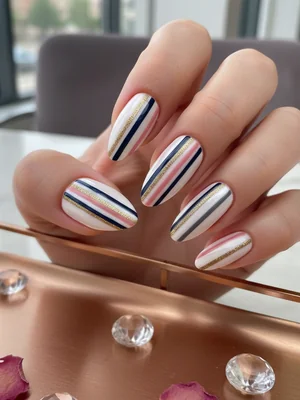
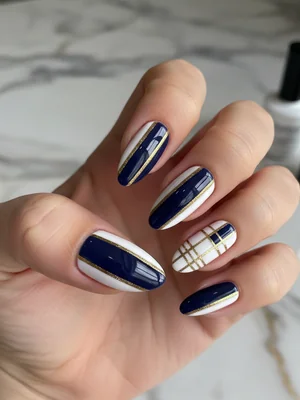
Beautiful Photo-real Salon Stripes Nails
Stripes inspired nail art with beautiful, photo-real finish and professional salon quality

Beautiful Photo-real Salon Stripes Nails
Stripes inspired nail art with beautiful, photo-real finish and professional salon quality

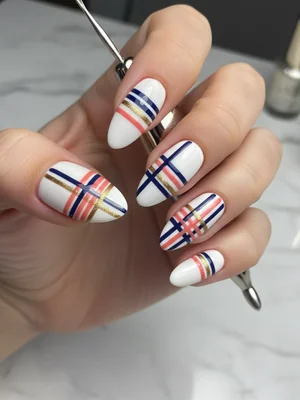
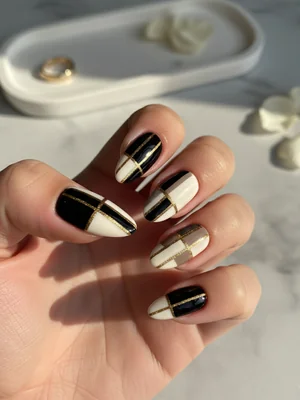
Gorgeous Photo-real Salon Stripes Nails
Stripes inspired nail art with gorgeous, photo-real finish and professional salon quality
Gorgeous Photo-real Salon Stripes Nails
Stripes inspired nail art with gorgeous, photo-real finish and professional salon quality
Beautiful Photo-real Salon Stripes Nails
Stripes inspired nail art with beautiful, photo-real finish and professional salon quality
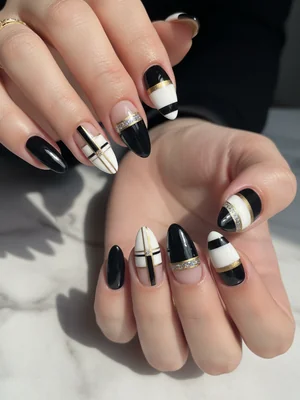
Stunning Photo-real Salon Stripes Nails
Stripes inspired nail art with stunning, photo-real finish and professional salon quality
Stunning Photo-real Salon Stripes Nails
Stripes inspired nail art with stunning, photo-real finish and professional salon quality

Gorgeous Photo-real Salon Stripes Nails
Stripes inspired nail art with gorgeous, photo-real finish and professional salon quality

Stunning Photo-real Salon Stripes Nails
Stripes inspired nail art with stunning, photo-real finish and professional salon quality
Sophisticated Photo-real Salon Stripes Nails
Stripes inspired nail art with sophisticated, photo-real finish and professional salon quality

Photo-real Salon Stripes Nails
Stripes inspired nail art with elegant, photo-real finish and professional salon quality
Sophisticated Photo-real Salon Stripes Nails
Stripes inspired nail art with sophisticated, photo-real finish and professional salon quality
Explore Similar Designs
Colors in this Design
Techniques Used
Perfect For
Nail Shapes
Frequently Asked Questions
How do I get my stripes so perfectly straight and thin?
Achieving perfectly straight, thin stripes requires a very steady hand, a high-quality ultra-fine liner brush, and a bit of practice. Stabilize your painting hand by resting your pinky on a surface, and draw with consistent, light pressure. Striping tape can also be used as a guide.
Can I use regular polish for this 'photo-real' effect?
While possible, gel polish is highly recommended for this design. Its controlled consistency, cure-on-demand nature, and self-leveling properties allow for sharper lines and a more durable, high-gloss 'photo-real' finish that regular polish struggles to replicate without smudging.
What if my lines aren't perfect on the first try?
Don't worry, practice is key! For gel polish, if a line isn't perfect before curing, you can wipe it off with a clean brush dipped in rubbing alcohol and try again without affecting the base layer. For regular polish, use a small brush with acetone for precise cleanup.
How long will this sophisticated striped design typically last?
With proper gel application, full curing, and diligent aftercare, this design can last 2-3 weeks without chipping, fading, or losing its photo-real shine, making it a highly durable and long-lasting option.
Is this design suitable for shorter nail lengths?
Absolutely! While longer nails offer a larger canvas, thin, precise stripes can look incredibly chic and elongating on shorter nail lengths too. The key is to adapt the stripe thickness and number to suit the nail size, maintaining that sophisticated balance.
What does 'photo-real' finish really mean for nail art?
'Photo-real' in nail art refers to a finish so flawless, precise, and high-definition that it appears as if the design was printed onto the nail, rather than hand-painted. It implies extreme crispness, smooth transitions, and a perfect, often high-gloss, surface.
Aftercare Tips
- ✓Avoid picking or peeling the gel polish, as this can damage your natural nail.
- ✓Apply hand cream regularly to keep your hands and nails hydrated.
- ✓Do not use your nails as tools (e.g., to open cans) to prevent chipping or breakage.
- ✓If any lifting occurs, refrain from pulling and seek professional repair to avoid further damage.
Safe Removal
- 1.Gently file off the top coat to break the gel seal, being careful not to file into your natural nail.
- 2.Soak nails in acetone for 10-15 minutes, using cotton balls soaked in acetone wrapped in foil.
- 3.Gently push off softened gel with a wooden cuticle pusher; do not scrape or force.