Gorgeous Photo-real Salon Stripes Nails - Stripes nail art - featuring nail art, red - nail art inspiration and design ideas
Gorgeous Photo-real Salon Stripes Nails
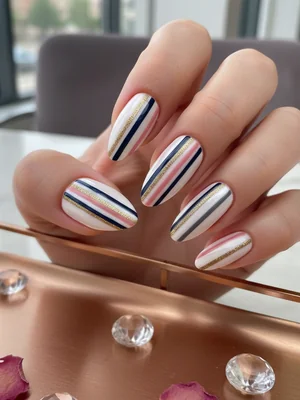
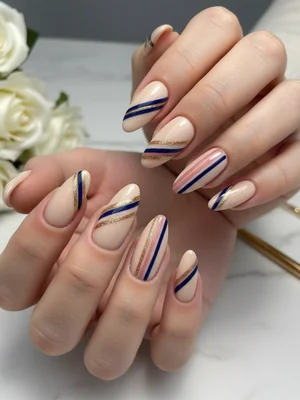
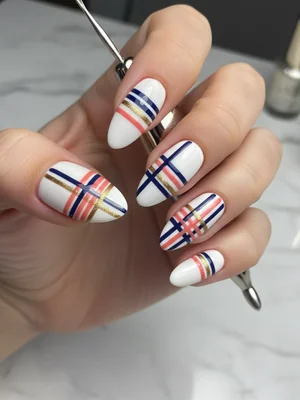
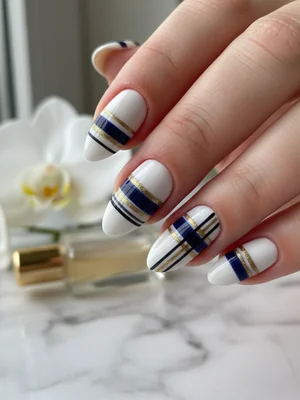
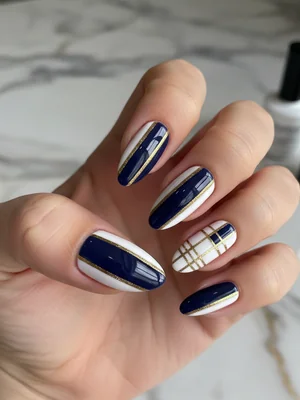
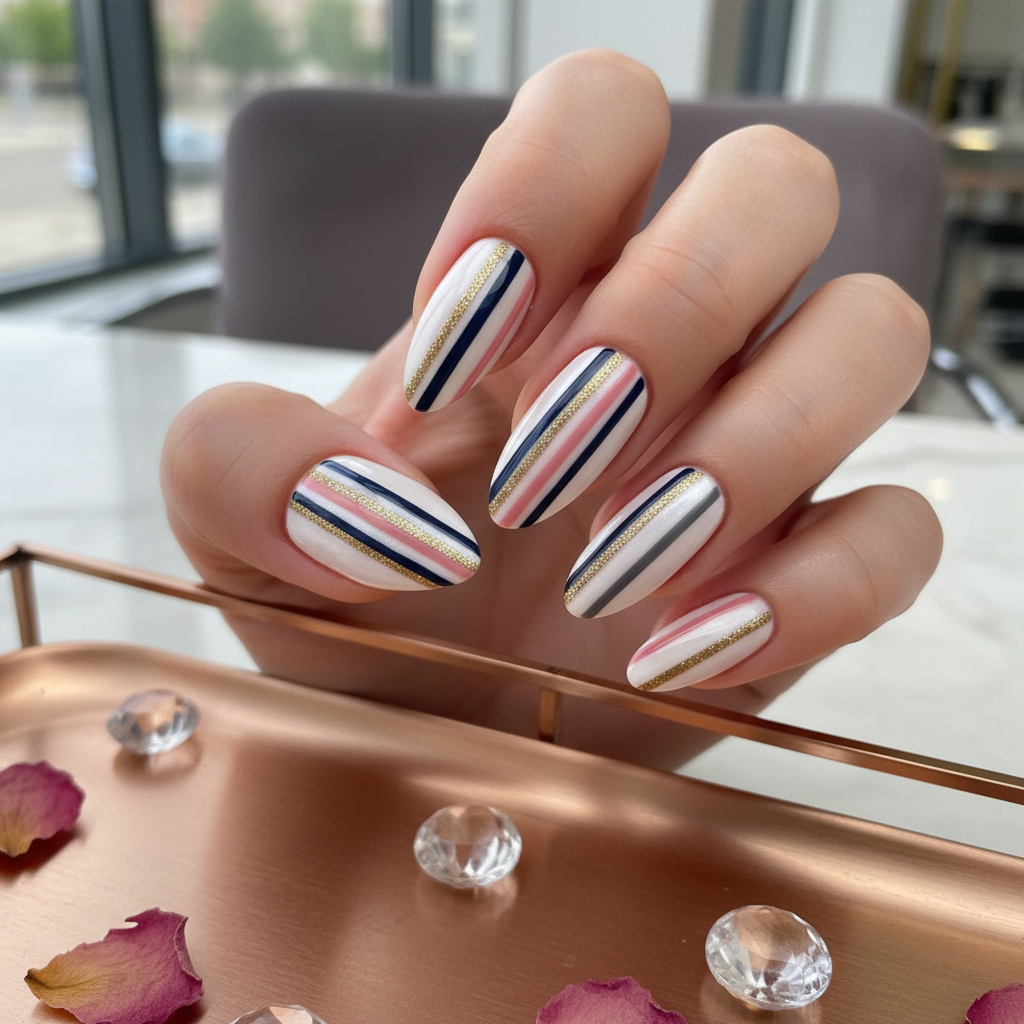
Photo-Real Salon Stripes Nail Art: Precision & Chic
Unveil the ultimate in crisp, professional nail artistry with our Photo-Real Salon Stripes design. This stunning look features ultra-sharp lines and a flawless finish, mimicking a high-resolution image right on your fingertips. It’s the perfect choice for those who appreciate meticulous detail and a truly polished aesthetic.
- Gel Base Coat
- Gel Top Coat (High-Gloss)
- White Gel Polish
- Black Gel Polish
- Metallic Gold Gel Polish (or striping gel)
- Fine Liner Brush (00 or 000)
- Striping Tape (optional, for ultra-crisp edges)
- UV/LED Curing Lamp
- Nail Cleanser/Wipe Off Solution
- Prepare nails (file, push cuticles, buff), then apply a thin layer of gel base coat and cure.
- Apply two thin coats of white gel polish as the base color, curing each layer thoroughly.
- Using striping tape for guidance or a very steady hand with a fine liner brush, apply sleek black stripes. Cure immediately after applying each stripe or set of stripes if using tape, removing tape before full cure for the sharpest edge.
- Carefully apply metallic gold accent stripes alongside or within the black stripes using the fine liner brush. Cure each gold stripe meticulously.
- Seal the entire design with a high-gloss gel top coat, ensuring even coverage over all lines, and cure fully for a durable, photo-real finish.
- Wipe off the tacky inhibition layer with nail cleanser for a brilliant, smudge-free shine.
Expert Tip
Achieving 'photo-real' quality requires patience and incredibly thin, even layers of polish. When using striping tape, ensure it's firmly pressed down to prevent bleeding, and remove it immediately after applying the stripe color *before* curing for the sharpest, most defined line. Practice makes perfect for this sophisticated stripes design!
Similar Styles
Beautiful Photo-real Salon Stripes Nails
Stripes inspired nail art with beautiful, photo-real finish and professional salon quality

Beautiful Photo-real Salon Stripes Nails
Stripes inspired nail art with beautiful, photo-real finish and professional salon quality

Gorgeous Photo-real Salon Stripes Nails
Stripes inspired nail art with gorgeous, photo-real finish and professional salon quality
Beautiful Photo-real Salon Stripes Nails
Stripes inspired nail art with beautiful, photo-real finish and professional salon quality
Stunning Photo-real Salon Stripes Nails
Stripes inspired nail art with stunning, photo-real finish and professional salon quality
Stunning Photo-real Salon Stripes Nails
Stripes inspired nail art with stunning, photo-real finish and professional salon quality

Gorgeous Photo-real Salon Stripes Nails
Stripes inspired nail art with gorgeous, photo-real finish and professional salon quality
Sophisticated Photo-real Salon Stripes Nails
Stripes inspired nail art with sophisticated, photo-real finish and professional salon quality

Stunning Photo-real Salon Stripes Nails
Stripes inspired nail art with stunning, photo-real finish and professional salon quality
Sophisticated Photo-real Salon Stripes Nails
Stripes inspired nail art with sophisticated, photo-real finish and professional salon quality

Photo-real Salon Stripes Nails
Stripes inspired nail art with elegant, photo-real finish and professional salon quality
Sophisticated Photo-real Salon Stripes Nails
Stripes inspired nail art with sophisticated, photo-real finish and professional salon quality
Explore Similar Designs
Colors in this Design
Perfect For
Nail Shapes
Frequently Asked Questions
How can I ensure my stripes are perfectly straight and 'photo-real'?
The key is precision! Use minimal polish on your fine liner brush, work in thin layers, and consider using high-quality striping tape as a guide, removing it before curing for super crisp edges.
Is this design durable enough for daily wear?
Absolutely! With proper gel application and a quality top coat, this design is very durable and can last 2-3 weeks without chipping or fading, maintaining its 'photo-real' quality.
What's the best way to choose colors for this stripes design?
For a 'photo-real' effect, high-contrast colors work best to make the lines pop. Think dark and light combinations, or add a metallic accent for an extra touch of luxury.
Can I achieve this at home without professional tools?
While professional tools and skill yield the best 'salon quality' results, with a steady hand, fine liner brushes, gel polishes, and a curing lamp, dedicated DIYers can certainly attempt this intricate stripes design at home with practice.
How long does the application process typically take?
Due to the precision required for 'photo-real' lines, this design typically takes 75-90 minutes in a salon setting to ensure every stripe is perfect and cured flawlessly.
Aftercare Tips
- ✓Moisturize hands and nails regularly to maintain flexibility.
- ✓Wear gloves when doing household chores or gardening to protect your manicure.
- ✓Avoid prolonged exposure to harsh chemicals like cleaning agents.
Safe Removal
- 1.Gently file off the top coat to break the seal.
- 2.Soak nails in acetone for 10-15 minutes, ensuring cotton pads are fully saturated and wrapped.
- 3.Carefully push off softened gel with an orangewood stick; do not pick or force.