Beautiful Photo-real Salon Stripes Nails - Stripes nail art - featuring nail art, red - nail art inspiration and design ideas
Beautiful Photo-real Salon Stripes Nails
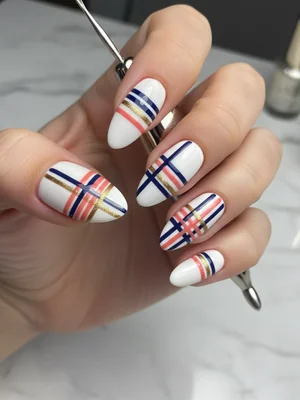
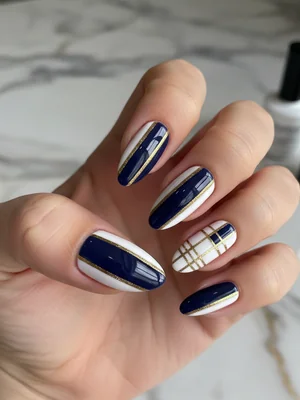
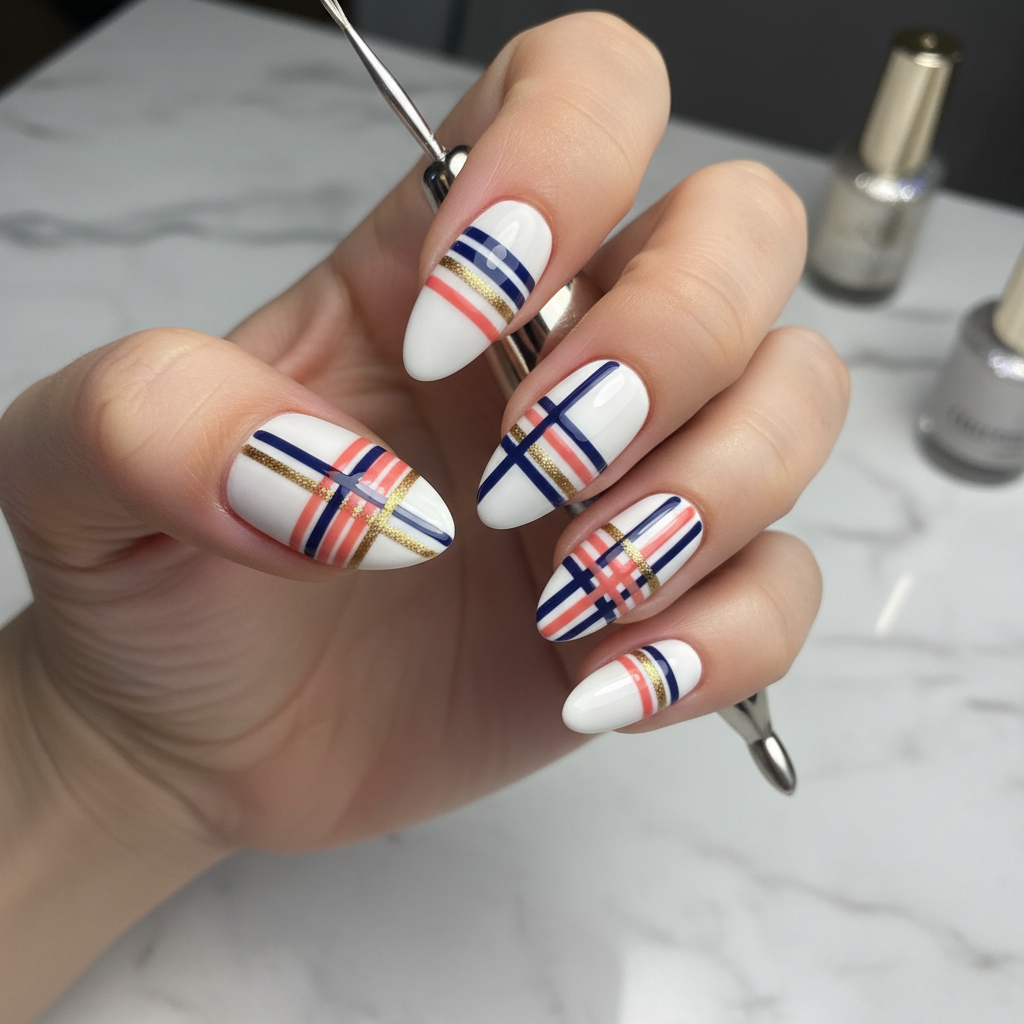
Photo-Real Salon Stripe Nails: Crisp & Chic Design
Experience the ultimate in nail precision with our Photo-Real Salon Stripe Nails. This design features exceptionally crisp, hair-thin lines laid over a flawlessly smooth base, creating a visual effect so perfect it looks almost printed. Achieving this professional salon quality requires meticulous attention to detail and a steady hand, resulting in a sophisticated and modern manicure.
- Gel Base Coat
- Milky White Gel Polish
- Jet Black Gel Polish
- Ultra-Fine Striping Brush (00 or 000)
- No-Wipe Gel Top Coat
- LED/UV Curing Lamp
- Nail Prep: Shape nails, push back cuticles, gently buff the nail plate, and cleanse thoroughly with alcohol for optimal adhesion.
- Base & Color: Apply a thin layer of gel base coat and cure. Follow with two thin, even coats of milky white gel polish, curing after each layer.
- Precise Striping: Dip your ultra-fine striping brush sparingly into jet black gel polish. With a steady hand, create your desired stripe pattern – think perfectly straight, parallel lines or crisp geometric shapes. Flash cure each stripe or section to prevent bleeding.
- Refine & Seal: Once all stripes are complete and fully cured, inspect for perfection. Apply a generous layer of no-wipe gel top coat, ensuring it encapsulates the stripes smoothly, and cure for the full recommended time.
- Final Touch: Cleanse around the cuticles with a lint-free wipe and apply a nourishing cuticle oil to complete the professional finish.
Expert Tip
Achieving photo-real stripes requires absolute minimal product on your striping brush and a light, consistent touch. Practice your lines on a nail tip beforehand, and remember to flash cure frequently to lock in each precise element and prevent any color bleeding.
Similar Styles
Beautiful Photo-real Salon Stripes Nails
Stripes inspired nail art with beautiful, photo-real finish and professional salon quality

Beautiful Photo-real Salon Stripes Nails
Stripes inspired nail art with beautiful, photo-real finish and professional salon quality

Gorgeous Photo-real Salon Stripes Nails
Stripes inspired nail art with gorgeous, photo-real finish and professional salon quality
Gorgeous Photo-real Salon Stripes Nails
Stripes inspired nail art with gorgeous, photo-real finish and professional salon quality
Stunning Photo-real Salon Stripes Nails
Stripes inspired nail art with stunning, photo-real finish and professional salon quality
Stunning Photo-real Salon Stripes Nails
Stripes inspired nail art with stunning, photo-real finish and professional salon quality

Gorgeous Photo-real Salon Stripes Nails
Stripes inspired nail art with gorgeous, photo-real finish and professional salon quality
Sophisticated Photo-real Salon Stripes Nails
Stripes inspired nail art with sophisticated, photo-real finish and professional salon quality

Stunning Photo-real Salon Stripes Nails
Stripes inspired nail art with stunning, photo-real finish and professional salon quality
Sophisticated Photo-real Salon Stripes Nails
Stripes inspired nail art with sophisticated, photo-real finish and professional salon quality

Photo-real Salon Stripes Nails
Stripes inspired nail art with elegant, photo-real finish and professional salon quality
Sophisticated Photo-real Salon Stripes Nails
Stripes inspired nail art with sophisticated, photo-real finish and professional salon quality
Explore Similar Designs
Colors in this Design
Techniques Used
Perfect For
Nail Shapes
Frequently Asked Questions
How long do photo-real stripe nails last?
With professional application of gel polish, this design can last 2-3 weeks without chipping, maintaining its 'photo-real' crispness throughout.
Can I achieve this precision at home?
While possible, achieving true 'photo-real' salon quality requires significant practice, a very steady hand, and professional-grade ultra-fine brushes. It's often best left to experienced nail artists.
Is this design suitable for shorter nails?
Absolutely! While longer nails offer more canvas, precise, thin stripes can look incredibly chic and elongating on shorter nails, especially with vertical patterns.
What's the best way to choose colors for this design?
For a 'photo-real' impact, choose high-contrast colors (e.g., black on white, metallic on dark base). For a softer look, opt for complementary tones or pastels with a subtle contrast.
Does this design damage natural nails?
When applied and removed correctly by a professional using quality products, gel polish designs like this do not damage your natural nails. Proper aftercare and maintenance are key.
What makes a stripe 'photo-real'?
A 'photo-real' stripe is characterized by its absolute crispness, razor-sharp edges without any feathering or bleeding, consistent line thickness, and a perfectly smooth, high-gloss finish that makes it appear almost digitally printed onto the nail.
Aftercare Tips
- ✓Allow gel polish to fully set for a few hours post-cure before exposing to harsh chemicals or extended water submersion.
- ✓Wear gloves when cleaning or doing dishes to protect your manicure.
- ✓If any lifting occurs, resist peeling or picking; consult your nail technician for proper repair to avoid damage to your natural nail.
Safe Removal
- 1.Gently buff the top coat to break the seal, avoiding the natural nail.
- 2.Soak cotton pads in 100% acetone, place them on each nail, and wrap tightly with foil for 10-15 minutes.
- 3.Gently push off the softened gel with an orange wood stick. Do not force or scrape; re-soak if necessary.