
Beautiful Photo-real Salon Stripes Nails - Stripes nail art - featuring nail art, red - nail art inspiration and design ideas
Beautiful Photo-real Salon Stripes Nails
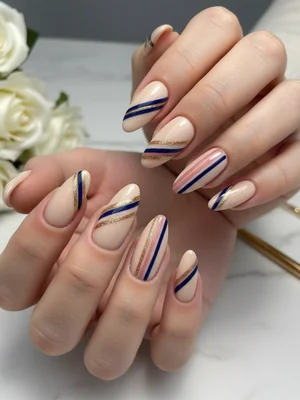
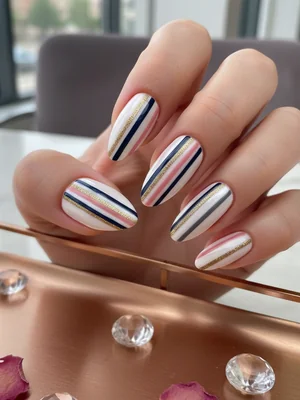
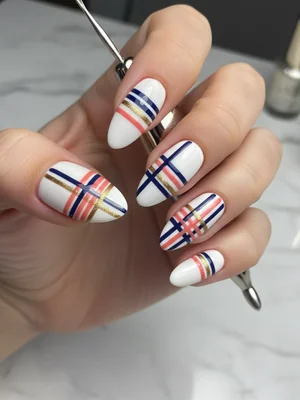
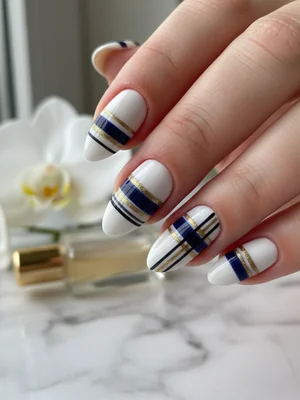
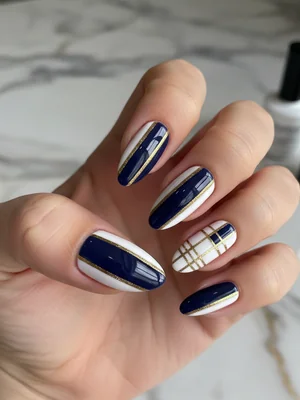
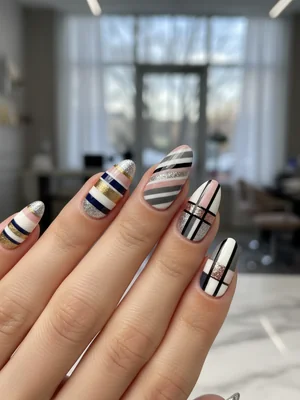
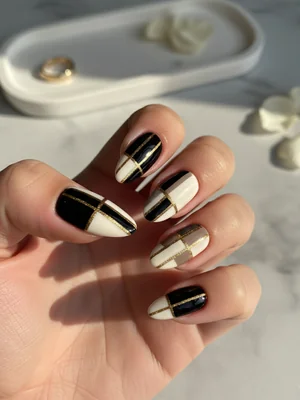
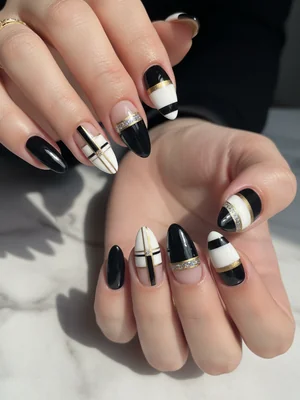
Photo-Real Salon Stripes: Crispy & Elegant Nail Design
Experience the epitome of precision with our Photo-Real Salon Stripes nail art. This design showcases impeccably crisp, razor-sharp lines set against a flawless, high-gloss base, creating a truly professional and 'photo-real' finish. It's minimalist yet impactful, perfect for those who appreciate sophisticated detail and salon-quality artistry.
- Gel Base Coat
- Sheer Nude Gel Polish
- Black/White/Metallic Gel Polish
- Ultra-Thin Striping Tape (1mm)
- Fine Detail Brush
- No-Wipe High-Gloss Gel Top Coat
- Perform full nail prep: clean, shape, buff, and dehydrate nails. Apply one layer of gel base coat and cure.
- Apply 1-2 thin, even coats of sheer nude gel polish, curing between each layer, ensuring a flawless base.
- Carefully apply ultra-thin striping tape in desired straight patterns, ensuring perfect alignment and adhesion. For freehand, use a fine detail brush and minimal gel polish to paint razor-sharp lines.
- Apply chosen stripe color (black, white, or metallic) over the tape or freehand lines. If using tape, gently remove it immediately after painting, before curing.
- Cure the stripes. Apply 1-2 layers of high-gloss, no-wipe gel top coat, ensuring even coverage and encapsulating the design for that 'photo-real' depth and shine. Cure fully.
- Cleanse any tacky layer (if applicable) and apply cuticle oil for a complete professional finish.
Expert Tip
To truly achieve that 'photo-real' salon quality finish for your Stripes.Design, work with very thin layers of gel polish for both the base and the stripes. Use a super-sharp fine detail brush or high-quality striping tape. After removing tape, if any polish bled, use a tiny brush dipped in alcohol to clean the edges *before* curing. Finish with a thick, self-leveling, high-shine top coat for ultimate depth.
Similar Styles
Beautiful Photo-real Salon Stripes Nails
Stripes inspired nail art with beautiful, photo-real finish and professional salon quality

Gorgeous Photo-real Salon Stripes Nails
Stripes inspired nail art with gorgeous, photo-real finish and professional salon quality
Gorgeous Photo-real Salon Stripes Nails
Stripes inspired nail art with gorgeous, photo-real finish and professional salon quality
Beautiful Photo-real Salon Stripes Nails
Stripes inspired nail art with beautiful, photo-real finish and professional salon quality
Stunning Photo-real Salon Stripes Nails
Stripes inspired nail art with stunning, photo-real finish and professional salon quality
Stunning Photo-real Salon Stripes Nails
Stripes inspired nail art with stunning, photo-real finish and professional salon quality

Gorgeous Photo-real Salon Stripes Nails
Stripes inspired nail art with gorgeous, photo-real finish and professional salon quality
Sophisticated Photo-real Salon Stripes Nails
Stripes inspired nail art with sophisticated, photo-real finish and professional salon quality

Stunning Photo-real Salon Stripes Nails
Stripes inspired nail art with stunning, photo-real finish and professional salon quality
Sophisticated Photo-real Salon Stripes Nails
Stripes inspired nail art with sophisticated, photo-real finish and professional salon quality

Photo-real Salon Stripes Nails
Stripes inspired nail art with elegant, photo-real finish and professional salon quality
Sophisticated Photo-real Salon Stripes Nails
Stripes inspired nail art with sophisticated, photo-real finish and professional salon quality
Explore Similar Designs
Colors in this Design
Techniques Used
Perfect For
Nail Shapes
Frequently Asked Questions
How long will this Photo-Real Salon Stripes design last?
With proper application and aftercare using quality gel products, this design can last 2-3 weeks without chipping or dulling, maintaining its photo-real quality.
Can I get this design on shorter nails?
Absolutely! While longer nails offer more canvas for the stripes, a single, perfectly executed thin stripe can look incredibly chic and precise even on shorter, well-manicured nails.
Is it possible to achieve this 'photo-real' precision at home?
Achieving true 'photo-real' salon quality requires significant skill, specific tools like ultra-fine brushes or striping tape, and professional gel polish. It's challenging for beginners, but practice and patience can get you closer to the look.
What base color best highlights the crisp stripes?
A sheer nude, pale pink, or even a classic white base provides a clean canvas that allows the contrasting stripes (like black, white, or metallics) to really pop and showcase their precision.
How do I ensure my stripes are perfectly straight?
The key is either using high-quality, adhesive striping tape applied with a steady hand, or mastering a fine detail brush with minimal gel polish and a precise, swift stroke. Practice on a nail wheel first!
Will this design damage my natural nails?
No, when applied and removed correctly by a professional, gel polish designs like this should not damage your natural nails. Proper prep and gentle removal are crucial.
Aftercare Tips
- ✓Keep nails moisturized with hand cream and cuticle oil to promote nail health and flexibility.
- ✓Wear gloves when doing household chores or gardening to protect your manicure from harsh chemicals.
- ✓Avoid prolonged exposure to extreme heat, like very hot showers or saunas, which can sometimes dull the gel finish.
Safe Removal
- 1.Gently buff the top layer of the gel polish to break the seal, being careful not to over-file the natural nail.
- 2.Soak cotton balls in acetone, place them on each nail, and wrap tightly with foil for 10-15 minutes.
- 3.Gently push off the softened gel with an orange wood stick. Do not scrape or force any remaining product.