
Sophisticated Photo-real Salon Stamping Nails - Stamping nail art - featuring nail art, red - nail art inspiration and design ideas
Sophisticated Photo-real Salon Stamping Nails
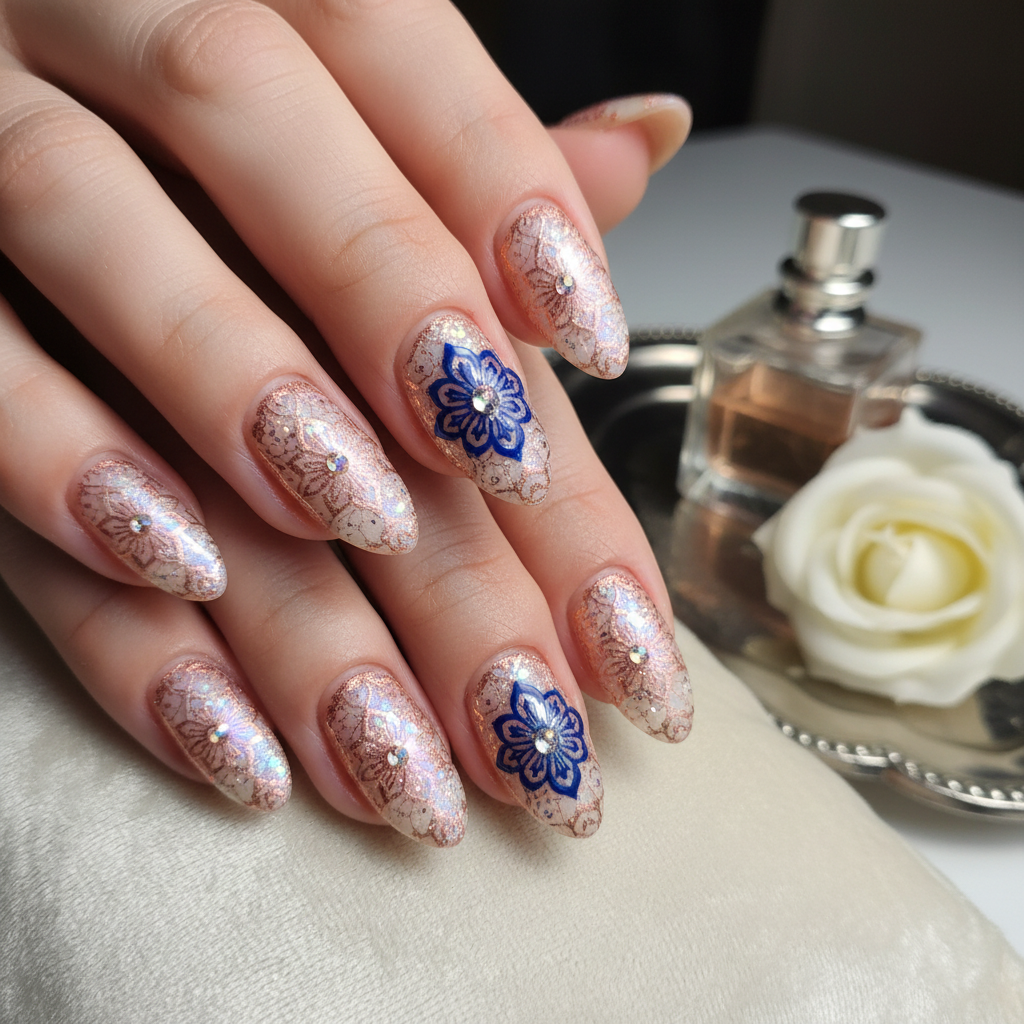
Sophisticated Photo-Real Stamping Nails: Salon Quality Artistry
Experience the pinnacle of nail artistry with our Sophisticated Photo-Real Stamping design. This unique look elevates classic nail stamping to a new level, featuring incredibly intricate, almost photographic details that capture an air of refined elegance. Achieve a professional, salon-quality finish that looks meticulously hand-painted.
- High-quality, fine-line stamping plates (photo-real designs)
- Opaque, highly pigmented stamping polish (charcoal grey/black)
- Clear jelly stamper and scraper
- Lint roller or tape for stamper cleaning
- Precision clean-up brush and acetone
- Gel base coat and no-wipe gel top coat
- Prep nails: shape, push cuticles, buff gently, dehydrate, and apply a thin layer of gel base coat; cure.
- Apply 1-2 coats of sheer nude gel polish for a clean canvas; cure each coat.
- Select a 'photo-real' stamping image from your plate. Apply a generous line of charcoal grey stamping polish, scrape swiftly at a 45-degree angle to fill the etching, and pick up the design with your clear stamper.
- Precisely align and roll the stamper over the nail to transfer the intricate design, ensuring complete contact for a crisp, photo-real image. Repeat for all nails.
- Clean up any excess polish around the cuticles and sidewalls using a precision brush dipped in acetone.
- Seal the intricate stamping design with a high-shine, no-wipe gel top coat, ensuring even coverage for durability and a flawless finish; cure.
Techniques
Expert Tip
To truly achieve that 'photo-real' effect, practice your stamping pressure and speed to ensure every fine line transfers perfectly. Use a high-quality, clear jelly stamper for precise placement and always work with freshly scraped, pigmented stamping polish for the sharpest images.
Similar Styles

Beautiful Photo-real Salon Stamping Nails
Stamping inspired nail art with beautiful, photo-real finish and professional salon quality

Gorgeous Photo-real Salon Stamping Nails
Stamping inspired nail art with gorgeous, photo-real finish and professional salon quality

Stunning Photo-real Salon Stamping Nails
Stamping inspired nail art with stunning, photo-real finish and professional salon quality

Photo-real Salon Stamping Nails
Stamping inspired nail art with elegant, photo-real finish and professional salon quality

Photo-real Salon Stamping Nails
Stamping inspired nail art with clean, photo-real finish and professional salon quality

Photo-real Salon Stamping Nails
Stamping inspired nail art with clean, photo-real finish and professional salon quality

Photo-real Salon Stamping Nails
Stamping inspired nail art with clean, photo-real finish and professional salon quality
Explore Similar Designs
Colors in this Design
Techniques Used
Perfect For
Nail Shapes
Frequently Asked Questions
How long will this photo-real stamping design last?
With proper application and aftercare, this gel-based stamping design can last 3-4 weeks, retaining its crisp details and high-shine finish.
Can I achieve this 'photo-real' effect at home?
While possible, achieving true 'photo-real' quality requires advanced stamping skills, specific fine-line stamping plates, and highly pigmented stamping polishes. Professional salon application is recommended for optimal results.
What kind of patterns work best for photo-real stamping?
Patterns with very fine, intricate lines and detailed elements, such as lace, botanical illustrations, architectural motifs, or delicate abstract designs, are ideal for achieving a photo-real look.
Is this design customizable with different colors?
Absolutely! While charcoal on nude offers a classic 'sophisticated' look, you can experiment with other rich, contrasting colors or even subtle metallics to match your personal style or event theme.
Will the intricate stamping smudge easily?
When sealed correctly with a high-quality gel top coat, the stamping design is well protected and durable. Using a no-wipe top coat is key to avoid smudging during application.
Is 'stamping' a durable technique?
Yes, especially when using gel polishes and sealing with a durable gel top coat. The design is encapsulated, making it just as long-lasting as any other gel polish application.
Aftercare Tips
- ✓Avoid picking or peeling at your nail art, as this can damage your natural nail.
- ✓Keep nails dry for the first few hours after application to allow all layers to fully set.
- ✓Moisturize your hands regularly to support overall nail health and appearance.
Safe Removal
- 1.Gently file off the top coat layer to break the seal.
- 2.Soak nails in acetone-soaked cotton balls wrapped in foil for 10-15 minutes.
- 3.Gently push off the softened polish with a wooden stick, never force or scrape harshly.