
Beautiful Photo-real Salon Stamping Nails - Stamping nail art - featuring nail art, red - nail art inspiration and design ideas
Beautiful Photo-real Salon Stamping Nails
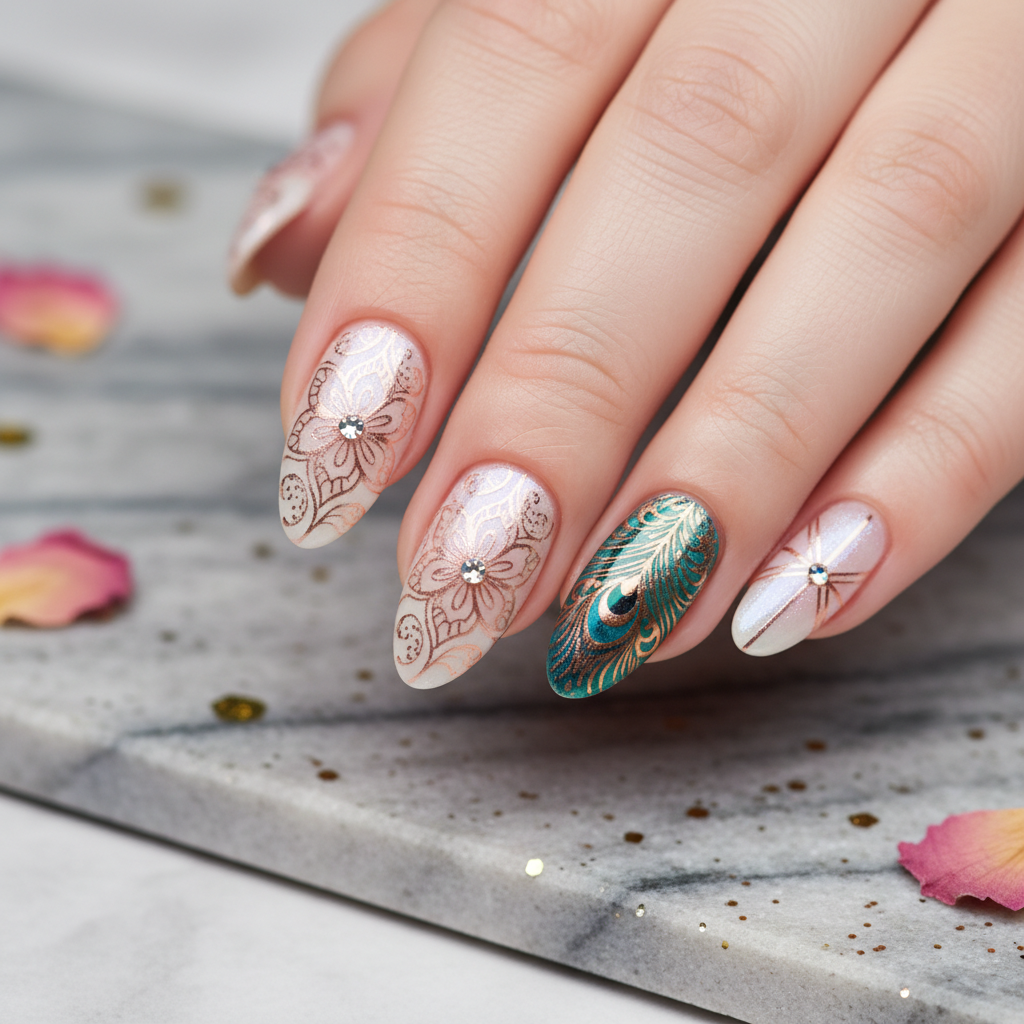
Photo-Real Salon Stamping Nails: Intricate Artistry
Experience the magic of photo-real salon stamping nails, where intricate designs come to life with stunning detail. This technique delivers a professional, high-definition finish, making your nails a canvas for breathtaking, realistic artistry without the extensive freehand time.
- High-definition photo-real stamping plate
- Specialized stamping polish (highly pigmented)
- Clear jelly stamper and scraper
- Lint roller or tape for stamper cleaning
- Smudge-proof top coat
- Pure acetone and lint-free wipes
- Prep nails by shaping, buffing, and applying a base coat, followed by your chosen base color (cure if gel).
- Apply a generous line of specialized stamping polish across your desired photo-real design on the plate.
- Using the scraper at a 45-degree angle, quickly and firmly scrape off excess polish, leaving it only in the engraved lines.
- Immediately press your clear jelly stamper onto the design with a rolling motion to pick up the intricate image.
- Carefully and precisely roll the stamper onto your nail, transferring the photo-real design. Clean up any excess around the cuticle.
- Once dry, seal the design with a quick-drying, smudge-proof top coat to preserve the crisp details and add shine.
Techniques
Expert Tip
For perfect photo-real results, speed and precision are crucial when working with stamping polish. Ensure your stamper is clean and tacky, and apply top coat carefully to avoid smudging the delicate details.
Similar Styles

Gorgeous Photo-real Salon Stamping Nails
Stamping inspired nail art with gorgeous, photo-real finish and professional salon quality

Stunning Photo-real Salon Stamping Nails
Stamping inspired nail art with stunning, photo-real finish and professional salon quality

Sophisticated Photo-real Salon Stamping Nails
Stamping inspired nail art with sophisticated, photo-real finish and professional salon quality

Photo-real Salon Stamping Nails
Stamping inspired nail art with elegant, photo-real finish and professional salon quality

Photo-real Salon Stamping Nails
Stamping inspired nail art with clean, photo-real finish and professional salon quality

Photo-real Salon Stamping Nails
Stamping inspired nail art with clean, photo-real finish and professional salon quality

Photo-real Salon Stamping Nails
Stamping inspired nail art with clean, photo-real finish and professional salon quality
Explore Similar Designs
Colors in this Design
Techniques Used
Perfect For
Nail Shapes
Frequently Asked Questions
What makes this 'photo-real' compared to regular stamping?
Photo-real stamping uses extremely fine, deeply etched stamping plates that capture intricate details, textures, and shading, giving the impression of a photograph or highly detailed drawing on your nail.
Is photo-real stamping difficult to achieve at home?
Due to the precision required for picking up and transferring such fine details, and the use of specialized products, achieving true salon-quality photo-real results at home can be challenging and is best left to experienced nail artists.
How long does a photo-real stamping manicure last?
With proper application of quality products and a good top coat, your photo-real stamping design can last 2-3 weeks, especially when applied over gel polish or acrylics.
Can I use any nail polish for photo-real stamping?
No, specialized stamping polishes are essential. They are highly pigmented and formulated to dry slower on the plate but transfer quickly, which is critical for capturing the intricate details of photo-real designs.
What kind of designs are available in photo-real stamping?
The possibilities are vast! From intricate floral patterns and realistic animal portraits to architectural details, abstract art, and even miniature landscapes, photo-real plates offer an incredible range of sophisticated imagery.
Does this technique damage my natural nails?
No, when applied and removed correctly by a professional, photo-real stamping is a non-damaging nail art technique. It simply adds a layer of design over your base polish.
Aftercare Tips
- ✓Allow your top coat to fully cure/dry before engaging in activities that could chip or smudge the design.
- ✓Avoid using your nails as tools to prevent damage to the delicate stamped image.
- ✓Apply cuticle oil daily to maintain nail health and flexibility, preventing premature lifting.
Safe Removal
- 1.Gently buff off the top coat to break the seal.
- 2.Soak nails in acetone (for gel or acrylic) or use non-acetone remover for regular polish, ensuring a complete and gentle removal.
- 3.Moisturize nails and cuticles thoroughly after removal to rehydrate.