
Photo-real Salon Ocean Nails - Ocean nail art - featuring nail art, red - nail art inspiration and design ideas
Photo-real Salon Ocean Nails
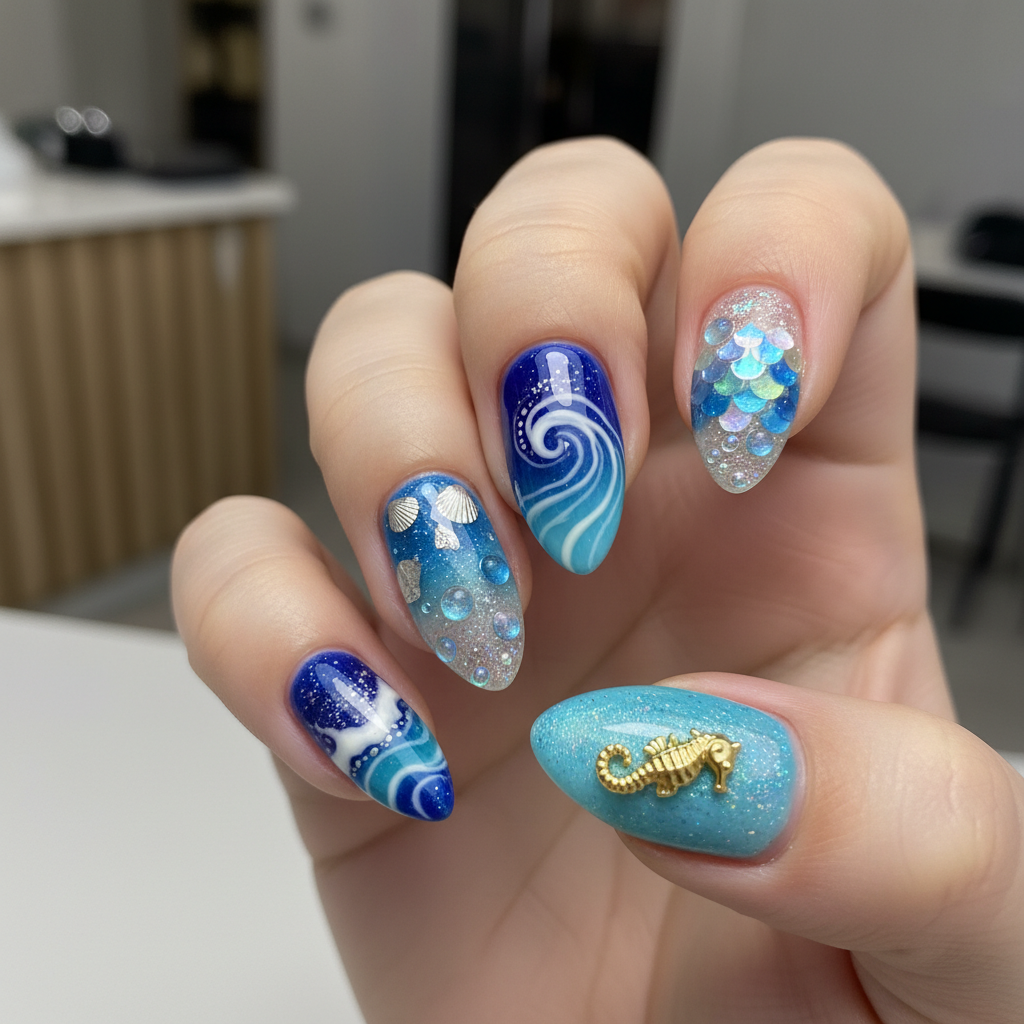
Photo-Real Ocean Wave Nail Art: Salon-Quality Design
Capture the breathtaking beauty of a rolling ocean wave with this hyper-realistic nail art design. Featuring a deep blue to sandy shore gradient and intricate, lacy sea foam created with blooming gel, this look brings professional salon artistry to your fingertips. It's a sophisticated manicure that perfectly mimics the dynamic movement of the sea.
- Gel Base & Top Coat
- Gel Polishes: Deep Navy, Aqua, Sandy Beige, White
- Blooming Gel
- Fine Liner Nail Art Brush
- Ombre Brush or Makeup Sponge
- UV/LED Curing Lamp
- Prep nails and apply a gel base coat, then cure.
- Create the ocean gradient. Apply sandy beige near the cuticle, aqua in the middle, and deep navy at the tip. Use an ombre brush to gently blend the colors together and cure.
- Apply a second coat of the gradient for full opacity and cure again.
- Apply a thin, even layer of blooming gel over the entire nail. DO NOT CURE.
- Using a fine liner brush dipped in white gel polish, draw delicate, wavy lines where the wave will crest. Watch the white polish 'bloom' or spread into a soft, foamy pattern, then cure immediately once you're happy with the effect.
- Add a few crisp, fine white lines over the cured foam for definition and spray, then finish with a high-gloss top coat and cure for the final time.
Expert Tip
For the most realistic sea foam, work quickly and cure as soon as the blooming gel has spread to your liking. The longer it sits, the more it will diffuse, potentially losing the lacy detail of the wave.
Similar Styles


Explore Similar Designs
Colors in this Design
Techniques Used
Nail Shapes
Frequently Asked Questions
Can this photo-real ocean nail design be done on short nails?
It's challenging on short nails as there is less space for the gradient and wave detail. A medium to long length, particularly almond or coffin shapes, provides the best canvas.
Is blooming gel essential for this look?
For the soft, diffused foam effect, blooming gel is highly recommended. It's the key to achieving that signature 'photo-real' look without harsh lines.
How long will a manicure like this last?
When done with professional gel products, this design will last 2-4 weeks without chipping, depending on your lifestyle and aftercare.
Can I use regular nail polish?
Achieving this level of realism with regular polish is extremely difficult due to its fast drying time. The blending and blooming effects rely on the slow-curing properties of gel.
How do you make the gradient so smooth?
The key is to apply thin coats and use a clean ombre brush with a light, dabbing motion. Building the color over two coats helps create a seamless transition.
What makes it 'salon quality'?
The 'salon quality' comes from the use of professional-grade gel, advanced techniques like blooming gel, precise application with clean cuticle lines, and a durable, high-gloss finish.
Aftercare Tips
- ✓Moisturize your hands and nails frequently, especially after washing.
- ✓Be gentle with your nails for the first 24 hours as the gel fully settles.
- ✓Schedule your next appointment for 2-4 weeks to maintain nail health and appearance.
- ✓Do not pick or peel the gel polish, as this can cause significant damage to your natural nail plate.
Safe Removal
- 1.Gently file the shiny top coat to break the seal.
- 2.Soak cotton balls in acetone, place them on the nails, and wrap each finger in foil for 10-15 minutes.
- 3.Carefully use an orangewood stick or cuticle pusher to slide off the softened gel.