
Photo-real Salon Marble Nails - Marble nail art - featuring nail art, marble, elegant, red - nail art inspiration and design ideas
Photo-real Salon Marble Nails
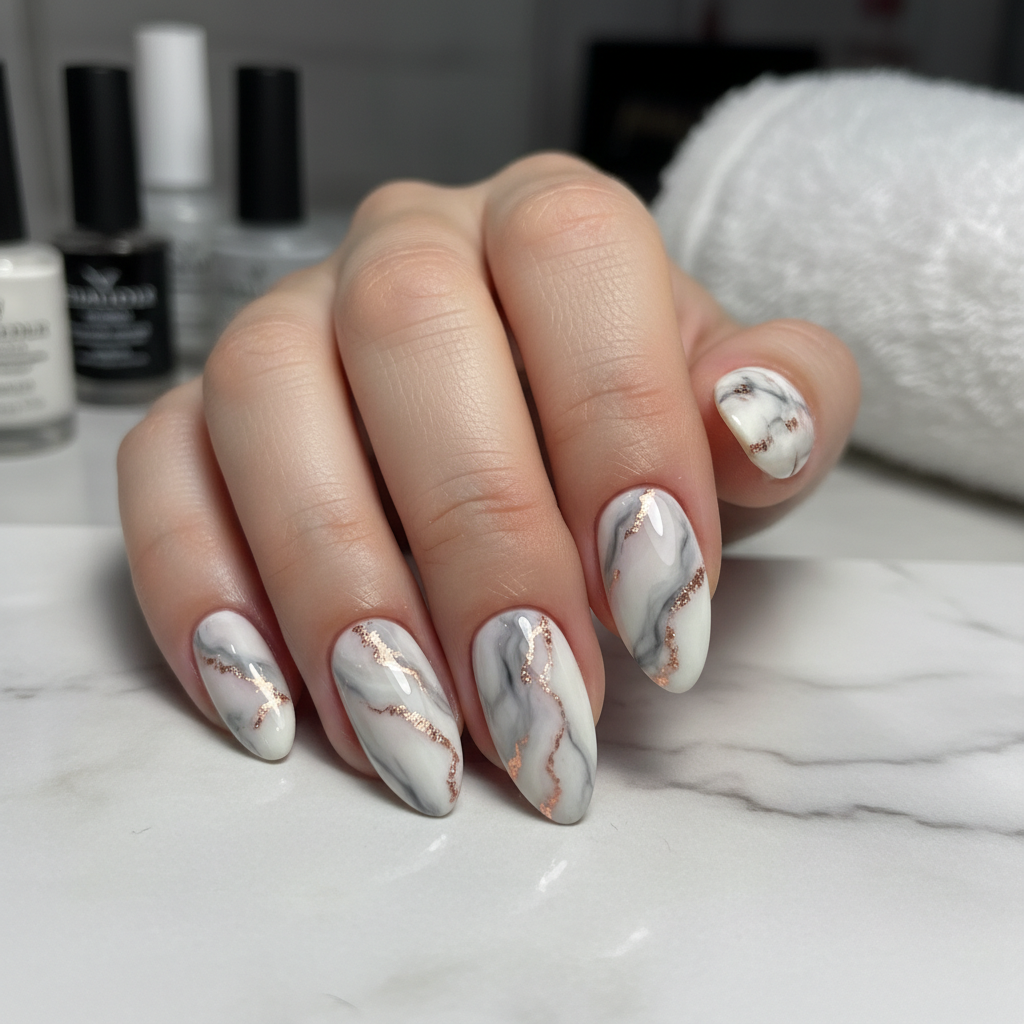
Photo-Real Marble Nails: Elegant Salon Quality Design
Experience the breathtaking beauty of our Photo-Real Marble Nails, a design that captures the intricate veins and natural elegance of genuine marble. This sophisticated look offers a high-gloss, salon-quality finish, perfect for those seeking a truly luxurious aesthetic.
- Gel base coat
- White, light gray, dark gray, and black gel polishes
- Thin striping/detail brush (000 size)
- Marbleizing liquid or rubbing alcohol
- High-gloss gel top coat
- LED/UV curing lamp
- Perform thorough nail prep, apply a gel base coat, and cure under the LED/UV lamp.
- Apply 1-2 thin coats of your chosen base color (e.g., white or very light gray gel) and cure each layer.
- Apply a thin, uncured layer of your base color. While wet, strategically drop small dots or lines of contrasting colors (e.g., black, dark gray) and use a thin brush or marbleizing tool to gently swirl and feather the lines, mimicking natural marble veins. Add a tiny touch of metallic gel for an opulent accent if desired.
- Allow the colors to bleed naturally for a moment to create depth, then carefully cure the design, ensuring no over-curing.
- Using a fine detail brush and a darker gel, add ultra-thin, sharp lines and subtle cracks within the softened veins to enhance the photo-realism and define the intricate patterns, then cure.
- Finish with a high-gloss, non-wipe top coat and cure for the recommended time, then cleanse with alcohol if needed.
Techniques
Expert Tip
Achieving truly photo-real results lies in understanding the natural flow and organic imperfections of real marble. Practice with various brush pressures and observe how the colors blend to create authentic depth and transparency, making each vein unique.
Similar Styles

Beautiful Photo-real Salon Marble Nails
Marble inspired nail art with beautiful, photo-real finish and professional salon quality

Gorgeous Photo-real Salon Marble Nails
Marble inspired nail art with gorgeous, photo-real finish and professional salon quality

Stunning Photo-real Salon Marble Nails
Marble inspired nail art with stunning, photo-real finish and professional salon quality

Sophisticated Photo-real Salon Marble Nails
Marble inspired nail art with sophisticated, photo-real finish and professional salon quality

Photo-real Salon Marble Nails
Marble inspired nail art with clean, photo-real finish and professional salon quality

Photo-real Salon Marble Nails
Marble inspired nail art with clean, photo-real finish and professional salon quality

Photo-real Salon Marble Nails
Marble inspired nail art with clean, photo-real finish and professional salon quality
Explore Similar Designs
Colors in this Design
Perfect For
Nail Shapes
Frequently Asked Questions
How long will my Photo-Real Marble Nails last?
With proper application and diligent aftercare, this gel design can beautifully last for 2-3 weeks, depending on your nail growth and daily activities.
Is each marble pattern unique?
Absolutely! Each Photo-Real Marble design is meticulously hand-painted, ensuring that every nail features a unique, organic, and truly one-of-a-kind pattern, just like natural marble.
Can I choose different colors for the marble effect?
Yes! We specialize in custom designs. While classic white, gray, and black are popular, we can create stunning marble effects using a wide range of colors to match your personal style.
Is this design suitable for shorter nails?
While the intricate details shine on medium to long nails, a simplified yet elegant version of this marble design can be adapted to beautifully adorn shorter nail lengths as well.
What makes this marble design 'photo-real'?
The 'photo-real' aspect comes from the advanced technique of layering, blending, and using ultra-fine lines to mimic the exact depth, transparency, and intricate veining found in natural stone, creating an incredibly realistic effect.
How often should I get a fill or new set?
For optimal appearance and nail health, we recommend scheduling a fill or a new set every 2-3 weeks to maintain the design and address natural nail growth.
Aftercare Tips
- ✓Keep nails dry for at least 1-2 hours immediately after the service to ensure full hardening of the top coat.
- ✓Moisturize hands and cuticles regularly to keep the skin hydrated and complement your elegant nails.
- ✓Avoid picking or peeling the design, which can damage your natural nails and the art.
- ✓If minor touch-ups are needed for a chip, visit a professional rather than attempting at home.
Safe Removal
- 1.Gently file off the shiny top coat using a fine-grit file, being careful not to reach the natural nail.
- 2.Soak cotton pads in acetone, place them on each nail, and wrap tightly with foil for 10-15 minutes.
- 3.Gently push off the softened gel with an orangewood stick; never force or peel the gel off.