
Beautiful Photo-real Salon Marble Nails - Marble nail art - featuring nail art, marble, red - nail art inspiration and design ideas
Beautiful Photo-real Salon Marble Nails
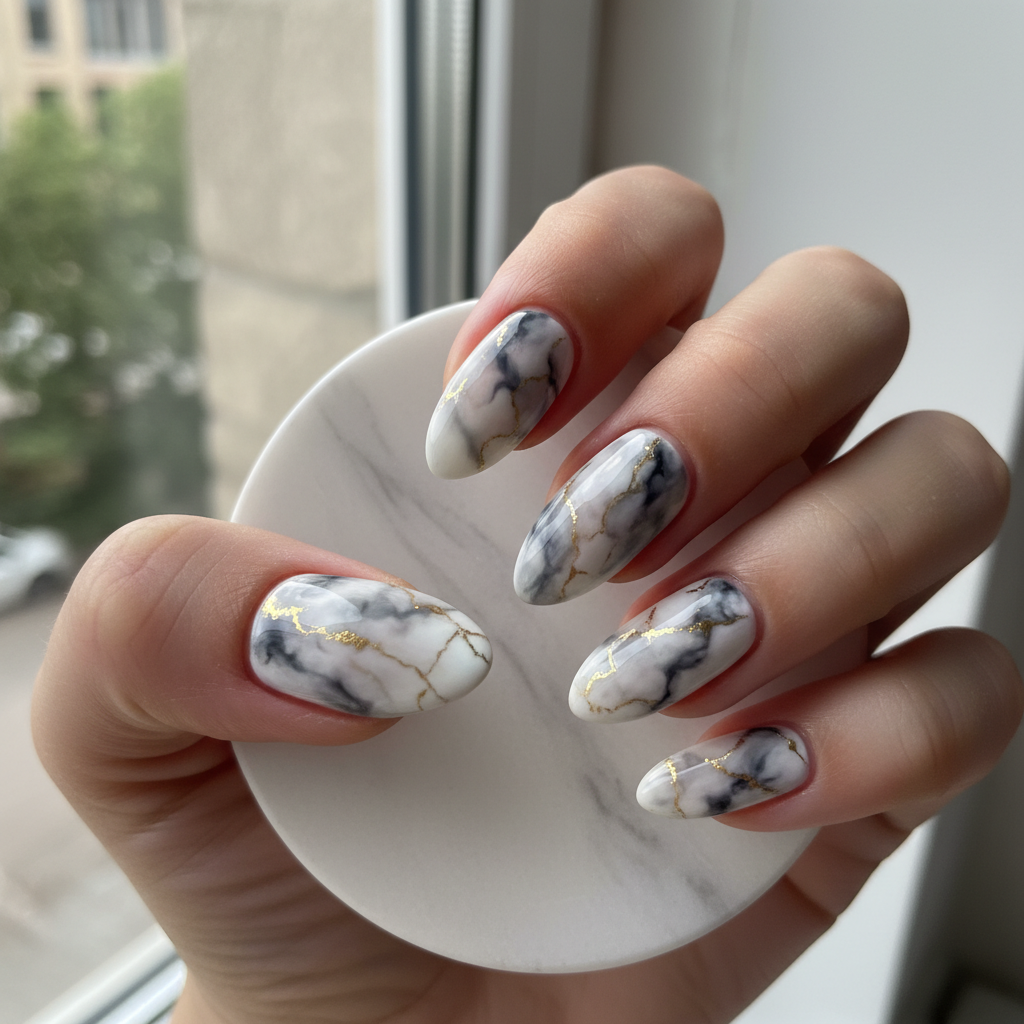
Photo-Real Salon Marble Nails: Elegant Stone Vein Art
This design captures the luxurious essence of natural stone with a stunning photo-real finish. Delicate, intricate veining creates a sophisticated marble pattern, achieving professional salon quality right at your fingertips. It's a truly elegant statement, perfect for those seeking refined nail artistry.
- White, Grey, and Black Gel Polishes
- Gel Base Coat and No-Wipe Top Coat
- Fine Detail Nail Art Brush
- Small Mixing Palette
- LED/UV Curing Lamp
- Isopropyl Alcohol Wipes
- **Prep & Base Color:** After nail prep, apply a gel base coat and cure. Apply 1-2 coats of your chosen base color (e.g., white or nude gel polish), curing each layer.
- **Initial Veining:** On a *cured* base, use a fine detail brush and a contrasting gel color (e.g., light grey) to sketch initial, organic vein patterns. Do not cure.
- **Softening & Blending:** While the initial veins are still wet, add small dots or lines of a darker color (e.g., black) along some of the grey veins. Lightly feather with the fine brush or a clean, dry brush to soften and blend, creating depth.
- **Adding Photo-Real Detail:** For enhanced realism, use an even finer brush to add thin, crisp white lines within or alongside some of the softened veins, simulating light reflections and sharper edges of natural stone.
- **Seal & Finish:** Once satisfied with the intricate marble design, cure thoroughly. Apply a high-shine no-wipe gel top coat, ensuring even coverage, and cure again for a durable, glossy finish.
Techniques
Expert Tip
Achieving true photo-realism in marble nail art lies in layering varying opacities and practicing a light hand with your detail brush. Don't be afraid to let lines be imperfect; natural marble is never uniformly structured, which adds to its charm.
Similar Styles

Gorgeous Photo-real Salon Marble Nails
Marble inspired nail art with gorgeous, photo-real finish and professional salon quality

Stunning Photo-real Salon Marble Nails
Marble inspired nail art with stunning, photo-real finish and professional salon quality

Sophisticated Photo-real Salon Marble Nails
Marble inspired nail art with sophisticated, photo-real finish and professional salon quality

Photo-real Salon Marble Nails
Marble inspired nail art with elegant, photo-real finish and professional salon quality

Photo-real Salon Marble Nails
Marble inspired nail art with clean, photo-real finish and professional salon quality

Photo-real Salon Marble Nails
Marble inspired nail art with clean, photo-real finish and professional salon quality

Photo-real Salon Marble Nails
Marble inspired nail art with clean, photo-real finish and professional salon quality
Explore Similar Designs
Perfect For
Nail Shapes
Frequently Asked Questions
How long does photo-real marble nail art last?
With proper application and diligent aftercare, this gel marble design typically lasts 2-3 weeks, depending on your individual nail growth rate and daily activities.
Can I get this design on shorter nails?
While longer nails provide more canvas for intricate detail, a simplified yet elegant marble pattern can certainly be adapted for shorter nails, focusing on fewer, bolder veins for impact.
Is every photo-real marble design unique?
Absolutely! Each photo-real marble design is meticulously hand-painted by our artists, ensuring that every nail, and every manicure, is a unique work of art, just like natural stone.
Will the marble design fade or chip easily?
No, when properly encapsulated with a durable gel top coat, the intricate design is fully protected from fading and is highly resistant to chipping, maintaining its beauty for weeks.
What's the difference between simple marble and photo-real marble?
Simple marble often uses basic wet-on-wet techniques for a swirly effect. Photo-real marble, however, involves advanced hand-painting, layering, and fine line work to mimic the intricate, lifelike veining of natural stone, achieving much greater depth and realism.
Can I choose my own colors for the marble design?
Yes, while classic grey and white are popular, we can customize both the base and vein colors to perfectly match your personal style, skin tone, or a specific outfit, ensuring a truly bespoke look.
Aftercare Tips
- ✓Allow the fresh gel top coat to fully set for a few hours post-cure before engaging in heavy-duty hand activities.
- ✓Moisturize hands and nails regularly to prevent dryness, which can contribute to nail fragility.
- ✓Be gentle with your new manicure, especially in the first 24 hours, to ensure maximum adhesion and durability.
- ✓Inspect nails daily for any signs of lifting or damage and consult your nail artist if issues arise.
Safe Removal
- 1.**Break the Seal:** Gently file off the top coat layer with a fine-grit file to break the gel seal, being careful not to file into the natural nail plate.
- 2.**Soak Off:** Saturate cotton balls in professional-grade acetone, place them directly on each nail, and wrap tightly with foil for 10-15 minutes.
- 3.**Gentle Removal:** Gently push off the softened gel with an orange wood stick. If gel doesn't easily slide off, re-soak; never force or pick at the gel.