
Stunning Photo-real Salon Geometric Nails - Geometric nail art - featuring nail art, geometric, red - nail art inspiration and design ideas
Stunning Photo-real Salon Geometric Nails
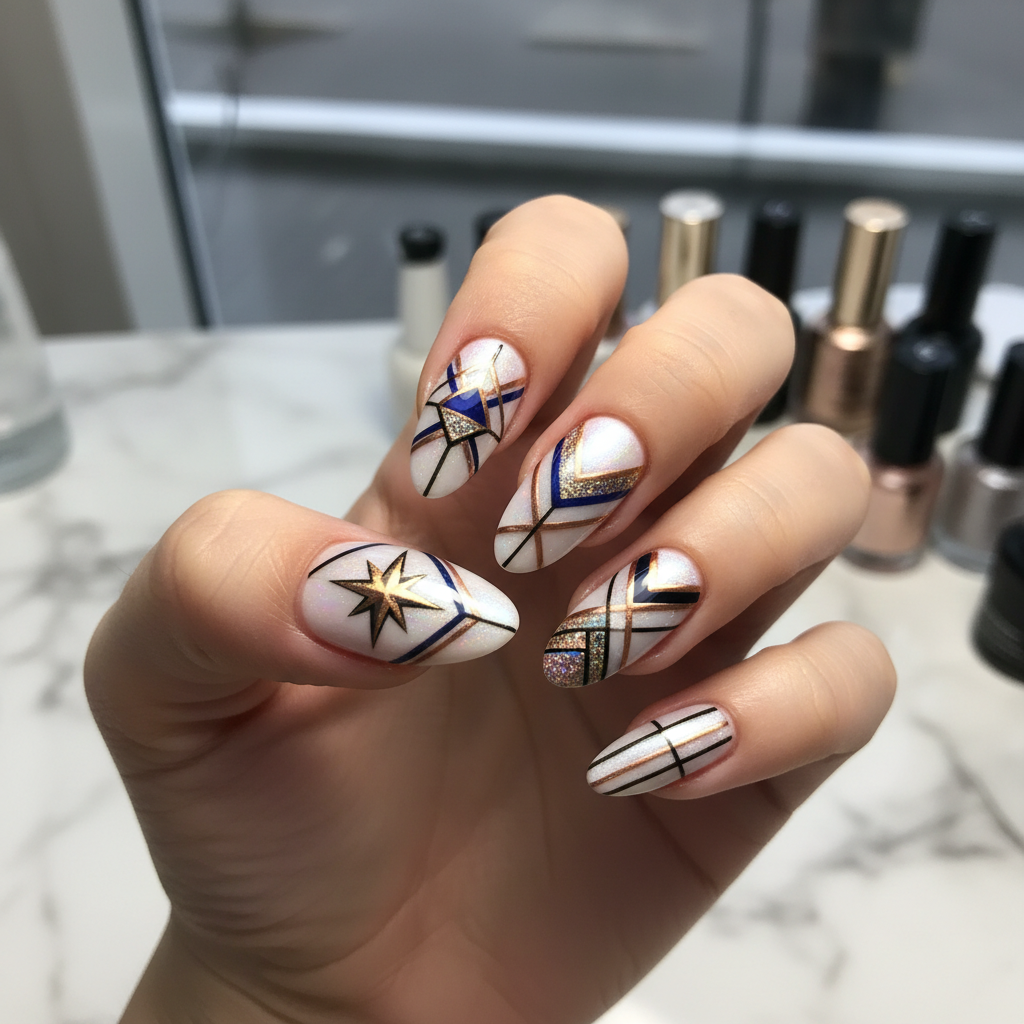
Stunning Photo-Real Geometric Nail Art: Salon Quality Finish
Unveil the pinnacle of modern nail design with our Photo-Real Geometric Nail Art. This design boasts ultra-crisp lines, precise angles, and a flawless, salon-quality finish that mimics a digital render right on your fingertips. It's an artful interplay of negative space and bold shapes, designed to make a sophisticated statement.
- High-pigment gel polishes (e.g., black, white, nude)
- Ultra-fine liner brush (000 or similar)
- Striping tape (1mm)
- Matte and high-gloss top coats
- LED/UV curing lamp
- Nail dehydrator and primer
- Prepare nails: shape, buff, dehydrate, and apply primer. Apply base coat and cure.
- Apply 1-2 thin coats of your chosen base color (e.g., nude or light gray) and cure each layer.
- Carefully plan your geometric pattern. Use striping tape to create razor-sharp lines and angular sections, ensuring tape is fully adhered.
- Using an ultra-fine liner brush, apply high-contrast gel polish (e.g., black or white) to fill in specific shapes or create bold outlines. Cure thoroughly after each color application to prevent bleeding.
- Gently remove striping tape to reveal crisp geometric edges. If desired, apply a secondary color or metallic accent within smaller shapes and cure.
- Finish with a high-gloss top coat over the entire design for that photo-real shine, or strategically apply a matte top coat to certain sections for added textural contrast. Cure completely and cleanse.
Techniques
Expert Tip
Achieving photo-realism hinges on absolute precision. Always use thin coats of gel polish to prevent flooding, and cure thoroughly between each color and line application. A fresh, ultra-fine liner brush is your best friend for those crisp, unblemished edges. Don't rush – patience is key for salon-quality results.
Similar Styles

Beautiful Photo-real Salon Geometric Nails
Geometric inspired nail art with beautiful, photo-real finish and professional salon quality

Gorgeous Photo-real Salon Geometric Nails
Geometric inspired nail art with gorgeous, photo-real finish and professional salon quality

Sophisticated Photo-real Salon Geometric Nails
Geometric inspired nail art with sophisticated, photo-real finish and professional salon quality

Photo-real Salon Geometric Nails
Geometric inspired nail art with elegant, photo-real finish and professional salon quality

Photo-real Salon Geometric Nails
Geometric inspired nail art with clean, photo-real finish and professional salon quality

Photo-real Salon Geometric Nails
Geometric inspired nail art with clean, photo-real finish and professional salon quality

Photo-real Salon Geometric Nails
Geometric inspired nail art with clean, photo-real finish and professional salon quality
Explore Similar Designs
Colors in this Design
Perfect For
Nail Shapes
Frequently Asked Questions
How long does Photo-Real Geometric Nail Art typically last?
With proper application of gel polish and professional top coats, this intricate design can last 2-3 weeks without chipping, maintaining its sharp lines beautifully.
Can this geometric design be done on shorter nails?
While longer nails allow for more intricate detail, a simplified geometric design can absolutely be adapted for shorter nails, focusing on fewer, bolder lines and shapes.
Is Photo-Real Geometric Nail Art freehand or does it use stencils?
It typically involves a combination of precision freehand work with ultra-fine liner brushes and the strategic use of striping tape to achieve the razor-sharp, 'photo-real' edges and clean angles.
Will the sharp lines fade or smudge over time?
With professional gel polish and a high-quality top coat, the lines are encapsulated and protected, ensuring they remain crisp and true throughout the wear of the manicure.
What's the best way to choose colors for a geometric design?
For a 'photo-real' effect, high contrast is key (e.g., black and white, or a dark color against a light nude). Limiting your palette to 2-3 complementary or contrasting colors will enhance the crispness of the design.
Is this design suitable for everyday wear or more for special occasions?
Its sophisticated and clean aesthetic makes it suitable for both! It elevates everyday chic while also being striking enough for any special occasion where you want to make a modern statement.
Aftercare Tips
- ✓Allow your nails to fully 'set' for a few hours after your appointment before engaging in heavy-duty tasks.
- ✓Keep your hands moisturized to prevent skin dryness around the precise design.
- ✓Resist the urge to pick or peel at any edges, as this can compromise the entire manicure.
- ✓Book your next appointment in advance to ensure continuous stunning nail health and style.
Safe Removal
- 1.Gently file off the top coat to break the seal, being careful not to file into your natural nail.
- 2.Soak nails in 100% acetone, wrapped in foil, for 10-15 minutes.
- 3.Gently push off the softened gel polish with a cuticle pusher. Do not force or scrape.