Sophisticated Photo-real Salon Sponging Nails - Sponging nail art - featuring nail art, red - nail art inspiration and design ideas
Sophisticated Photo-real Salon Sponging Nails
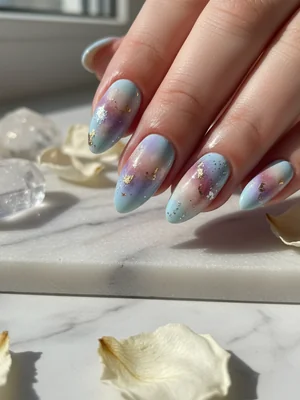
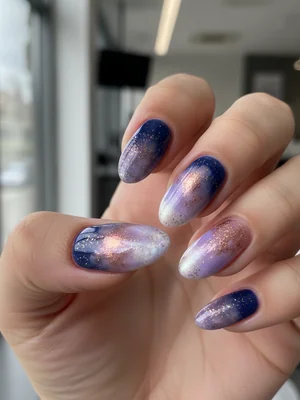
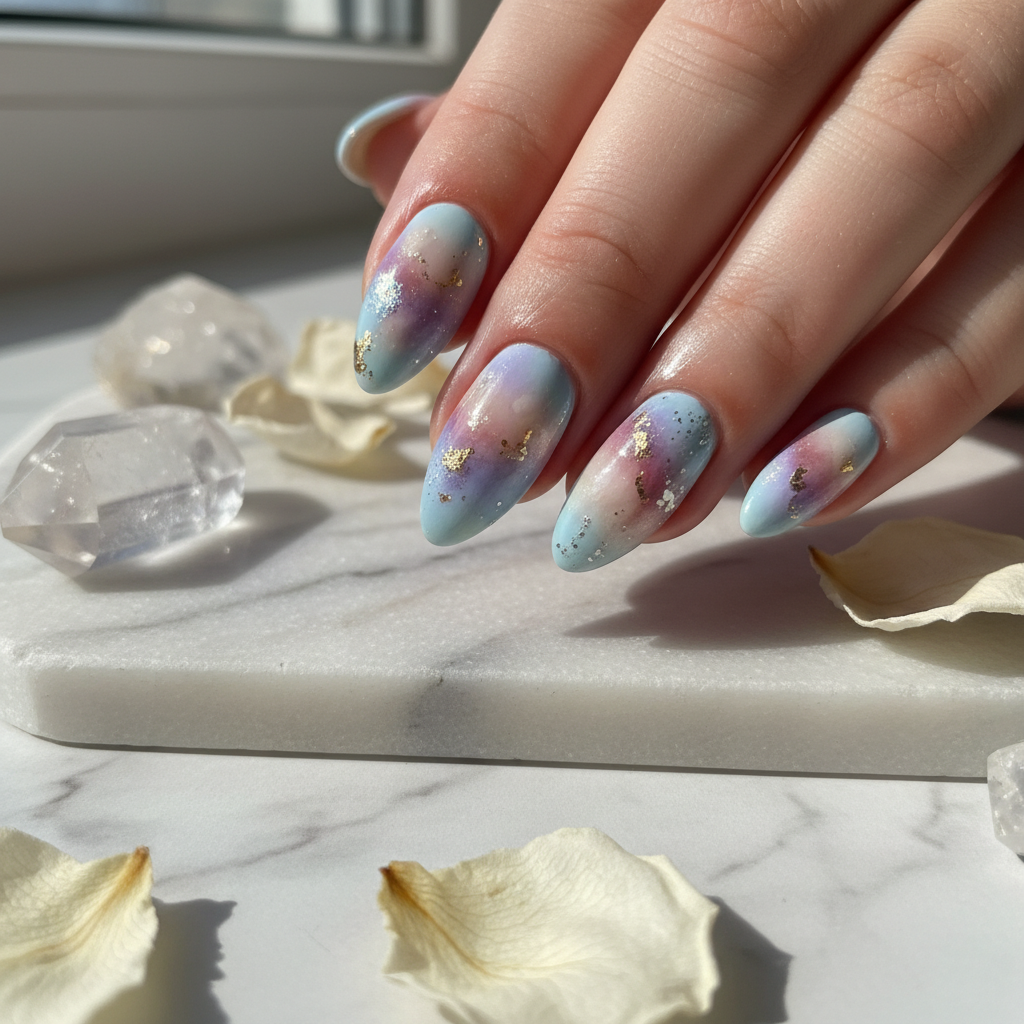
Sophisticated Photo-Real Sponging Nails: Salon Quality Design
Discover the artistry of our Sophisticated Photo-Real Sponging Nails, a design that transcends basic texture with its stunning depth and multi-tonal finish. This professional salon technique masterfully blends colors, creating an almost three-dimensional, atmospheric effect that's both modern and elegant. It's an elevated take on the classic sponging method, perfect for those seeking understated luxury.
- Gel Base Coat
- 3-4 complementary Gel Polish colors (dark, medium, light tones)
- Non-latex Makeup Sponges (fine pore)
- Gel Top Coat (glossy or matte)
- Nail Art Brush (for cleanup)
- UV/LED Curing Lamp
- Prep & Base: Prepare nails, apply a thin layer of gel base coat, and cure. Apply 1-2 coats of your lightest base color and cure each thoroughly.
- Initial Sponging: Dab the darkest gel polish onto a small section of a clean sponge. Lightly and unevenly press onto the nail, creating initial texture. Cure for 30 seconds.
- Layered Blending: Repeat with the medium tone, overlapping some of the darker areas and extending into the lighter base. Use a dabbing and rolling motion for natural blending and cure.
- Refined Depth: Apply the lightest accent color (or a slightly contrasting shade) very sparingly, focusing on subtle highlights or specific textures. Build up layers of all colors, curing between each, until the desired photo-real depth is achieved.
- Seal & Finish: Clean up any polish on skin with a brush. Apply a generous layer of gel top coat (glossy for shine, or matte for a velvety stone-like effect) and cure thoroughly for 60 seconds.
Expert Tip
For a truly photo-real effect, focus on building up thin, almost translucent layers of color, allowing the previous layers to peek through. This creates the depth and illusion of natural texture, rather than a flat, opaque sponge print, which is key to its sophisticated appeal.
Similar Styles
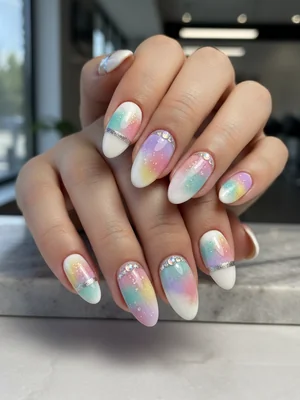
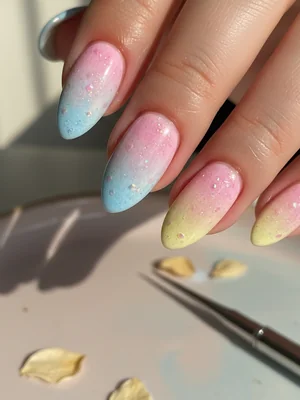
Beautiful Photo-real Salon Sponging Nails
Sponging inspired nail art with beautiful, photo-real finish and professional salon quality
Beautiful Photo-real Salon Sponging Nails
Sponging inspired nail art with beautiful, photo-real finish and professional salon quality
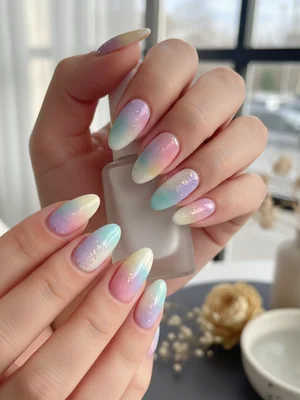
Gorgeous Photo-real Salon Sponging Nails
Sponging inspired nail art with gorgeous, photo-real finish and professional salon quality
Gorgeous Photo-real Salon Sponging Nails
Sponging inspired nail art with gorgeous, photo-real finish and professional salon quality
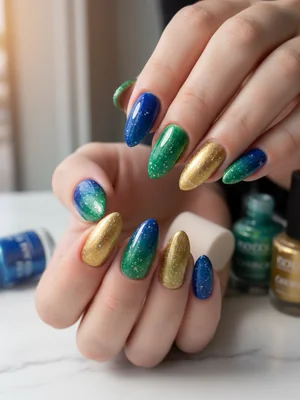
Stunning Photo-real Salon Sponging Nails
Sponging inspired nail art with stunning, photo-real finish and professional salon quality

Stunning Photo-real Salon Sponging Nails
Sponging inspired nail art with stunning, photo-real finish and professional salon quality

Sophisticated Photo-real Salon Sponging Nails
Sponging inspired nail art with sophisticated, photo-real finish and professional salon quality
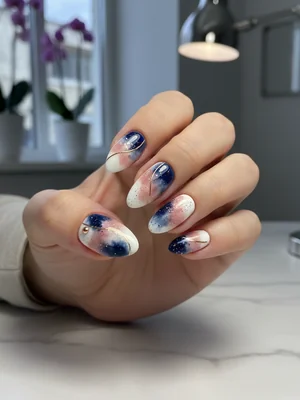
Photo-real Salon Sponging Nails
Sponging inspired nail art with elegant, photo-real finish and professional salon quality
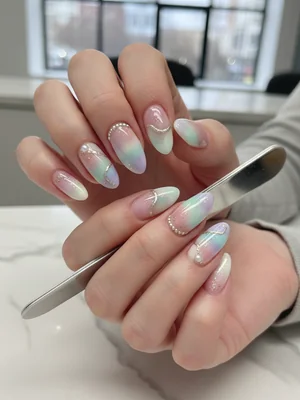
Photo-real Salon Sponging Nails
Sponging inspired nail art with elegant, photo-real finish and professional salon quality

Photo-real Salon Sponging Nails
Sponging inspired nail art with clean, photo-real finish and professional salon quality

Photo-real Salon Sponging Nails
Sponging inspired nail art with clean, photo-real finish and professional salon quality

Photo-real Salon Sponging Nails
Sponging inspired nail art with clean, photo-real finish and professional salon quality
Explore Similar Designs
Colors in this Design
Techniques Used
Perfect For
Nail Shapes
Frequently Asked Questions
What makes this 'photo-real' compared to regular sponging?
The 'photo-real' aspect comes from the intricate layering of multiple, often translucent gel colors and precise dabbing, creating an illusion of depth, light, and natural texture similar to a photograph or natural stone, rather than just a simple speckled effect.
How long does this sophisticated design typically last?
With proper application and aftercare, this gel design can last 2-3 weeks before needing a fill or removal, just like other professional gel manicures, maintaining its stunning photo-real finish.
Can I achieve this salon-quality sponging at home?
While basic sponging is DIY-friendly, achieving the 'sophisticated photo-real salon quality' requires advanced techniques, professional gel products, a UV/LED lamp, and skilled layering, making a salon visit highly recommended for best results.
Is this design suitable for short nails?
While beautiful on any length, the full depth and detail of the photo-real sponging technique are best showcased on medium to long nails, allowing more space for the intricate color blending to truly shine.
How do I choose the right color palette for a sophisticated look?
For a sophisticated aesthetic, opt for muted, earthy tones, deep jewel colors, or classic neutrals. Avoid overly bright or neon shades, and consider subtle metallic accents for added depth without being flashy.
Will the texture from the sponging feel bumpy?
No, despite the layered appearance, a professional salon finish ensures a smooth top coat application, sealing in the design and leaving a perfectly smooth, glossy or matte surface, completely comfortable to the touch.
Aftercare Tips
- ✓Avoid prolonged water submersion for the first 24 hours post-application to ensure maximum gel adhesion.
- ✓Moisturize hands and nails regularly to extend the life and vibrancy of your sophisticated manicure.
- ✓Immediately address any lifting or chipping with professional repair to prevent further damage or water ingress.
Safe Removal
- 1.Gently buff the top layer of the gel polish to break the seal, allowing acetone to penetrate.
- 2.Soak cotton pads in 100% acetone, place them on each nail, and wrap tightly with foil for 10-15 minutes.
- 3.Gently push off softened gel with an orange wood stick. Do not force or peel to avoid damaging natural nails.