Photo-real Salon Gradient Nails - Gradient nail art - featuring nail art, gradient, elegant, red - nail art inspiration and design ideas
Photo-real Salon Gradient Nails
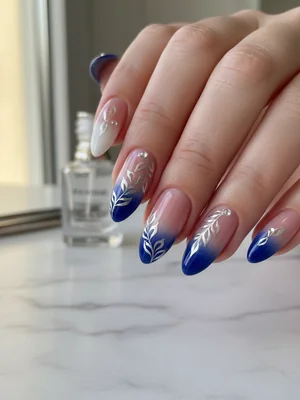
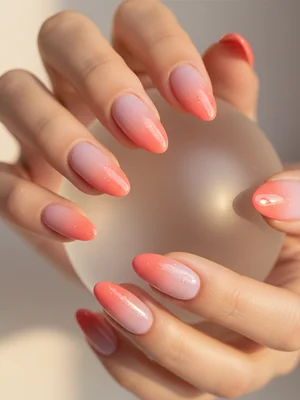
Photo-Real Salon Gradient Nails: Elegant Seamless Fade
Experience the ultimate in nail sophistication with our Photo-Real Salon Gradient Nails. This design features a perfectly seamless, 'airbrushed' color transition, delivering an elegant finish that rivals professional salon quality. It's a delicate yet striking look, showcasing a flawless blend from one shade to another.
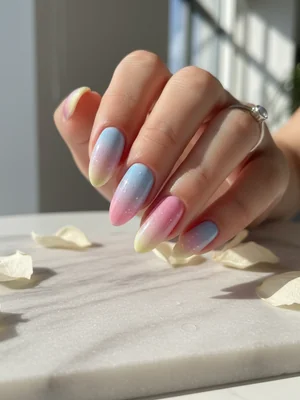
- Gel Base Coat
- 2-3 Gel Polish Colors (e.g., Soft Peach, Blush Pink, Creamy White)
- Gradient Sponge Applicator
- Lint-Free Wipes
- Nail Cleanser/Alcohol
- UV/LED Curing Lamp
- Gel Top Coat (No-Wipe recommended)
- Small Detail Brush (for cleanup)
- Prep nails: file, buff, push back cuticles, and cleanse with alcohol.
- Apply a thin layer of gel base coat and cure under UV/LED lamp.
- Apply the lightest gel polish color to the entire nail, cure. Then, on a gradient sponge, apply your chosen gradient colors side-by-side, overlapping slightly.
- Dab the sponge repeatedly onto the nail, moving it slightly up and down to create a seamless blend. Cure this layer. Repeat sponging 2-3 times, curing after each, until desired opacity and blend are achieved.
- Clean any polish from the skin with a detail brush and cleanser. Apply a thin layer of no-wipe gel top coat, ensuring even coverage over the gradient, and cure thoroughly.
- Wipe nails with a lint-free wipe after curing (if using a sticky top coat) and finish with cuticle oil for a professional look.
Expert Tip
The secret to a truly 'photo-real' gradient is applying very thin, even layers of polish with your sponge and curing each layer completely. This prevents bulkiness and allows for a smooth, airbrushed appearance with no harsh lines.
Similar Styles
Beautiful Photo-real Salon Gradient Nails
Gradient inspired nail art with beautiful, photo-real finish and professional salon quality
Beautiful Photo-real Salon Gradient Nails
Gradient inspired nail art with beautiful, photo-real finish and professional salon quality
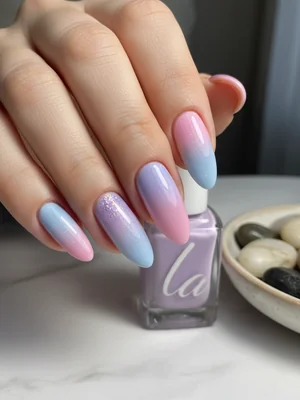
Gorgeous Photo-real Salon Gradient Nails
Gradient inspired nail art with gorgeous, photo-real finish and professional salon quality
Gorgeous Photo-real Salon Gradient Nails
Gradient inspired nail art with gorgeous, photo-real finish and professional salon quality

Stunning Photo-real Salon Gradient Nails
Gradient inspired nail art with stunning, photo-real finish and professional salon quality
Sophisticated Photo-real Salon Gradient Nails
Gradient inspired nail art with sophisticated, photo-real finish and professional salon quality
Stunning Photo-real Salon Gradient Nails
Gradient inspired nail art with stunning, photo-real finish and professional salon quality
Photo-real Salon Gradient Nails
Gradient inspired nail art with elegant, photo-real finish and professional salon quality
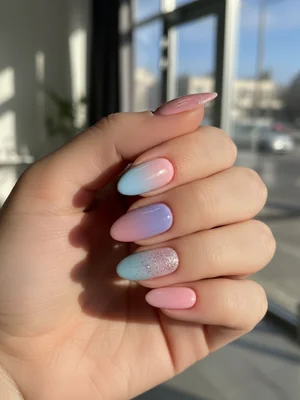
Photo-real Salon Gradient Nails
Gradient inspired nail art with clean, photo-real finish and professional salon quality
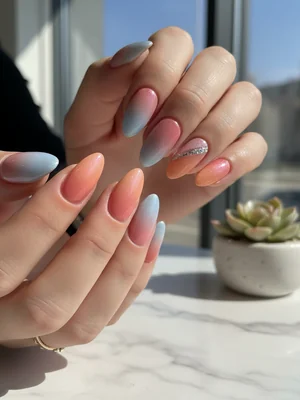
Photo-real Salon Gradient Nails
Gradient inspired nail art with clean, photo-real finish and professional salon quality
Photo-real Salon Gradient Nails
Gradient inspired nail art with clean, photo-real finish and professional salon quality
Explore Similar Designs
Colors in this Design
Perfect For
Nail Shapes
Frequently Asked Questions
How long do photo-real gradient nails typically last?
With proper application and aftercare, photo-real gel gradient nails can last 2-3 weeks without chipping or lifting, maintaining their seamless beauty.
Can I achieve this 'photo-real' effect at home?
While possible, achieving true 'photo-real' salon quality requires advanced skill, precise technique, and professional-grade products. Practice and patience are key for DIY attempts.
What's the best way to choose colors for a seamless gradient?
For a truly seamless look, choose colors within the same family or shades that are close on the color wheel. Opting for 2-3 colors with a clear difference in tone but good blendability works best.
Is this design damaging to natural nails?
No, when applied and removed correctly by a professional or with proper technique, gel gradients are not damaging. The key is gentle preparation and never peeling off the polish.
What makes this different from a regular gradient?
The 'photo-real' aspect emphasizes an almost imperceptible, airbrushed transition, free of lines or noticeable demarcation. It's a higher level of refinement and smoothness compared to a basic gradient.
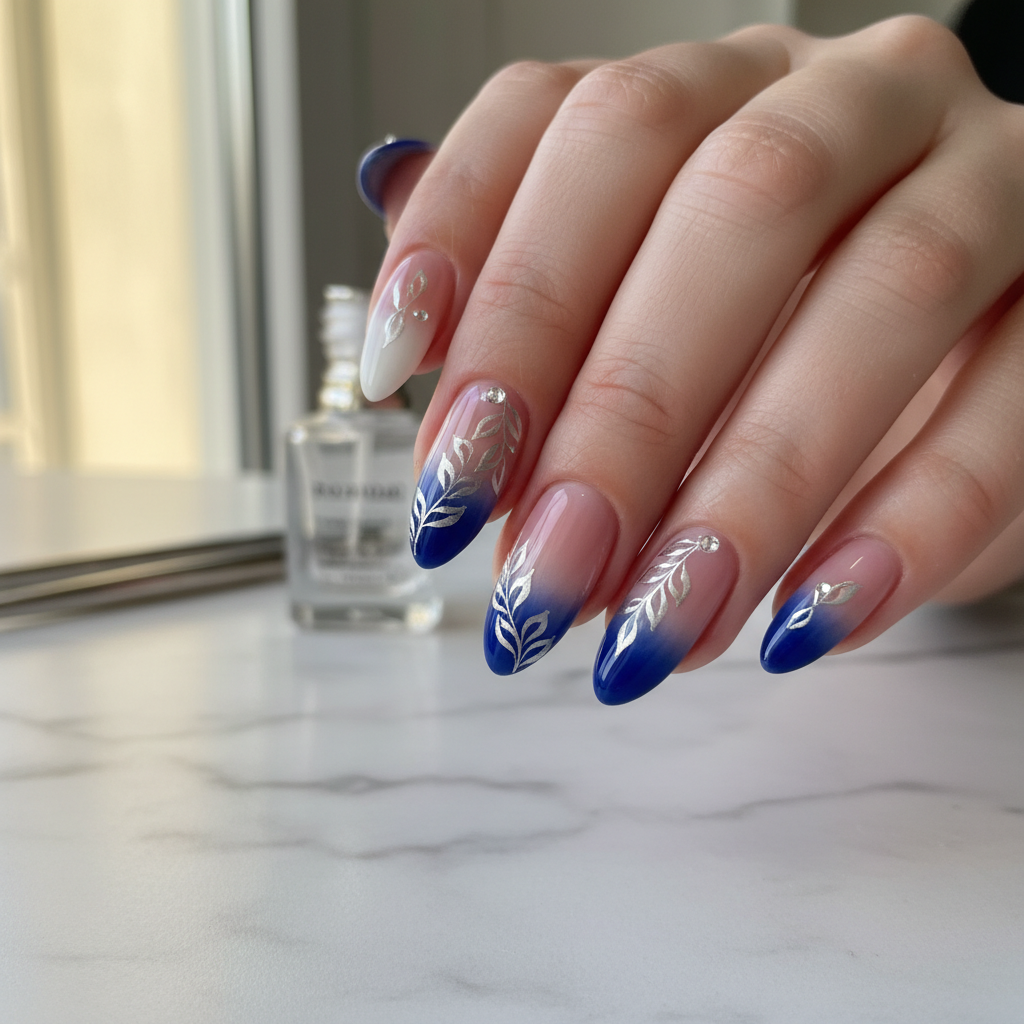
Can I add nail art on top of this gradient?
Absolutely! A photo-real gradient serves as an exquisite base. Delicate fine line art, subtle glitter accents, or minimalist foil designs can further enhance its elegant appeal without overwhelming the seamless blend.
Aftercare Tips
- ✓Moisturize hands and cuticles regularly to maintain nail health.
- ✓Avoid prolonged exposure to hot water immediately after application.
- ✓Do not pick or peel at your gel polish; this can damage your natural nails.
- ✓Schedule your next fill or removal appointment within 2-3 weeks.
Safe Removal
- 1.Gently buff off the top coat to break the seal, being careful not to buff natural nail.
- 2.Soak cotton pads in acetone, place on each nail, and wrap tightly with foil for 10-15 minutes.
- 3.Gently push off softened gel with a wooden stick; never force it. Moisturize nails and cuticles post-removal.