Gorgeous Photo-real Salon Gradient Nails - Gradient nail art - featuring nail art, gradient, red - nail art inspiration and design ideas
Gorgeous Photo-real Salon Gradient Nails
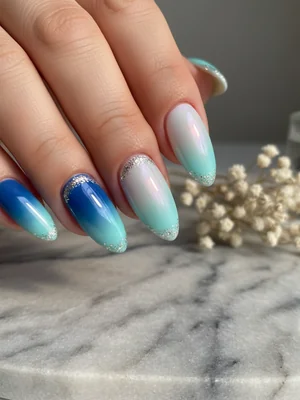
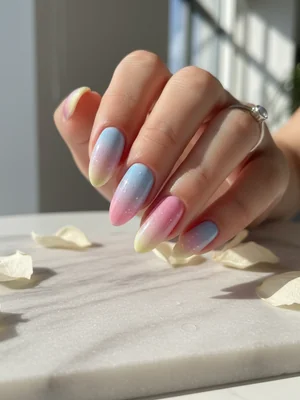
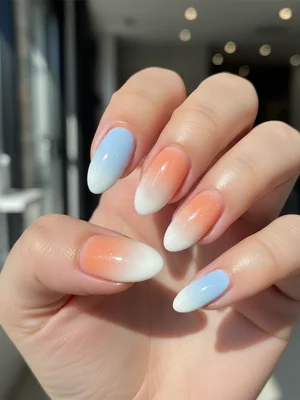
Gorgeous Photo-Real Gradient Nails: Salon Quality Blend
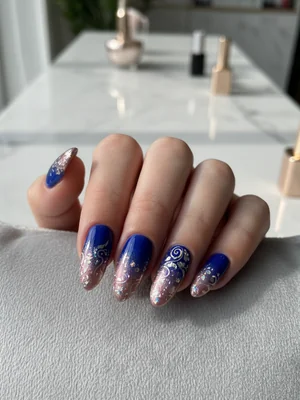
Experience the epitome of nail artistry with our Gorgeous Photo-Real Salon Gradient Nails. This design features a seamless, almost imperceptible blend of colors, creating a stunning, high-definition transition that looks professionally airbrushed. Achieve a sophisticated and polished look that rivals any high-end salon finish.
Gorgeous Photo-Real Gradient Nails: Salon Quality Blend
Experience the epitome of nail artistry with our Gorgeous Photo-Real Salon Gradient Nails. This design features a seamless, almost imperceptible blend of colors, creating a stunning, high-definition transition that looks professionally airbrushed. Achieve a sophisticated and polished look that rivals any high-end salon finish.
- Gel Base Coat
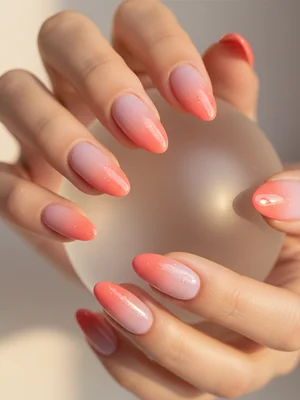
- 3 Gel Polishes (Dusty Rose, Soft Peach, Creamy Beige)
- Non-Latex Makeup Sponge (dense)
- Cleanup Brush
- Acetone/Gel Cleanser
- No-Wipe Gel Top Coat
- UV/LED Curing Lamp
- Prep nails (file, push cuticles, buff, dehydrate) and apply a thin layer of gel base coat, cure.
- Apply the lightest color (Creamy Beige) to the nail tips and blend a small amount of Soft Peach into the middle, curing after each thin application.
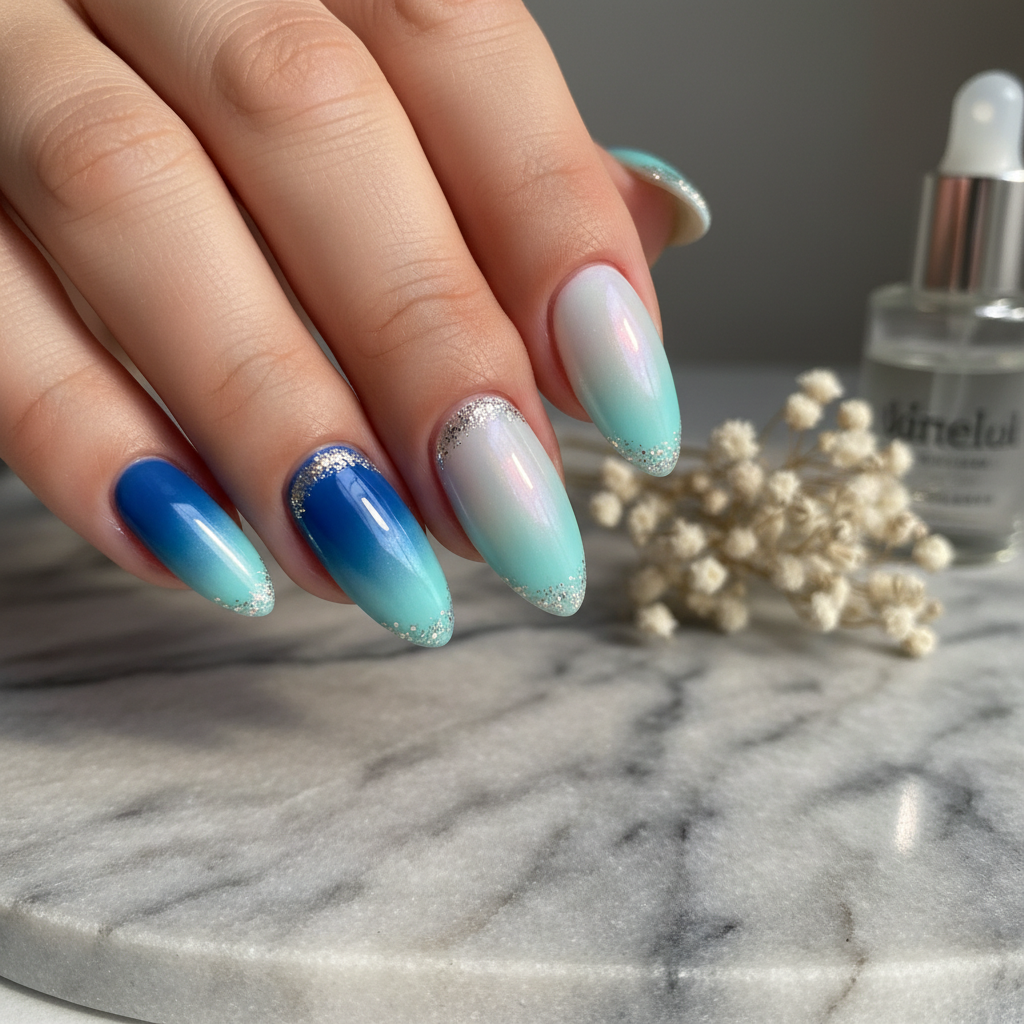
- Using a dense non-latex sponge, dab a small amount of Soft Peach and Dusty Rose onto the sponge, lightly pressing and rolling onto the nail, starting from the cuticle with Dusty Rose and blending into the peach.
- Repeat sponging 2-3 thin layers, curing each time, ensuring a smooth, photo-real transition. Clean up any polish from skin with a brush dipped in cleanser.
- Apply a final, even layer of no-wipe gel top coat over the entire nail, cap the free edge, and cure thoroughly for a high-gloss finish.
Expert Tip
Achieving a truly photo-real gradient requires extremely thin layers and careful, repetitive dabbing with a slightly damp (with base coat or cleanser) sponge. Don't rush; build the color intensity and blend gradually for that seamless, salon-quality look.
Similar Styles
Beautiful Photo-real Salon Gradient Nails
Gradient inspired nail art with beautiful, photo-real finish and professional salon quality
Beautiful Photo-real Salon Gradient Nails
Gradient inspired nail art with beautiful, photo-real finish and professional salon quality
Gorgeous Photo-real Salon Gradient Nails
Gradient inspired nail art with gorgeous, photo-real finish and professional salon quality

Stunning Photo-real Salon Gradient Nails
Gradient inspired nail art with stunning, photo-real finish and professional salon quality
Sophisticated Photo-real Salon Gradient Nails
Gradient inspired nail art with sophisticated, photo-real finish and professional salon quality
Stunning Photo-real Salon Gradient Nails
Gradient inspired nail art with stunning, photo-real finish and professional salon quality
Photo-real Salon Gradient Nails
Gradient inspired nail art with elegant, photo-real finish and professional salon quality
Photo-real Salon Gradient Nails
Gradient inspired nail art with elegant, photo-real finish and professional salon quality
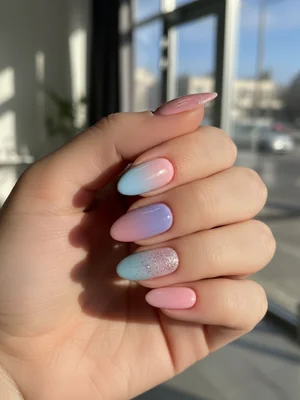
Photo-real Salon Gradient Nails
Gradient inspired nail art with clean, photo-real finish and professional salon quality
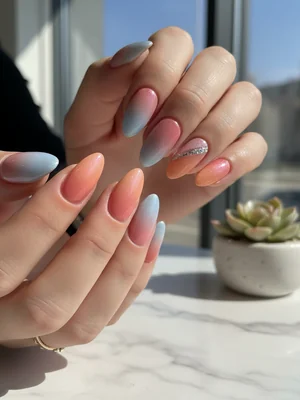
Photo-real Salon Gradient Nails
Gradient inspired nail art with clean, photo-real finish and professional salon quality
Photo-real Salon Gradient Nails
Gradient inspired nail art with clean, photo-real finish and professional salon quality
Explore Similar Designs
Techniques Used
Perfect For
Nail Shapes
Frequently Asked Questions
How long do these photo-real gradient nails typically last?
With proper application and aftercare, you can expect this gel design to last 2-3 weeks without chipping or lifting.
Can I choose different colors for my gradient?
Absolutely! The beauty of this design is its versatility. We can create a photo-real gradient with almost any color combination you desire.
Is this design suitable for short nails?
While a longer nail length allows for a more dramatic color transition, a subtle and elegant photo-real gradient can still be achieved beautifully on shorter nails.
What makes this 'photo-real' compared to a regular gradient?
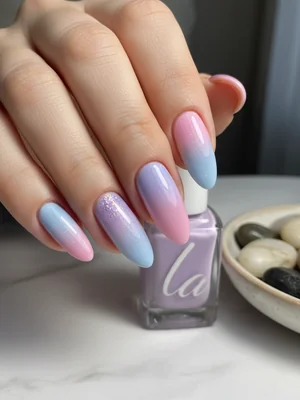
A 'photo-real' gradient focuses on an incredibly smooth, almost airbrushed transition, with no harsh lines or visible texture, making it appear perfect, as if digitally rendered.
Does this design take longer than a standard gel manicure?
Yes, due to the intricate layering and precise blending required for the photo-real finish, this service typically takes longer than a single-color gel manicure.
Will the colors look as vibrant in person as they do in photos?
Our commitment to professional salon quality ensures the colors are vibrant and the blend is as stunning in person as in any high-quality photograph.
Aftercare Tips
- ✓Moisturize your hands and cuticles regularly to maintain nail health and appearance.
- ✓Avoid prolonged exposure to water or harsh chemicals immediately after application.
- ✓Be gentle with your nails, especially within the first 24 hours.
- ✓Do not pick or peel at your gel polish, as this can damage your natural nails.
Safe Removal
- 1.Gently buff off the top coat to break the seal.
- 2.Soak nails in acetone for 10-15 minutes, or until the gel is soft and easily removable.
- 3.Gently push off softened gel with a wooden stick or metal pusher, then lightly buff any residue.