Beautiful Photo-real Salon Sponging Nails - Sponging nail art - featuring nail art, red - nail art inspiration and design ideas
Beautiful Photo-real Salon Sponging Nails
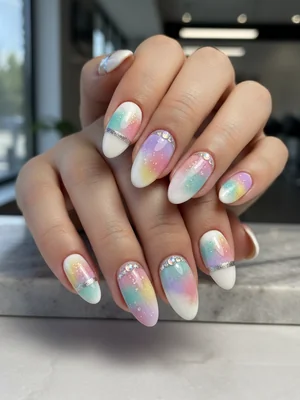
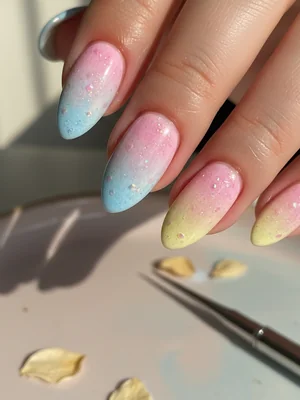
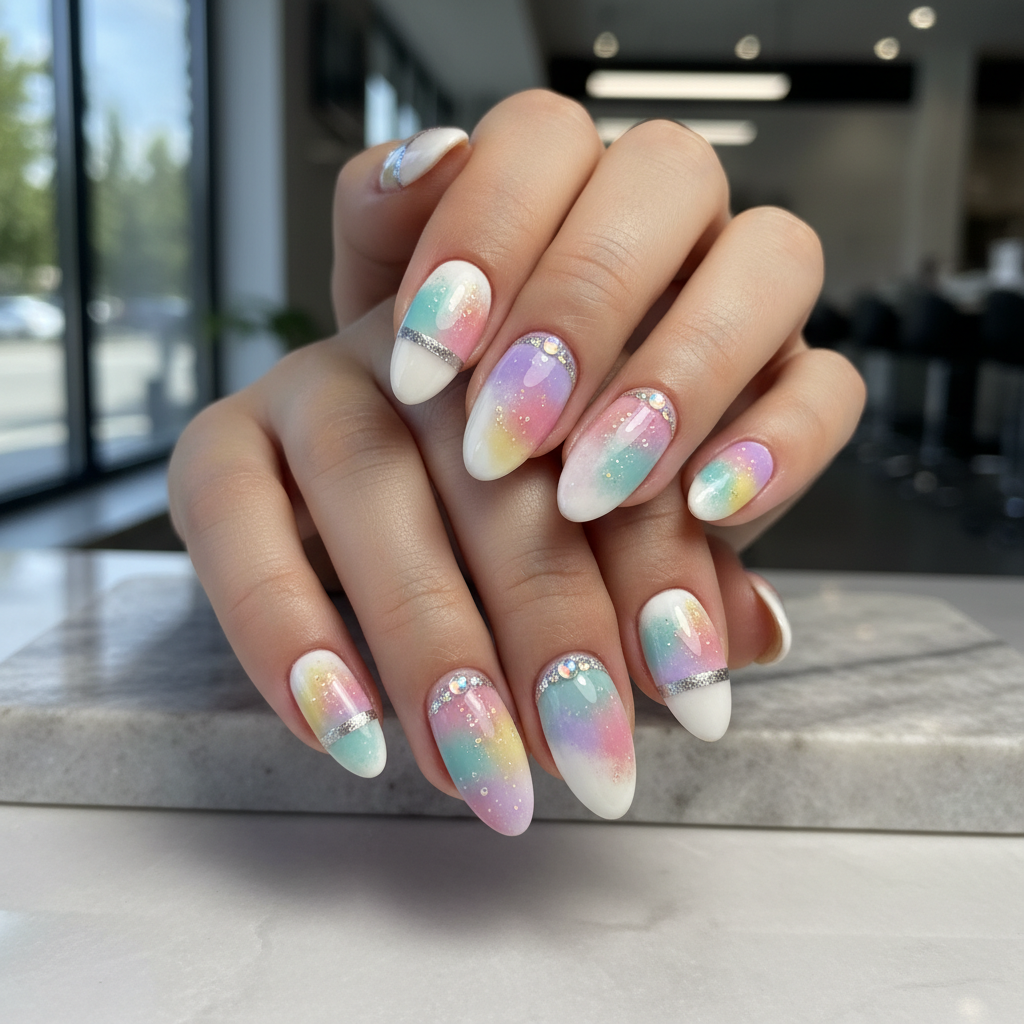
Photo-Real Salon Sponging Nails: Ethereal Gradient Art
Step into a world of sophisticated nail art with our Photo-Real Salon Sponging design. This unique creation showcases a mesmerizing, seamless blend of colors, meticulously layered to achieve a depth and fluidity that feels almost photographic. Experience professional salon quality with an artistic touch.
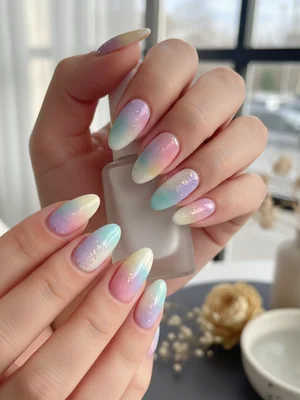
- Fine-Pored Nail Sponges
- 3-4 Complementary Gel Polishes (e.g., misty blue, soft lavender, white)
- Gel Base & No-Wipe Top Coat
- Acetone-Free Nail Polish Remover (for cleanup)
- Detail Brush for Cleanup
- UV/LED Curing Lamp
- **Nail Prep & Base Coat:** Prepare nails (file, push cuticles), apply a thin layer of gel base coat, and cure under UV/LED lamp.
- **Apply Lightest Base Color:** Apply 1-2 thin coats of the lightest color (e.g., Cloud White) as your base, curing each layer. This ensures the sponged colors pop.
- **First Sponging Layer:** Dab a small amount of the misty blue and soft lavender polishes onto a flat surface. Lightly dab a fine-pored sponge into both colors, then gently and repeatedly dab onto the nail, focusing on a smooth transition. Cure.
- **Build Depth & Blend:** Repeat the sponging process, adding more thin layers of your chosen colors. Concentrate on building color depth in desired areas and ensuring a seamless, 'photo-real' blend. Dab, don't press. Cure each layer.
- **Seal with Top Coat & Clean Up:** Apply a generous layer of no-wipe gel top coat, ensuring smooth coverage to encapsulate the design. Cure fully. Use a detail brush dipped in remover to clean any polish from the cuticles and skin for a crisp, salon-perfect finish.
Expert Tip
To achieve that truly 'photo-real' look, use very fine-pored sponges and apply extremely thin, buildable layers of polish. Dab, don't press hard, and allow slight drying time between layers to prevent muddiness and ensure a seamless blend. A clean-up brush dipped in remover is essential for crisp edges.
Similar Styles
Beautiful Photo-real Salon Sponging Nails
Sponging inspired nail art with beautiful, photo-real finish and professional salon quality
Gorgeous Photo-real Salon Sponging Nails
Sponging inspired nail art with gorgeous, photo-real finish and professional salon quality
Gorgeous Photo-real Salon Sponging Nails
Sponging inspired nail art with gorgeous, photo-real finish and professional salon quality
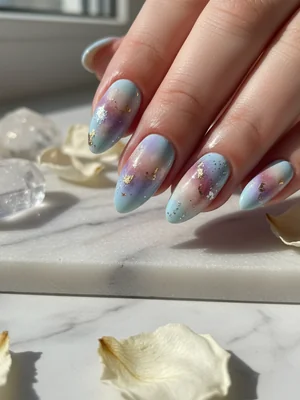
Stunning Photo-real Salon Sponging Nails
Sponging inspired nail art with stunning, photo-real finish and professional salon quality

Stunning Photo-real Salon Sponging Nails
Sponging inspired nail art with stunning, photo-real finish and professional salon quality

Sophisticated Photo-real Salon Sponging Nails
Sponging inspired nail art with sophisticated, photo-real finish and professional salon quality
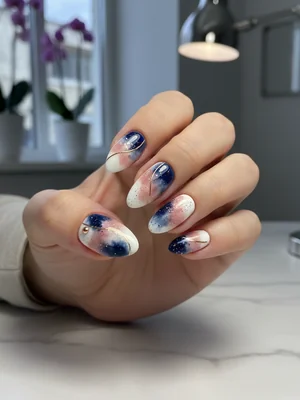
Photo-real Salon Sponging Nails
Sponging inspired nail art with elegant, photo-real finish and professional salon quality
Sophisticated Photo-real Salon Sponging Nails
Sponging inspired nail art with sophisticated, photo-real finish and professional salon quality
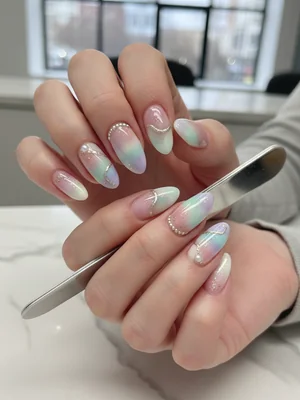
Photo-real Salon Sponging Nails
Sponging inspired nail art with elegant, photo-real finish and professional salon quality

Photo-real Salon Sponging Nails
Sponging inspired nail art with clean, photo-real finish and professional salon quality

Photo-real Salon Sponging Nails
Sponging inspired nail art with clean, photo-real finish and professional salon quality

Photo-real Salon Sponging Nails
Sponging inspired nail art with clean, photo-real finish and professional salon quality
Explore Similar Designs
Colors in this Design
Techniques Used
Nail Shapes
Frequently Asked Questions
How is a photo-real sponging effect different from a regular gradient?
Photo-real sponging involves more subtle color transitions and often multiple, very thin layers to create exceptional depth and a hyper-smooth, almost airbrushed appearance, mimicking natural elements rather than a stark two-tone blend.
Can I achieve this 'photo-real' look at home?
While basic sponging is DIY-friendly, achieving the salon-quality, seamless, photo-real finish often requires professional-grade polishes, specialized fine-pored sponges, and advanced blending techniques best executed by a skilled artist.
How long does this design typically last?
With proper application and aftercare, especially with high-quality gel polish, this design can last 2-3 weeks, maintaining its stunning depth and flawless finish.
Is this design suitable for shorter nails?
While longer nails allow for more gradient space and detail, a simplified version of this design can certainly be adapted for shorter nails, focusing on a more condensed, two-to-three color blend for an equally striking effect.
What type of sponge works best for this design?
Fine-pored makeup sponges or specialized nail art sponges are crucial for achieving the smooth, seamless 'photo-real' blend without visible texture or harsh lines from the sponge itself.
Aftercare Tips
- ✓Moisturize hands and cuticles regularly to maintain skin health around your beautiful nail art.
- ✓Avoid using nails as tools to prevent lifting or damage to the intricate sponged design.
- ✓If using gel, avoid prolonged exposure to harsh chemicals or extreme heat immediately after application, as this can affect durability.
Safe Removal
- 1.For gel polish, gently file down the top coat to break the seal.
- 2.Soak nails in acetone wraps or cotton pads soaked in acetone for 10-15 minutes.
- 3.Carefully push off softened gel with a wooden stick, never force or peel.