
Photo-real Salon Summer Vacation Nails - Summer Vacation nail art - featuring nail art, red, summer - nail art inspiration and design ideas
Photo-real Salon Summer Vacation Nails
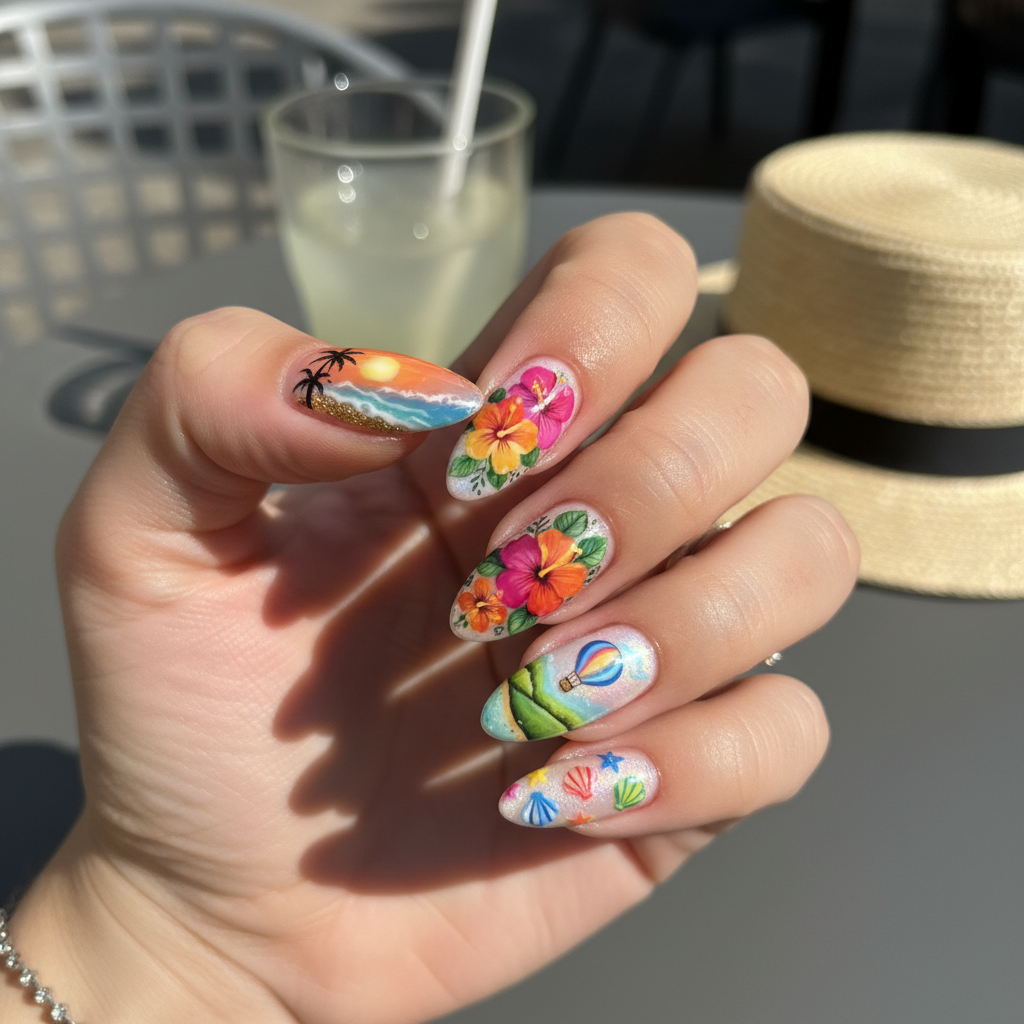
Photo-Real Summer Vacation Nails: Salon-Quality Art
Escape to paradise with these stunning photo-real summer vacation nails! This design captures the essence of summer with vibrant colors and meticulous detail, bringing a professional salon-quality look to your fingertips.
Photo-Real Summer Vacation Nails: Salon-Quality Art
Escape to paradise with these stunning photo-real summer vacation nails! This design captures the essence of summer with vibrant colors and meticulous detail, bringing a professional salon-quality look to your fingertips.
- Nail polish in various summer-themed colors
- Fine detail brushes
- Dotting tools
- Airbrush (optional)
- Nail art sealant
- Base and top coat
- Apply a base coat to protect your nails and let it dry completely.
- Paint the base color(s) of your choice (e.g., blue for the sky, beige for the sand).
- Using fine detail brushes, begin painting the photo-real elements, such as palm trees, waves, and sunsets, layering colors to create depth.
- If using an airbrush, apply subtle gradients and shadows to enhance the realism.
- Allow the design to dry completely, then apply a top coat for a glossy finish and to seal in the design.
- Clean up any excess polish around your cuticles for a professional look.
Expert Tip
Use high-quality acrylic paints for the fine details, as they offer better control and color payoff. Practice your blending techniques on a piece of paper before applying them to your nails for a smoother, more realistic finish.
Similar Styles


Explore Similar Designs
Colors in this Design
Nail Shapes
Frequently Asked Questions
How long will this design last?
With proper maintenance and care, this design can last up to 2 weeks.
Can I do this design at home?
While challenging, with patience, the right tools, and practice, you can achieve a similar effect at home.
What type of brushes should I use?
Use fine detail brushes with synthetic bristles for precise application.
Is airbrushing necessary?
No, airbrushing is optional. You can achieve a similar effect with hand painting and blending techniques.
Can I use gel polish for this design?
Yes, gel polish can be used, but you will need a UV/LED lamp to cure each layer.
How can I protect my nails from damage during removal?
Use acetone sparingly and moisturize your nails and cuticles immediately after removal.
Aftercare Tips
- ✓Wear gloves when doing housework or gardening to protect your nails.
- ✓Moisturize your hands regularly to prevent dryness and cracking.
- ✓Avoid picking or biting your nails, as this can damage the design and your natural nails.
Safe Removal
- 1.Soak cotton balls in acetone-based nail polish remover.
- 2.Place the cotton balls on your nails and wrap them in foil for 10-15 minutes.
- 3.Gently remove the foil and cotton balls, and wipe away any remaining polish.