Sophisticated Photo-real Salon Spring Nails - Spring nail art - featuring nail art, red, spring - nail art inspiration and design ideas
Sophisticated Photo-real Salon Spring Nails
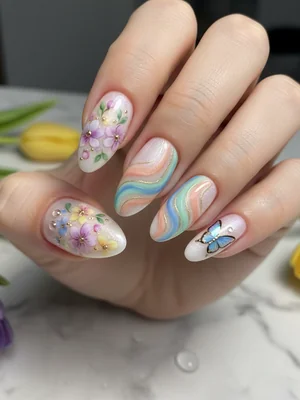
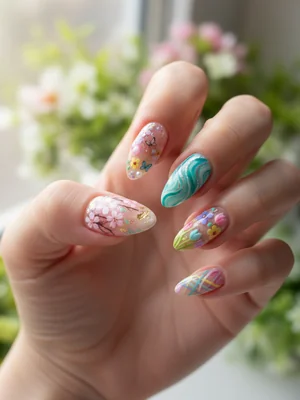
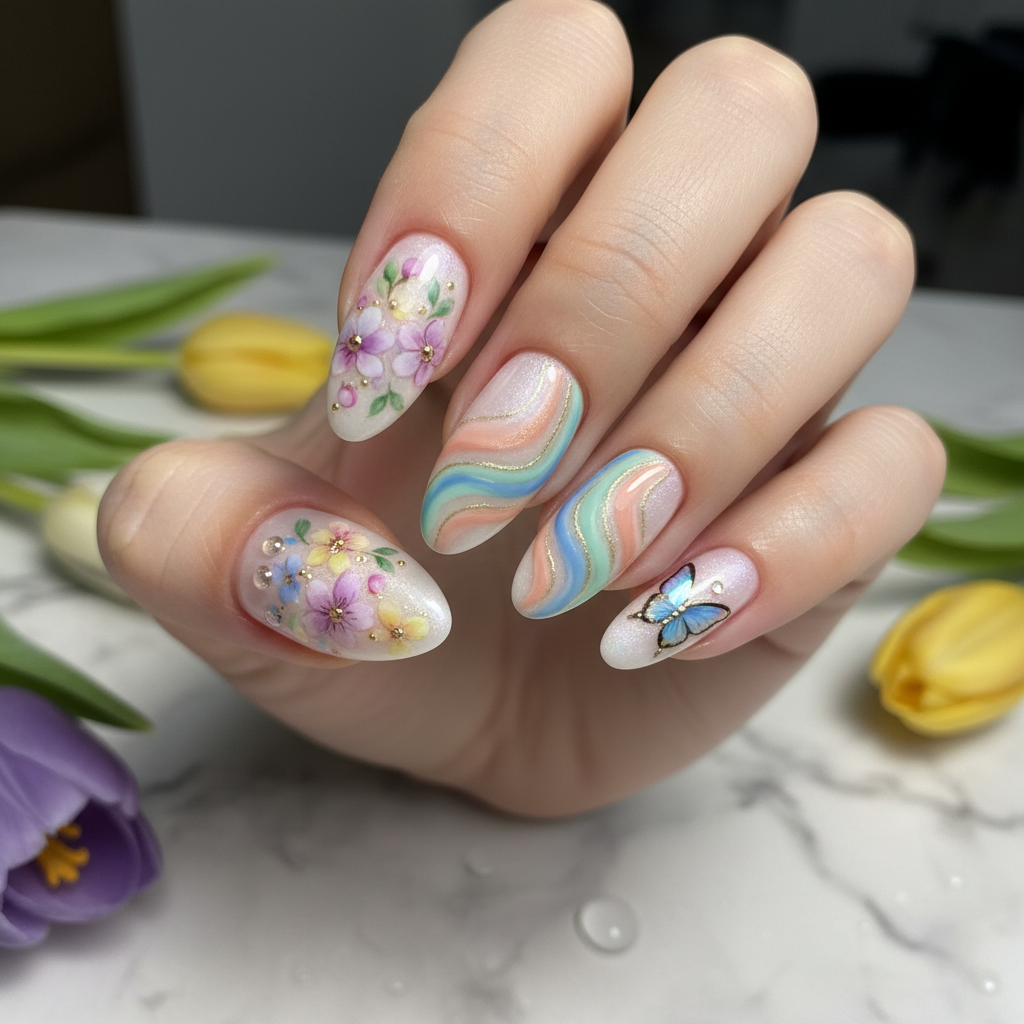
Sophisticated Photo-Real Spring Blossom Nails
Immerse your fingertips in the beauty of spring with our Sophisticated Photo-Real Spring Blossom Nails. This exquisite design captures the delicate essence of blooming flowers with stunning, lifelike detail and a professional salon-quality finish, offering an elegant touch for any occasion.
- Gel Polish (base, pastel colors)
- Ultra-fine Detail Brushes (000, liner)
- Non-wipe Glossy Top Coat
- UV/LED Curing Lamp
- Nail Art Pigments (for shading)
- Dotting Tool (for tiny details)
- Perform nail prep, apply a gel base coat, and cure. Apply two coats of a soft, neutral pastel gel polish (e.g., creamy nude or light sky blue) as the base, curing each layer.
- Using ultra-fine detail brushes and varying pastel gel polishes (pinks, whites, soft greens), meticulously hand-paint the main outlines of spring blossoms (e.g., cherry or dogwood flowers) on chosen nails.
- Apply translucent layers of gel polish and pigments, building up shading and highlights to create a three-dimensional, photo-real effect. Focus on the subtle contours and depth of each petal and leaf.
- Add exquisite fine details like delicate stamen, tiny leaf veins, or subtle dewdrop effects using a micro-liner brush and contrasting, highly pigmented gels.
- Seal the entire masterpiece with a high-gloss, non-wipe top coat, ensuring full encapsulation and a flawless, professional salon-quality finish, then cure completely.
Expert Tip
Achieving a true photo-real effect requires patience and light, controlled brushstrokes. Build your colors and shading in thin layers, allowing each to cure slightly, to prevent bleeding and create a seamless, lifelike transition.
Similar Styles
Beautiful Photo-real Salon Spring Nails
Spring inspired nail art with beautiful, photo-real finish and professional salon quality
Gorgeous Photo-real Salon Spring Nails
Spring inspired nail art with gorgeous, photo-real finish and professional salon quality
Beautiful Photo-real Salon Spring Nails
Spring inspired nail art with beautiful, photo-real finish and professional salon quality

Gorgeous Photo-real Salon Spring Nails
Spring inspired nail art with gorgeous, photo-real finish and professional salon quality
Stunning Photo-real Salon Spring Nails
Spring inspired nail art with stunning, photo-real finish and professional salon quality
Stunning Photo-real Salon Spring Nails
Spring inspired nail art with stunning, photo-real finish and professional salon quality
Sophisticated Photo-real Salon Spring Nails
Spring inspired nail art with sophisticated, photo-real finish and professional salon quality
Photo-real Salon Spring Nails
Spring inspired nail art with elegant, photo-real finish and professional salon quality
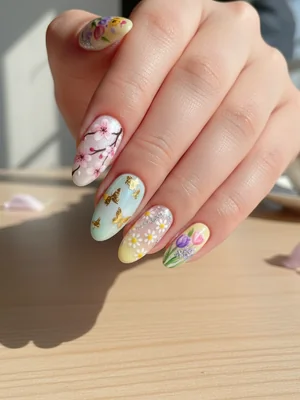
Photo-real Salon Spring Nails
Spring inspired nail art with elegant, photo-real finish and professional salon quality
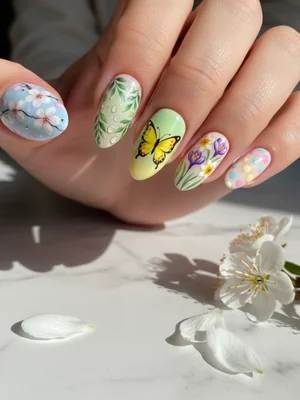
Photo-real Salon Spring Nails
Spring inspired nail art with clean, photo-real finish and professional salon quality
Photo-real Salon Spring Nails
Spring inspired nail art with clean, photo-real finish and professional salon quality
Photo-real Salon Spring Nails
Spring inspired nail art with clean, photo-real finish and professional salon quality
Explore Similar Designs
Colors in this Design
Techniques Used
Perfect For
Nail Shapes
Frequently Asked Questions
How long does this photo-real design typically last?
With proper care and high-quality gel products, this intricate design typically lasts 2-3 weeks, maintaining its stunning detail and shine.
Is the 'photo-real' effect truly hand-painted?
Yes, the sophisticated 'photo-real' effect is achieved through meticulous hand-painting, layering, and shading with ultra-fine brushes and gel polishes by a skilled artist.
Can this detailed design be applied to shorter nails?
While medium to longer nails provide an optimal canvas for the full detail, a simplified photo-real accent bloom can still look incredibly stunning and sophisticated on shorter lengths.
Will the intricate design feel textured on my nails?
Despite the depth of the art, a high-quality, non-wipe top coat will fully encapsulate the design, leaving a smooth, glossy, and comfortable finish.
Can I choose different types of spring flowers for the design?
Absolutely! We encourage personalization. We can discuss various spring blossoms like tulips, daffodils, or even realistic foliage to perfectly tailor your unique photo-real look.
Is this detailed design more prone to chipping than a regular gel manicure?
No, as the entire design is fully sealed under a durable top coat, it's as resilient as any other professional gel manicure. Proper aftercare is always key.
Aftercare Tips
- ✓Allow a few hours post-appointment for the top coat to fully harden, even after curing, for maximum durability.
- ✓Hydrate your hands and cuticles regularly with a quality moisturizer and cuticle oil to support nail health and shine.
- ✓Be gentle with your nails, especially the detailed art, to prevent premature wear or damage.
- ✓Contact your nail technician immediately if you notice any lifting or chipping for professional advice and a quick fix.
Safe Removal
- 1.Gently file down the glossy top coat to break the seal, being careful not to file into the natural nail plate.
- 2.Soak nails in 100% acetone, typically using cotton balls wrapped in foil, for 10-15 minutes.
- 3.Carefully push off the softened gel with a cuticle pusher. Do not peel or force it, then gently buff the natural nail and apply nourishing oil.