
Photo-real Salon Spring Wedding Nails - Spring Wedding nail art - featuring nail art, red, wedding, spring - nail art inspiration and design ideas
Photo-real Salon Spring Wedding Nails
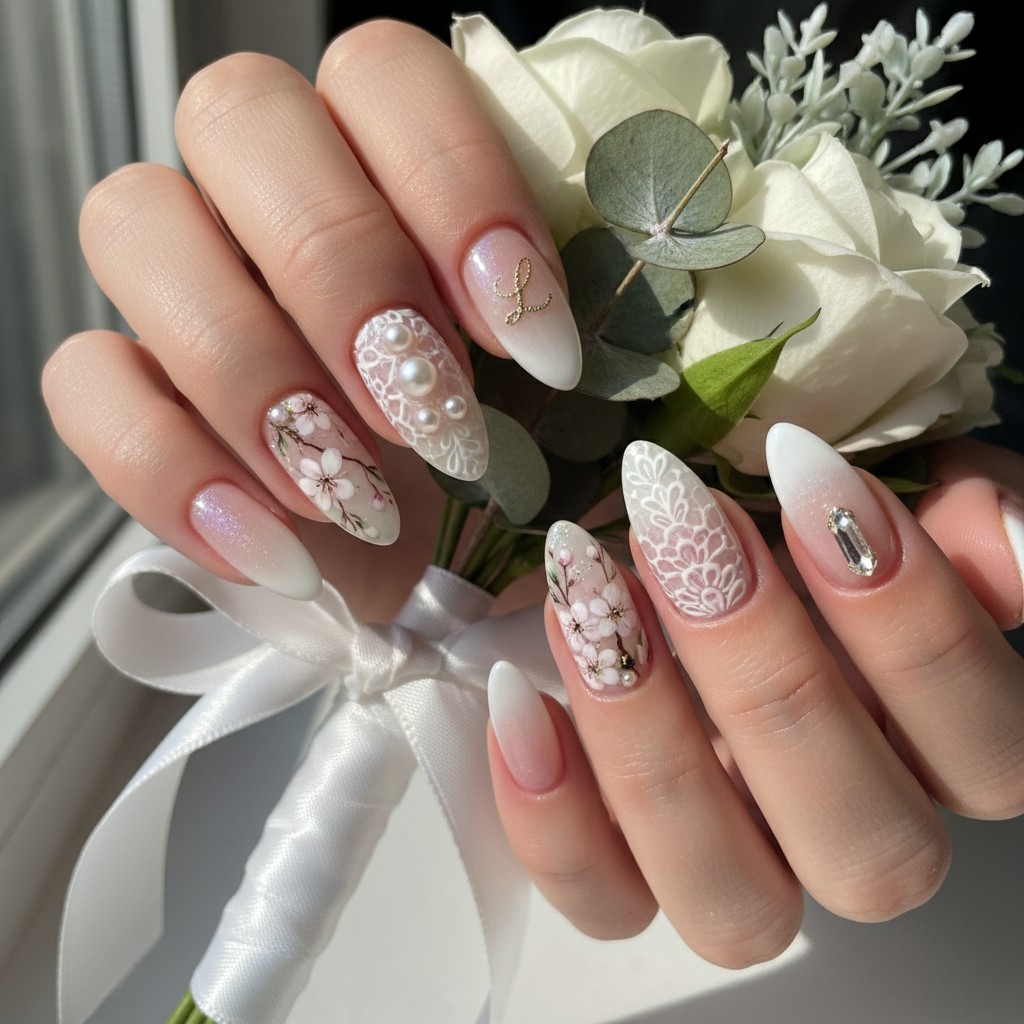
Elegant Spring Wedding Nails | Photo-Real Salon Finish
Achieve stunning, photo-real salon-quality nails perfect for a Spring Wedding. This sophisticated design captures the essence of spring with delicate details and a flawlessly smooth finish, ideal for brides or wedding guests.
Elegant Spring Wedding Nails | Photo-Real Salon Finish
Achieve stunning, photo-real salon-quality nails perfect for a Spring Wedding. This sophisticated design captures the essence of spring with delicate details and a flawlessly smooth finish, ideal for brides or wedding guests.
- Gel polish (white, pale pink, light gold, nude)
- Fine detail nail art brush
- LED/UV lamp
- Base coat
- Top coat
- Nail cleanser
- Prep nails: Shape, buff, and clean nails. Apply a base coat and cure.
- Apply base color: Apply 2-3 thin coats of a soft white or pale pink gel polish, curing between each coat.
- Create subtle details: Using a fine detail brush and light gold gel polish, add delicate floral accents or subtle lines near the cuticle or along the nail edge. Cure.
- Optional Ombre: If desired, use a makeup sponge to create a very subtle ombre effect using the nude gel polish at the base of the nail, blending seamlessly into the white/pink. Cure.
- Seal with top coat: Apply a generous layer of glossy top coat and cure thoroughly. Cleanse nails to remove any sticky residue.
- Final Inspection: Check for any imperfections and apply a second coat of top coat if needed.
Perfect For
Expert Tip
Use a very light hand when creating the floral details to maintain a delicate and refined appearance. Practice on a nail wheel first to perfect your technique.
Similar Styles


Explore Similar Designs
Colors in this Design
Nail Shapes
Frequently Asked Questions
How do I achieve a photo-real finish?
Using high-quality gel polishes, applying thin, even coats, and ensuring proper curing under a UV/LED lamp are crucial. A glossy top coat also enhances the effect.
Can I do this design with regular nail polish?
While possible, achieving the same photo-real finish is more challenging with regular polish. Gel polish provides a smoother, more durable finish.
What if I'm not good at fine details?
Practice on a nail wheel first to improve your technique. You can also use stencils or decals to create more intricate designs.
How long will this design last?
With proper application and aftercare, this gel manicure can last up to two weeks without chipping or peeling.
What is the best way to remove gel polish without damaging my nails?
Soak your nails in acetone after gently filing the top coat. Avoid picking or scraping the polish off, as this can damage the nail bed.
Can I change the shape and length?
Yes! Adapt the shape and length to suit your personal preference. Shorter nails can still achieve a beautiful and elegant look.
Aftercare Tips
- ✓Moisturize hands and nails regularly.
- ✓Avoid picking or biting your nails.
- ✓Schedule a professional manicure for removal to prevent damage.
Safe Removal
- 1.Gently file the top coat to break the seal.
- 2.Soak nails in acetone for 10-15 minutes. Gently push off the softened gel polish with a cuticle pusher.