
Photo-real Salon Ombre Nails - Ombre nail art - featuring nail art, red - nail art inspiration and design ideas
Photo-real Salon Ombre Nails
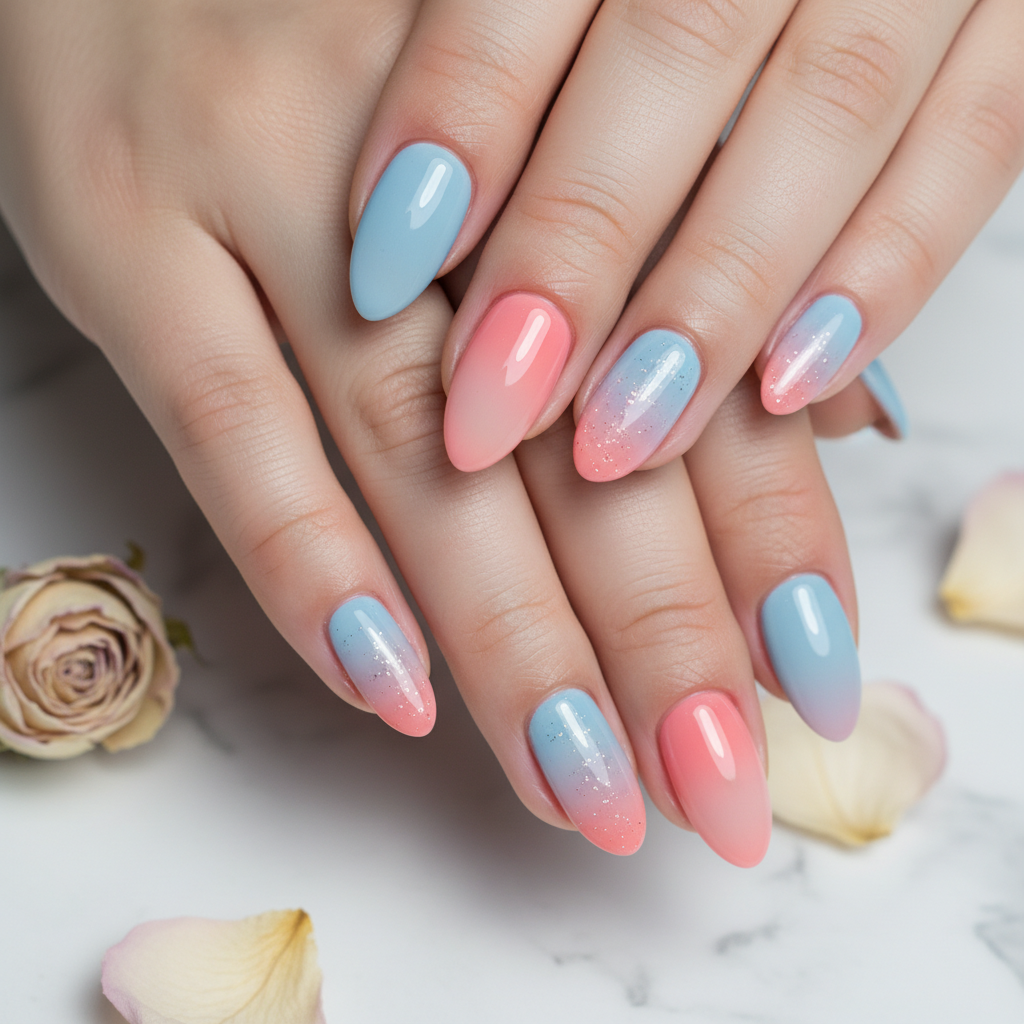
Flawless Salon Ombre Nails: Gradient Perfection
Achieve photo-real salon-quality ombre nails at home with this stunning design. This tutorial guides you through creating a seamless gradient for a professional and polished look.
Flawless Salon Ombre Nails: Gradient Perfection
Achieve photo-real salon-quality ombre nails at home with this stunning design. This tutorial guides you through creating a seamless gradient for a professional and polished look.
- Light pink nail polish
- White nail polish
- Cosmetic sponge
- Base coat
- Top coat
- Liquid latex or cuticle protector
- Apply a base coat to protect your natural nails and let it dry completely.
- Apply 2 coats of light pink nail polish and let them dry completely.
- On a cosmetic sponge, apply strips of light pink and white nail polish next to each other.
- Dab the sponge onto your nails, starting from the base and blending upwards to create the ombre effect. Repeat until the desired gradient is achieved.
- Clean up any excess polish on your skin using a brush and acetone.
- Apply a glossy top coat to seal the design and add shine. Let it dry completely.
Techniques
Expert Tip
For a smoother gradient, dampen the cosmetic sponge slightly before applying the polish. This helps the colors blend more seamlessly and prevents the sponge from absorbing too much product.
Similar Styles

Beautiful Photo-real Salon Ombre Nails
Ombre inspired nail art with beautiful, photo-real finish and professional salon quality

Gorgeous Photo-real Salon Ombre Nails
Ombre inspired nail art with gorgeous, photo-real finish and professional salon quality

Stunning Photo-real Salon Ombre Nails
Ombre inspired nail art with stunning, photo-real finish and professional salon quality

Sophisticated Photo-real Salon Ombre Nails
Ombre inspired nail art with sophisticated, photo-real finish and professional salon quality

Photo-real Salon Ombre Nails
Ombre inspired nail art with elegant, photo-real finish and professional salon quality

Photo-real Salon Ombre Nails
Ombre inspired nail art with clean, photo-real finish and professional salon quality

Photo-real Salon Ombre Nails
Ombre inspired nail art with clean, photo-real finish and professional salon quality
Explore Similar Designs
Colors in this Design
Techniques Used
Frequently Asked Questions
Can I use regular makeup sponges for this design?
Yes, but cosmetic sponges with a finer texture will yield the best results. Avoid sponges with large pores.
How do I prevent the polish from getting all over my skin?
Apply liquid latex or a cuticle protector around your nails before applying the sponge.
What if I don't have liquid latex?
You can use petroleum jelly (Vaseline) around your nails as a barrier, but be careful not to get it on the nail itself.
How long does it take for the ombre nails to dry completely?
It depends on the polish, but typically 30-60 minutes. Use a quick-drying top coat to speed up the process.
Can I use gel polish for this design?
Yes, you can, but you'll need a UV/LED lamp to cure each layer.
Is this design suitable for short nails?
Absolutely! Ombre looks great on nails of any length.
Aftercare Tips
- ✓Use cuticle oil daily to keep your nails and cuticles hydrated.
- ✓Avoid picking or biting your nails.
- ✓Moisturize your hands regularly.
Safe Removal
- 1.Soak cotton pads in acetone-based nail polish remover.
- 2.Place the cotton pads on your nails and wrap them in foil. Let them sit for 5-10 minutes.
- 3.Remove the foil and cotton pads, and gently scrape off any remaining polish.