
Photo-real Salon Luxury Nails - Luxury nail art - featuring nail art, red - nail art inspiration and design ideas
Photo-real Salon Luxury Nails
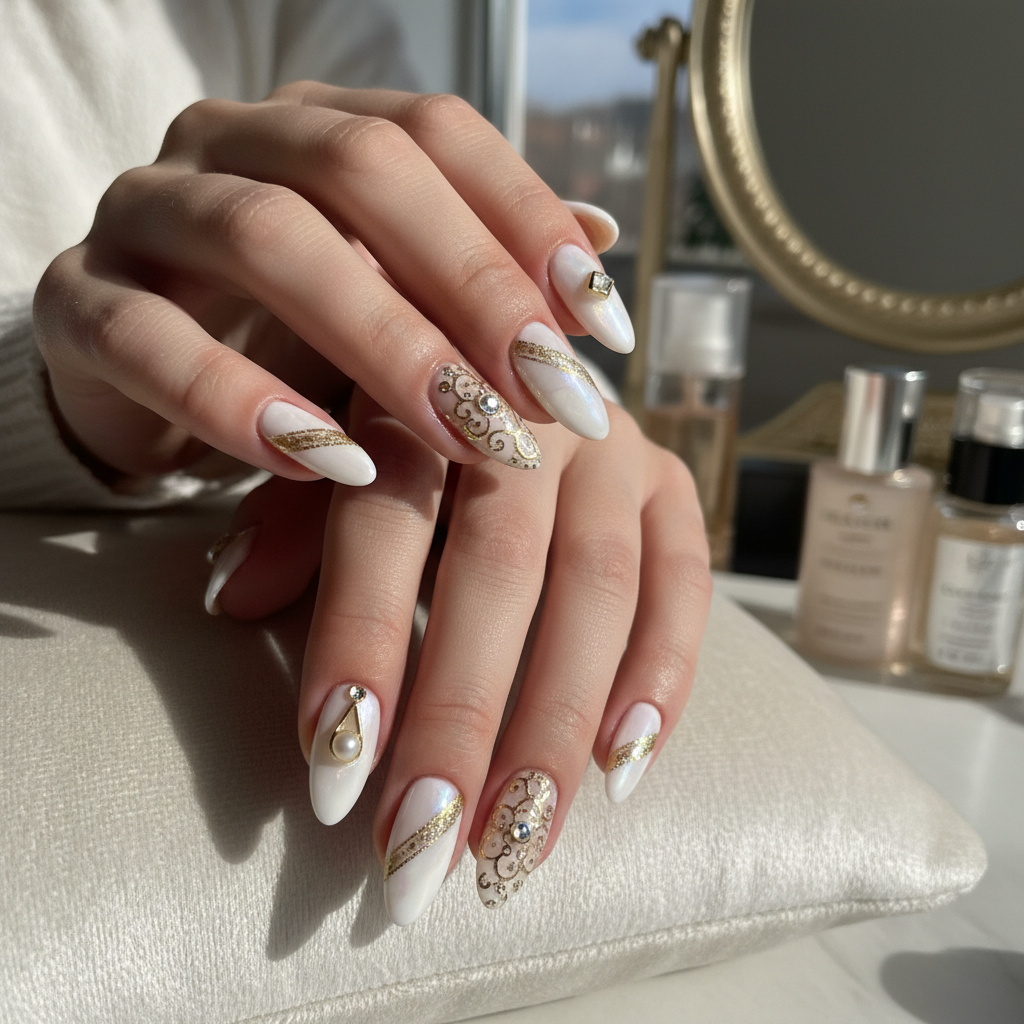
Photo-Real Cream & Gold Flake Luxury Salon Nails
Experience true salon luxury with this exquisite nail art design, featuring a pristine creamy white gel base perfected to a 'photo-real' finish. Delicate gold foil flakes are artfully encapsulated on accent nails, creating a sophisticated and effortlessly opulent manicure.
- Gel Base Coat
- Opaque Creamy White Gel Polish
- Fine Gold Nail Art Flakes/Foil
- Self-Leveling High-Gloss Gel Top Coat
- UV/LED Curing Lamp
- Nail Cleaner/Wipe
- Prepare nails by shaping, buffing, and cleaning. Apply a thin layer of gel base coat and cure.
- Apply two thin, even coats of the creamy white gel polish, curing each layer thoroughly for opaque coverage.
- On desired accent nails (typically ring fingers), apply a thin layer of clear gel or a second, uncured coat of top coat. Carefully pick up and strategically place small gold foil flakes onto the tacky surface.
- Encapsulate the gold flakes and achieve the 'photo-real' finish by applying a generous, self-leveling layer of high-gloss gel top coat over all nails, ensuring flakes are fully submerged and the surface is perfectly smooth. Cure completely.
- Wipe off the inhibition layer with a gel cleanser for a brilliant, non-tacky shine and apply cuticle oil.
Expert Tip
Achieving the 'photo-real' finish is all about precise gold flake placement and a perfectly smooth, self-leveled top coat. Ensure flakes lay flat and apply enough top coat to fully encapsulate them without creating bulk, then cure thoroughly for maximum shine and durability.
Similar Styles


Explore Similar Designs
Colors in this Design
Perfect For
Nail Shapes
Frequently Asked Questions
Aftercare Tips
- ✓Avoid prolonged water exposure or hot showers for the first 24 hours to ensure optimal gel adhesion.
- ✓Keep your hands moisturized, focusing on cuticles and surrounding skin to maintain flexibility.
- ✓Resist the urge to pick or peel at your manicure, which can damage your natural nail plate.
Safe Removal
- 1.Gently file off the top layer of gel to break the seal, being careful not to file into your natural nail.
- 2.Soak cotton pads in 100% pure acetone, place them on each nail, and wrap tightly with foil for 10-15 minutes.
- 3.Gently push off the softened gel with an orange wood stick. Never force or scrape if the gel isn't ready.