Stunning Photo-real Salon Glitter Application Nails - Glitter Application nail art - featuring nail art, glitter, red - nail art inspiration and design ideas
Stunning Photo-real Salon Glitter Application Nails
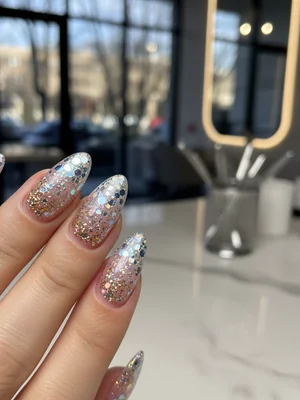
Photo-Real Salon Glitter Nails: Dazzling Sparkle Perfection
Experience the ultimate sparkle with our Photo-Real Salon Glitter Nails, where dazzling glitter is applied with such precision it appears flawlessly smooth. This design elevates traditional glitter application to an art form, promising a high-end, professional salon finish that catches every light and feels incredibly sleek.
- High-quality ultrafine glitter
- Builder gel or clear hard gel
- Gel polish base coat
- Non-wipe high-gloss topcoat
- Precision glitter brush/applicator
- LED/UV nail lamp
- Prep nails: clean, file, push cuticles, dehydrate and apply bond.
- Apply gel base coat and cure under LED/UV lamp.
- Apply a thin, even layer of builder gel or clear hard gel over the entire nail (do not cure).
- Gently pat or sprinkle desired ultrafine glitter evenly over the wet gel layer, ensuring full, smooth coverage.
- Lightly encapsulate the glitter with another thin layer of builder gel or clear hard gel, ensuring a smooth, level surface, then cure.
- Finish with a non-wipe high-gloss topcoat and cure for that ultimate photo-real shine.
Colors in This Design
Expert Tip
For the ultimate photo-real finish, use ultrafine glitters and ensure each layer of gel is thin and evenly applied, building up the sparkle gradually before fully encapsulating for a perfectly smooth, glass-like surface.
Similar Styles
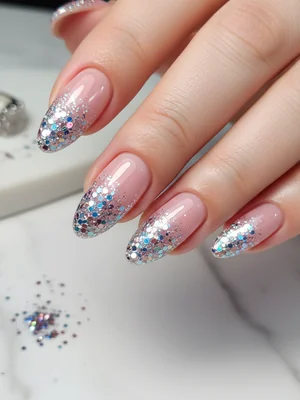
Beautiful Photo-real Salon Glitter Application Nails
Glitter Application inspired nail art with beautiful, photo-real finish and professional salon quality
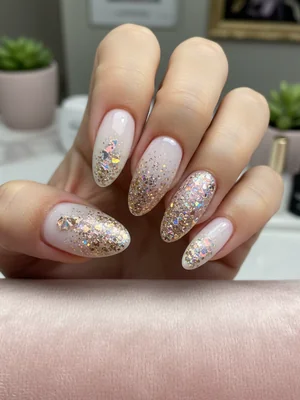
Gorgeous Photo-real Salon Glitter Application Nails
Glitter Application inspired nail art with gorgeous, photo-real finish and professional salon quality
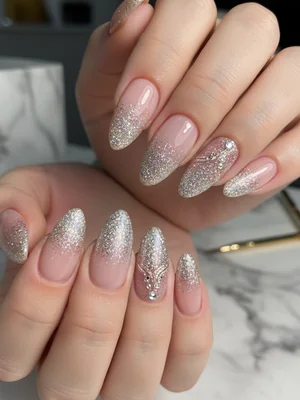
Sophisticated Photo-real Salon Glitter Application Nails
Glitter Application inspired nail art with sophisticated, photo-real finish and professional salon quality
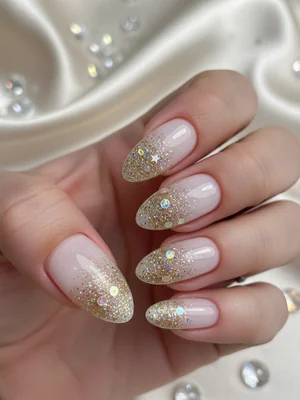
Photo-real Salon Glitter Application Nails
Glitter Application inspired nail art with elegant, photo-real finish and professional salon quality
Photo-real Salon Glitter Application Nails
Glitter Application inspired nail art with clean, photo-real finish and professional salon quality

Photo-real Salon Glitter Application Nails
Glitter Application inspired nail art with clean, photo-real finish and professional salon quality
Photo-real Salon Glitter Application Nails
Glitter Application inspired nail art with clean, photo-real finish and professional salon quality
Explore Similar Designs
Colors in this Design
Techniques Used
Perfect For
Nail Shapes
Frequently Asked Questions
How long does this design last?
Typically 2-3 weeks, depending on your natural nail growth, daily activities, and adherence to aftercare.
Can I get this look with regular polish?
Achieving the 'photo-real' smooth finish is significantly harder with regular polish; gel or acrylic is recommended for the best, most durable results.
Will the glitter feel rough or textured?
No, the hallmark of this specific glitter application design is its perfectly smooth, encapsulated finish, unlike traditional loose glitter applications.
Can I choose any glitter color?
Absolutely! The beauty of this technique is that it can be adapted to almost any glitter color or blend you desire, from classic metallics to vibrant jewel tones.
Is this design damaging to my natural nails?
When applied and removed correctly by a trained professional, following proper techniques, it should not damage your natural nails.
What's the key difference between this and regular glitter nails?
The key difference is the 'photo-real' smoothness, depth, and highly refined finish, achieved by meticulous layering and encapsulation of the glitter for a truly professional, high-end look.
Aftercare Tips
- ✓Allow at least 24 hours for full adhesion before excessive water exposure or heavy-duty tasks.
- ✓Avoid harsh chemicals or abrasives directly on your nails immediately after application.
- ✓Keep nails hydrated with nourishing oils and hand cream to maintain flexibility.
- ✓Gently file any snags or rough edges immediately to prevent further damage.
Safe Removal
- 1.Gently file off the topcoat to break the seal over the glitter application.
- 2.Soak nails in acetone for 10-15 minutes or until the product softens.
- 3.Carefully push off softened product with a wooden stick, never force or peel.