Gorgeous Photo-real Salon French Tips Nails - French Tips nail art - featuring nail art, red - nail art inspiration and design ideas
Gorgeous Photo-real Salon French Tips Nails
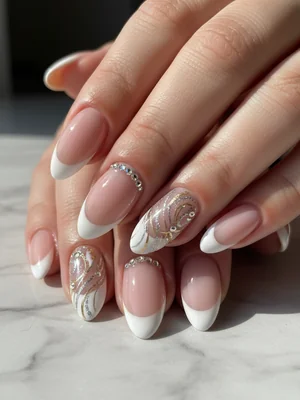
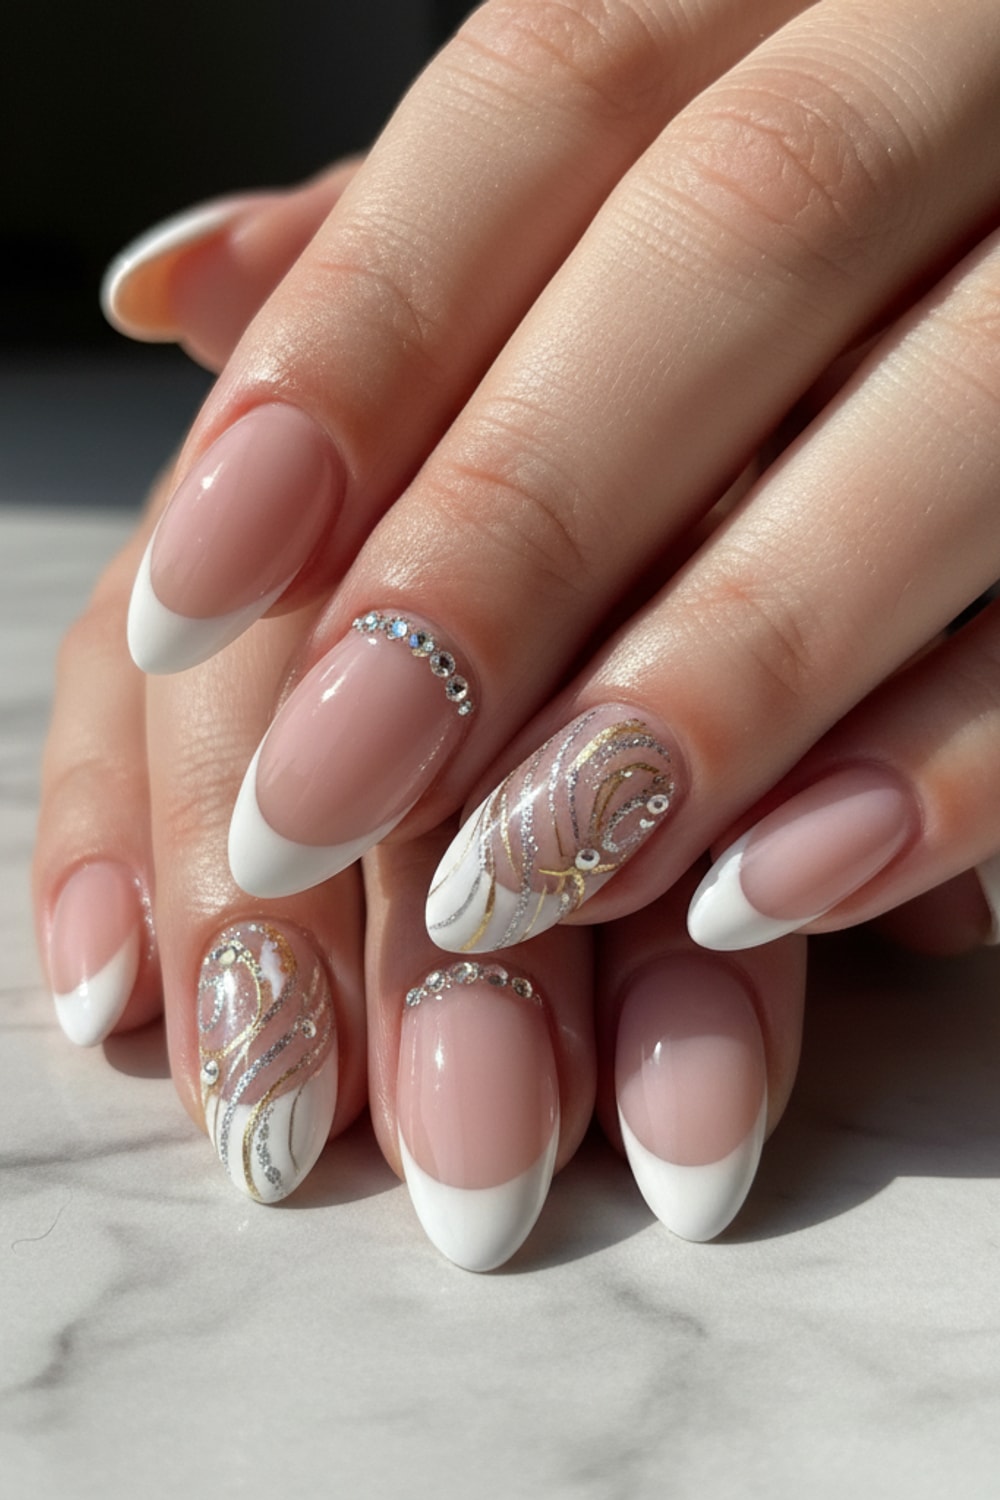
Flawless Photo-Real Salon French Tips: Crisp & Elegant
Experience the epitome of nail artistry with our Photo-Real Salon French Tips, designed for unparalleled elegance. This classic French Tips design boasts a pristine, crisp white tip and a flawlessly smooth, natural-looking base, embodying professional salon quality with every stroke. Achieve that 'just stepped out of the salon' look with a finish so perfect, it's truly photo-ready.
- Premium Builder Gel (Sheer Nude/Pink)
- Opaque White Gel Polish
- Fine Liner Brush (000 size)
- High-Gloss Gel Top Coat
- Nail Dehydrator & Primer
- Lint-Free Wipes & Cleanser
- Thoroughly prep nails: file, buff, push back cuticles, dehydrate, and prime for optimal adhesion.
- Apply a thin, even layer of sheer nude or pink builder gel for the base, ensuring perfect apex and C-curve, then cure.
- Using a fine liner brush and opaque white gel, meticulously freehand paint the perfect, crisp C-curve tip, aiming for absolute symmetry. Cure.
- Apply a second thin layer of white gel to the tip if needed for full opacity, ensuring no thickness, then cure again.
- Cap the entire nail with a high-gloss top coat, sealing the edges and creating a flawless, 'photo-real' shine. Cure completely.
- Cleanse the inhibition layer with alcohol and apply cuticle oil for a professional, hydrated finish.
Techniques
Expert Tip
Achieving that 'photo-real' crispness lies in thin, even layers of white gel and a very steady hand with your liner brush. Practice painting on a nail wheel first to perfect your C-curve and ensure a perfectly uniform line before applying to the client's nails. Use an angled brush or a precise clean-up brush dipped in alcohol to sharpen any imperfect lines before curing.
Similar Styles
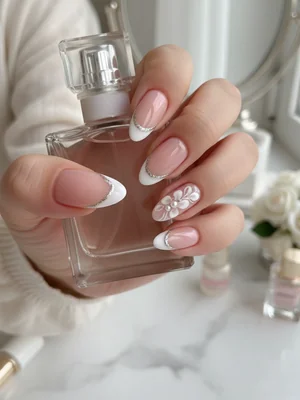
Beautiful Photo-real Salon French Tips Nails
French Tips inspired nail art with beautiful, photo-real finish and professional salon quality
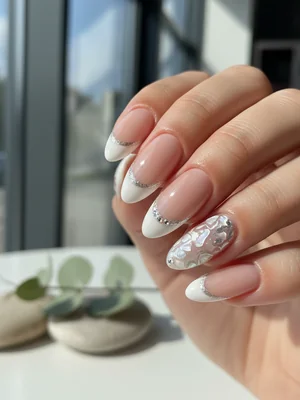
Stunning Photo-real Salon French Tips Nails
French Tips inspired nail art with stunning, photo-real finish and professional salon quality
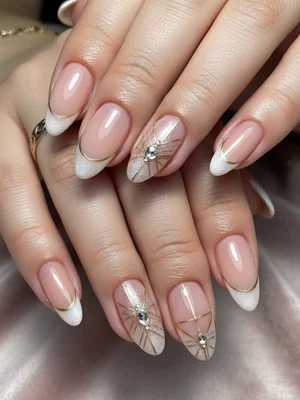
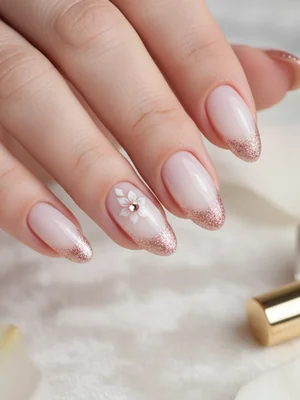
Sophisticated Photo-real Salon French Tips Nails
French Tips inspired nail art with sophisticated, photo-real finish and professional salon quality
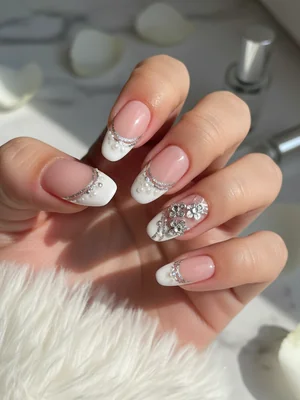
Photo-real Salon French Tips Nails
French Tips inspired nail art with elegant, photo-real finish and professional salon quality
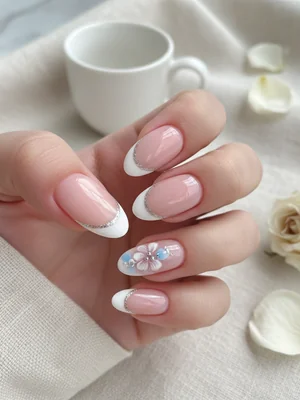
Photo-real Salon French Tips Nails
French Tips inspired nail art with clean, photo-real finish and professional salon quality
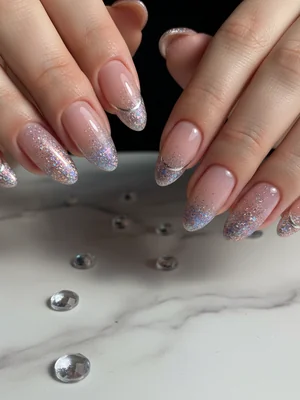
Photo-real Salon French Tips Nails
French Tips inspired nail art with clean, photo-real finish and professional salon quality
Photo-real Salon French Tips Nails
French Tips inspired nail art with clean, photo-real finish and professional salon quality
Explore Similar Designs
Colors in this Design
Techniques Used
Perfect For
Nail Shapes
Frequently Asked Questions
What makes these French Tips 'photo-real'?
The 'photo-real' aspect refers to the incredibly precise, sharp lines, perfectly uniform opacity of the white tip, and a glass-like glossy finish on the base. It’s a level of perfection that looks flawless even under close scrutiny and in high-definition photos.
How long do these professional French Tips typically last?
With proper application and aftercare, these gel-based French Tips can last 3-4 weeks before needing a fill or removal, maintaining their crispness and shine.
Can I achieve this 'salon quality' look at home?
While possible with extensive practice, the 'photo-real' salon quality requires advanced skill, a steady hand, and professional-grade products. We recommend trusting a skilled nail artist for the best results.
What's the best base color for a natural look?
A sheer nude or soft pink builder gel that complements your skin tone is ideal. It should be just transparent enough to look natural while providing a healthy, even tone.
Is this design suitable for shorter nails?
Absolutely! A well-executed French tip, even on shorter nails, can elongate the nail bed and still provide that sophisticated, clean aesthetic. The key is to adjust the thickness of the white tip proportionally.
How often should I get my French Tips re-done?
For optimal appearance and to prevent lifting or damage, we recommend a re-application or fill every 2-3 weeks, depending on your natural nail growth.
Aftercare Tips
- ✓Moisturize hands and cuticles regularly to promote nail health and flexibility.
- ✓Avoid prolonged exposure to water right after your appointment.
- ✓Resist picking or peeling at the polish, as this can damage your natural nail.
- ✓Apply a thin layer of clear top coat every few days to refresh the shine and add protection.
Safe Removal
- 1.Gently file down the top coat to break the seal, avoiding filing into the natural nail.
- 2.Soak nails in acetone-soaked cotton pads wrapped in foil for 10-15 minutes.
- 3.Carefully scrape off the softened gel with a wooden stick; do not force it. Repeat soaking if necessary.