
Photo-real Salon Floral Nails - Floral nail art - featuring nail art, floral, red - nail art inspiration and design ideas
Photo-real Salon Floral Nails
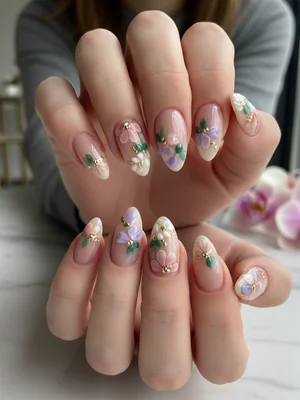
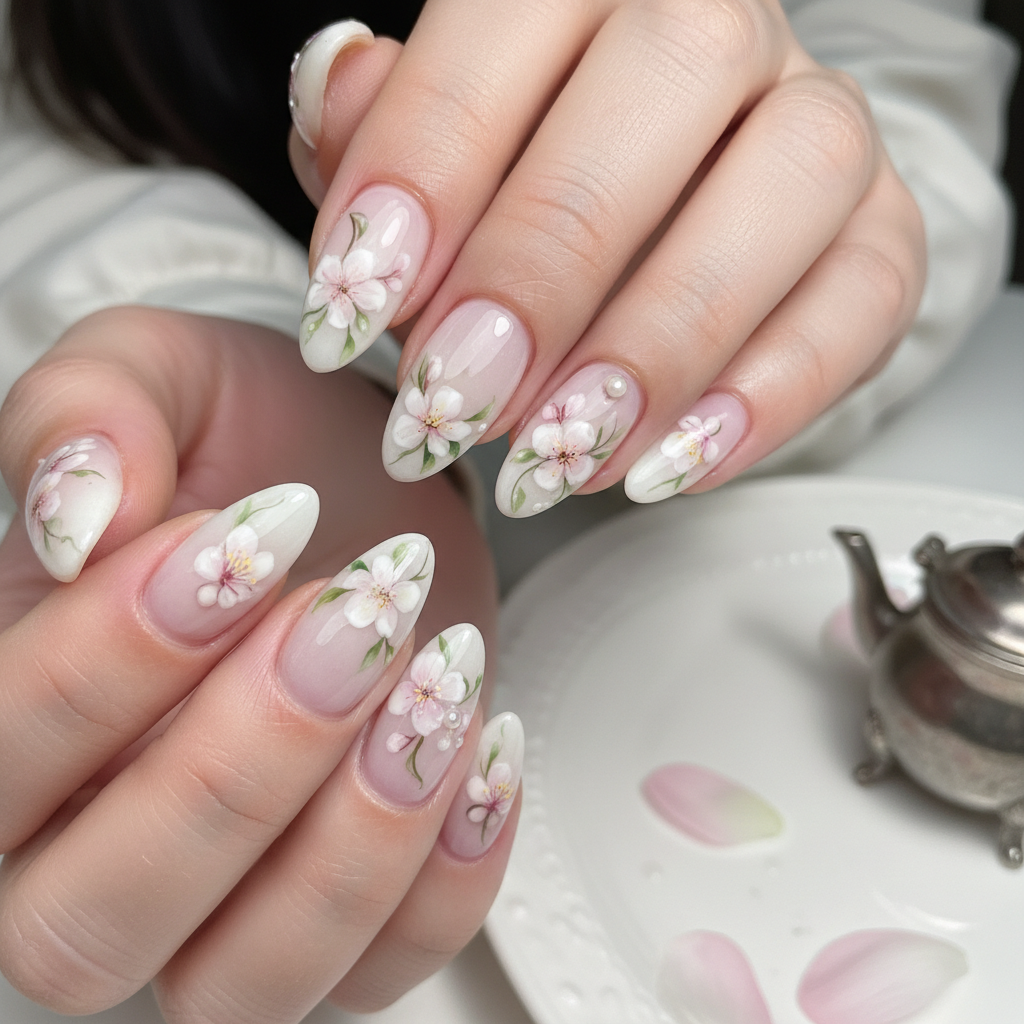
Elegant Photo-Real Floral Nails: Salon-Quality Art
Experience the delicate beauty of a botanical garden at your fingertips. This design features meticulously hand-painted, photo-realistic florals on a clean, neutral base, offering a sophisticated and timeless look with professional salon quality.
Elegant Photo-Real Floral Nails: Salon-Quality Art
Experience the delicate beauty of a botanical garden at your fingertips. This design features meticulously hand-painted, photo-realistic florals on a clean, neutral base, offering a sophisticated and timeless look with professional salon quality.
- Sheer nude or pink builder gel for a clean base
- Ultra-fine detail nail art brush (00 or smaller)
- High-pigment artistic gel paints in various floral and leaf shades
- A palette for mixing custom colors
- High-shine, no-wipe gel top coat
- UV/LED curing lamp
- Prep the nail and apply one to two coats of a sheer nude base gel, curing after each layer.
- Using a fine detail brush, sketch the basic outline of your main flower with a light pink or white gel paint.
- Begin layering darker shades from the center of the flower outwards, blending gently to create depth and shadow for a 3D effect. Cure for 30-60 seconds.
- Add delicate leaves using a sage green, adding a darker green for vein details. Use a touch of white to create highlights on the petals and leaves, enhancing the photo-realistic look. Cure again.
- Repeat the process for smaller accent florals or buds on the same or other nails, ensuring a balanced composition.
- Finish with a high-shine, no-wipe top coat, making sure to cap the free edge for a durable, salon-quality finish. Cure for a final 60 seconds.
Perfect For
Expert Tip
For ultimate realism, mix your gel paint colors on a palette to create custom, in-between shades. Never use a color straight from the bottle; subtle variations are key to mimicking nature.
Similar Styles
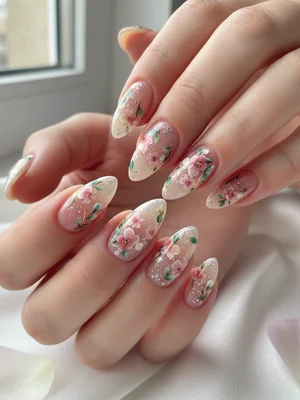
Sophisticated Photo-real Salon Floral Nails
Floral inspired nail art with sophisticated, photo-real finish and professional salon quality
Sophisticated Photo-real Salon Floral Nails
Floral inspired nail art with sophisticated, photo-real finish and professional salon quality

Photo-real Salon Floral Nails
Floral inspired nail art with elegant, photo-real finish and professional salon quality
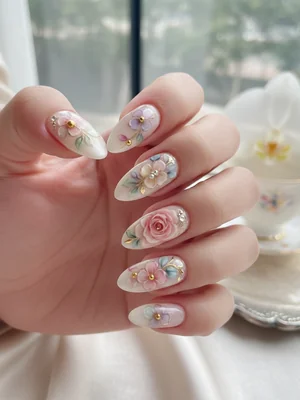
Photo-real Salon Floral Nails
Floral inspired nail art with elegant, photo-real finish and professional salon quality

Sophisticated Photo-real Salon Floral Nails
Floral inspired nail art with sophisticated, photo-real finish and professional salon quality
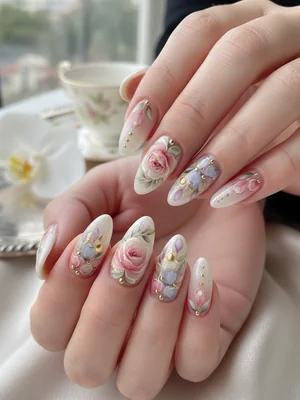
Photo-real Salon Floral Nails
Floral inspired nail art with elegant, photo-real finish and professional salon quality

Photo-real Salon Floral Nails
Floral inspired nail art with clean, photo-real finish and professional salon quality

Photo-real Salon Floral Nails
Floral inspired nail art with clean, photo-real finish and professional salon quality

Photo-real Salon Floral Nails
Floral inspired nail art with clean, photo-real finish and professional salon quality

Photo-real Salon Floral Nails
Floral inspired nail art with clean, photo-real finish and professional salon quality

Photo-real Salon Floral Nails
Floral inspired nail art with clean, photo-real finish and professional salon quality
Explore Similar Designs
Colors in this Design
Techniques Used
Perfect For
Nail Shapes
Frequently Asked Questions
How long does a photo-real floral manicure last?
With proper care and a durable gel top coat, this design can last 2-4 weeks without chipping or fading.
Can this be done with regular nail polish?
It's extremely difficult. The slow drying time of regular polish makes the necessary layering and blending for a photo-real effect nearly impossible. Gel paint is highly recommended.
What's the difference between this and regular floral nails?
Photo-real nails focus on realistic shading, depth, and detail to mimic a photograph, whereas standard floral nails are often more stylized, flat, or abstract.
How do I find a nail artist who can do this?
Look for artists who specialize in hand-painted nail art. Check their portfolios for examples of detailed, intricate work and fine-line painting.
Does this design damage my natural nails?
The design itself does not. Damage is caused by improper application or removal. Always seek a professional for both to ensure your nail health is maintained.
Can I get this on short nails?
While possible, the detail is best showcased on medium to long nails which provide a larger canvas. A simplified, single-bloom version can be adapted for shorter nails.
Aftercare Tips
- ✓Wear gloves when doing household chores, especially involving prolonged water exposure.
- ✓Be gentle with your hands for the first 24 hours to allow the gel to fully settle.
- ✓Moisturize your hands and cuticles frequently to frame the artwork beautifully.
- ✓Avoid picking at or filing the nails, which can break the top coat's seal.
Safe Removal
- 1.Gently file off the top coat to break the seal, being careful not to file the natural nail.
- 2.Soak a cotton ball in acetone, place it on the nail, and wrap it securely with foil for 10-15 minutes.
- 3.Gently push away the softened gel with an orangewood stick or cuticle pusher. Re-wrap if necessary, never force it.