Photo-real Salon Embellished Nails - Embellished nail art - featuring nail art, elegant, red - nail art inspiration and design ideas
Photo-real Salon Embellished Nails
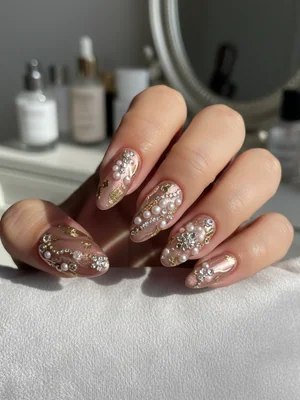
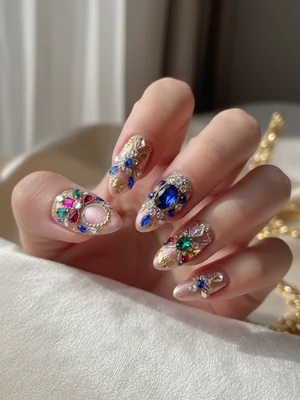
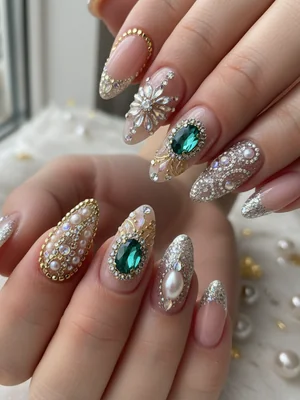
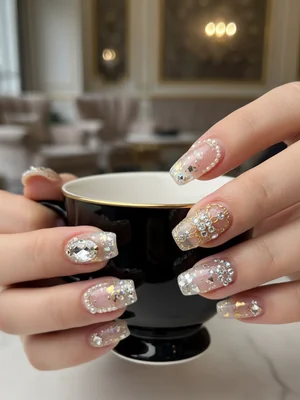
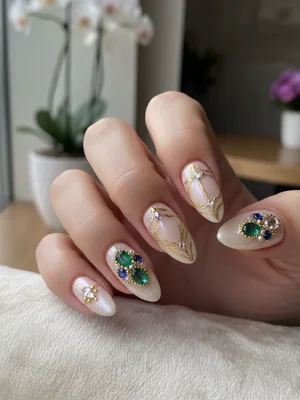
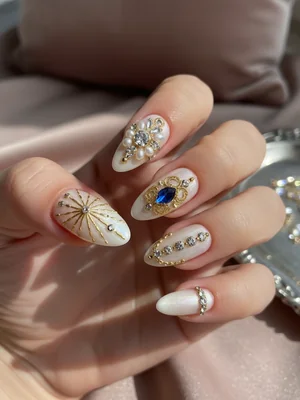
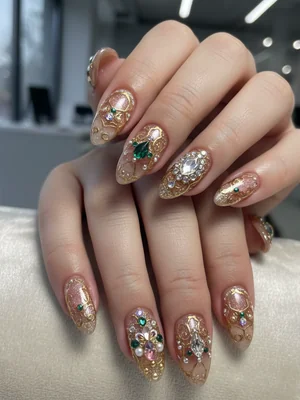
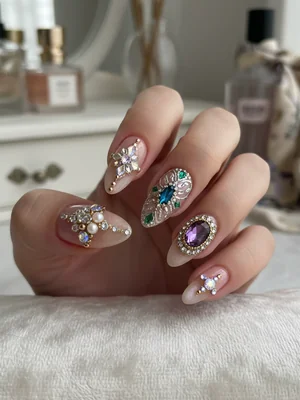
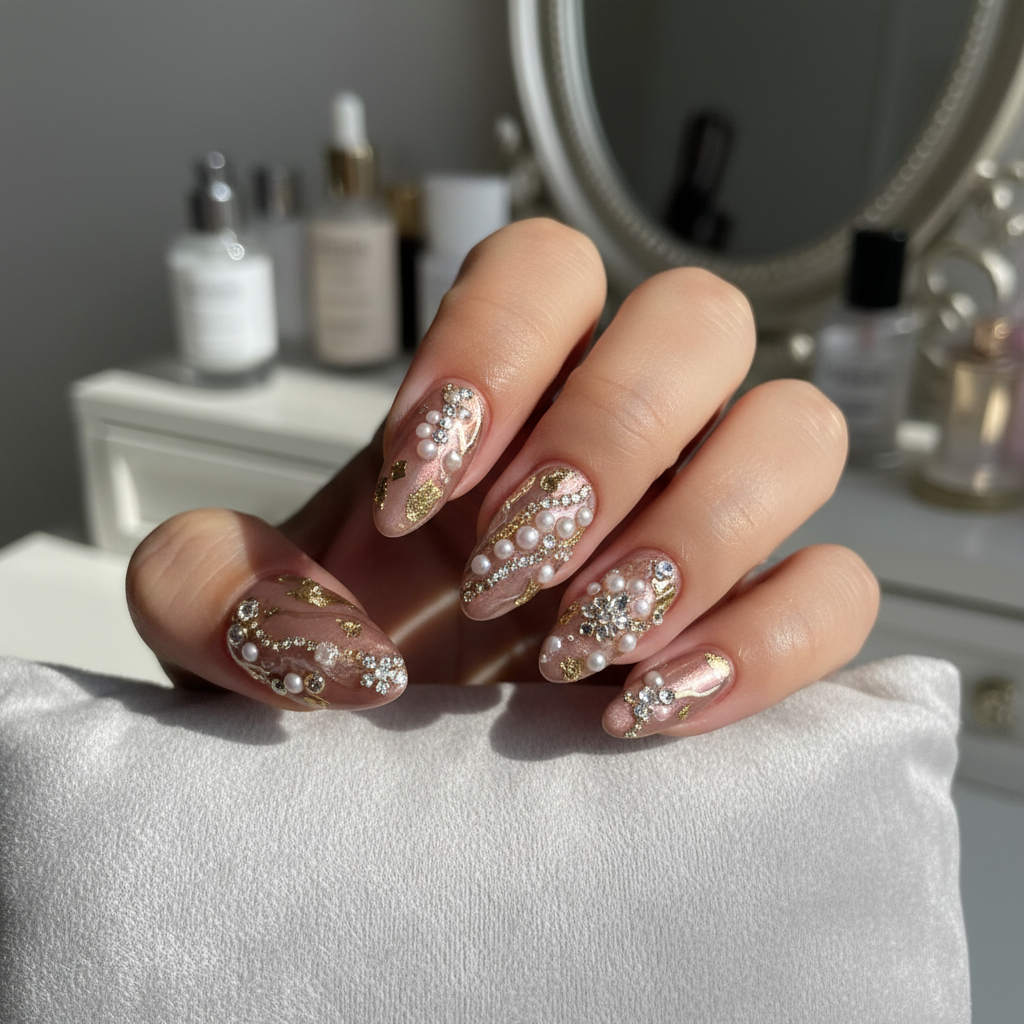
Photo-Real Blossom Embellished Nails: Elegant Salon Artistry
This exquisite design marries the delicate artistry of miniature, photo-realistic hand-painted elements with subtle, elegant embellishments. Imagine tiny, lifelike blossoms or intricate lace patterns brought to life on your nails, framed by a professional, high-gloss finish. It's a true salon masterpiece designed for those who appreciate unparalleled detail and sophisticated luxury.
- High-quality gel polish in nude/pastel base shades
- Ultra-fine detail brushes (e.g., 000, liner brush)
- Artist's palette for color mixing
- Tiny, flat-back Swarovski crystals or pearls
- Strong nail art adhesive gel/resin
- Non-wipe top coat
- UV/LED curing lamp
- **Nail Prep & Base Application**: File, buff, push cuticles, dehydrate. Apply a gel base coat and cure. Apply 1-2 coats of your chosen nude/pastel base color, curing each layer.
- **Photo-Real Micro-Painting**: Using ultra-fine brushes and selected gel polishes, meticulously hand-paint the intricate, photo-realistic details (e.g., delicate petals, lace segments, tiny leaves). Cure lightly after each complex layer to lock in detail.
- **Embellishment Placement**: Apply a tiny dot of strong nail art adhesive gel where each embellishment will go. Carefully place tiny crystals or pearls using a wax-tipped tool, embedding them slightly for security. Flash cure briefly to hold in place.
- **Seal & Finish**: Encapsulate the embellishments with a thin layer of builder gel or specialized embellishment top coat for extra security, if needed, avoiding covering the entire gem surface if it's meant to sparkle. Finish with a high-shine non-wipe top coat over the entire nail, ensuring smooth coverage around painted areas and embellishments.
- **Final Cure & Aftercare**: Perform a full final cure under the UV/LED lamp. Cleanse with alcohol if using a wipe-off top coat, then apply cuticle oil for a perfect finish.
Expert Tip
Achieving photo-realism requires patience and a light hand. Work in thin layers, gradually building up color and shadow. Use a high-quality artist's detail brush and ensure your gel polishes are well-pigmented for sharp lines and vibrant results.
Similar Styles
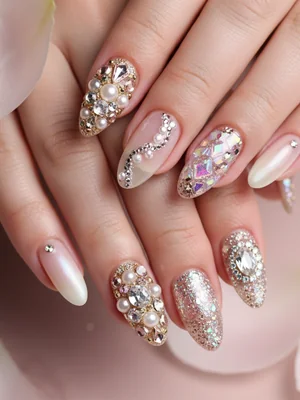
Beautiful Photo-real Salon Embellished Nails
Embellished inspired nail art with beautiful, photo-real finish and professional salon quality
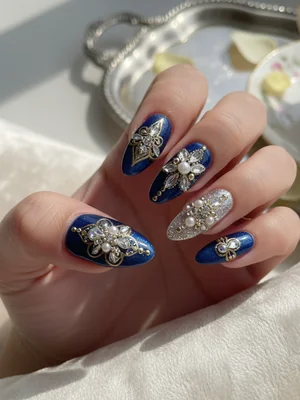
Gorgeous Photo-real Salon Embellished Nails
Embellished inspired nail art with gorgeous, photo-real finish and professional salon quality
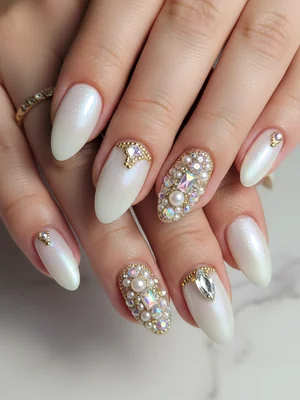
Stunning Photo-real Salon Embellished Nails
Embellished inspired nail art with stunning, photo-real finish and professional salon quality
Beautiful Photo-real Salon Embellished Nails
Embellished inspired nail art with beautiful, photo-real finish and professional salon quality

Beautiful Photo-real Salon Embellished Nails
Embellished inspired nail art with beautiful, photo-real finish and professional salon quality
Gorgeous Photo-real Salon Embellished Nails
Embellished inspired nail art with gorgeous, photo-real finish and professional salon quality
Sophisticated Photo-real Salon Embellished Nails
Embellished inspired nail art with sophisticated, photo-real finish and professional salon quality
Stunning Photo-real Salon Embellished Nails
Embellished inspired nail art with stunning, photo-real finish and professional salon quality
Gorgeous Photo-real Salon Embellished Nails
Embellished inspired nail art with gorgeous, photo-real finish and professional salon quality
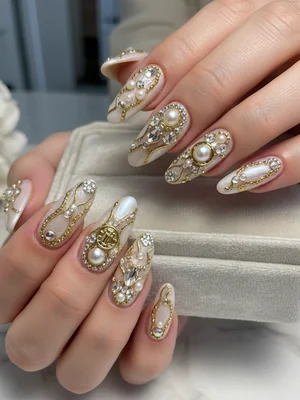
Photo-real Salon Embellished Nails
Embellished inspired nail art with elegant, photo-real finish and professional salon quality
Sophisticated Photo-real Salon Embellished Nails
Embellished inspired nail art with sophisticated, photo-real finish and professional salon quality
Stunning Photo-real Salon Embellished Nails
Embellished inspired nail art with stunning, photo-real finish and professional salon quality
Explore Similar Designs
Colors in this Design
Techniques Used
Perfect For
Nail Shapes
Frequently Asked Questions
How long does this design typically last?
With proper application and aftercare, you can expect this gel design to last 3-4 weeks before a fill or removal is recommended.
Can I customize the photo-real elements?
Absolutely! The beauty of this design is its bespoke nature. We can discuss specific florals, patterns, or even small landscape elements you'd like to incorporate.
Are the embellishments durable?
Yes, we use high-quality, flat-back embellishments secured with a strong adhesive gel and often encapsulated for maximum durability. However, gentle handling is always recommended.
What is the typical time commitment for this intricate design?
Due to the detailed hand-painting and careful embellishment placement, expect your appointment to range from 75 to 90 minutes.
Is this design suitable for shorter nails?
While medium to long nails allow for the most intricate detail, skilled artists can adapt a simplified version of the photo-real elements for shorter lengths, focusing on one or two accent nails.
Aftercare Tips
- ✓Keep your hands and nails moisturized, especially around the cuticles, to maintain nail health and flexibility.
- ✓Wear gloves for household chores and avoid prolonged exposure to harsh chemicals to prevent lifting or dulling of your beautiful design.
Safe Removal
- 1.Gently file off the top coat and any encapsulating gel over the embellishments, being careful not to file into the natural nail.
- 2.Soak cotton pads in acetone, place them on each nail, and wrap tightly with foil for 10-15 minutes.
- 3.Carefully push off the softened gel with a wooden cuticle pusher. Repeat soaking if necessary, never force or peel the gel.