
Photo-real Salon Christmas Day Nails - Christmas Day nail art - featuring nail art, red, christmas - nail art inspiration and design ideas
Photo-real Salon Christmas Day Nails
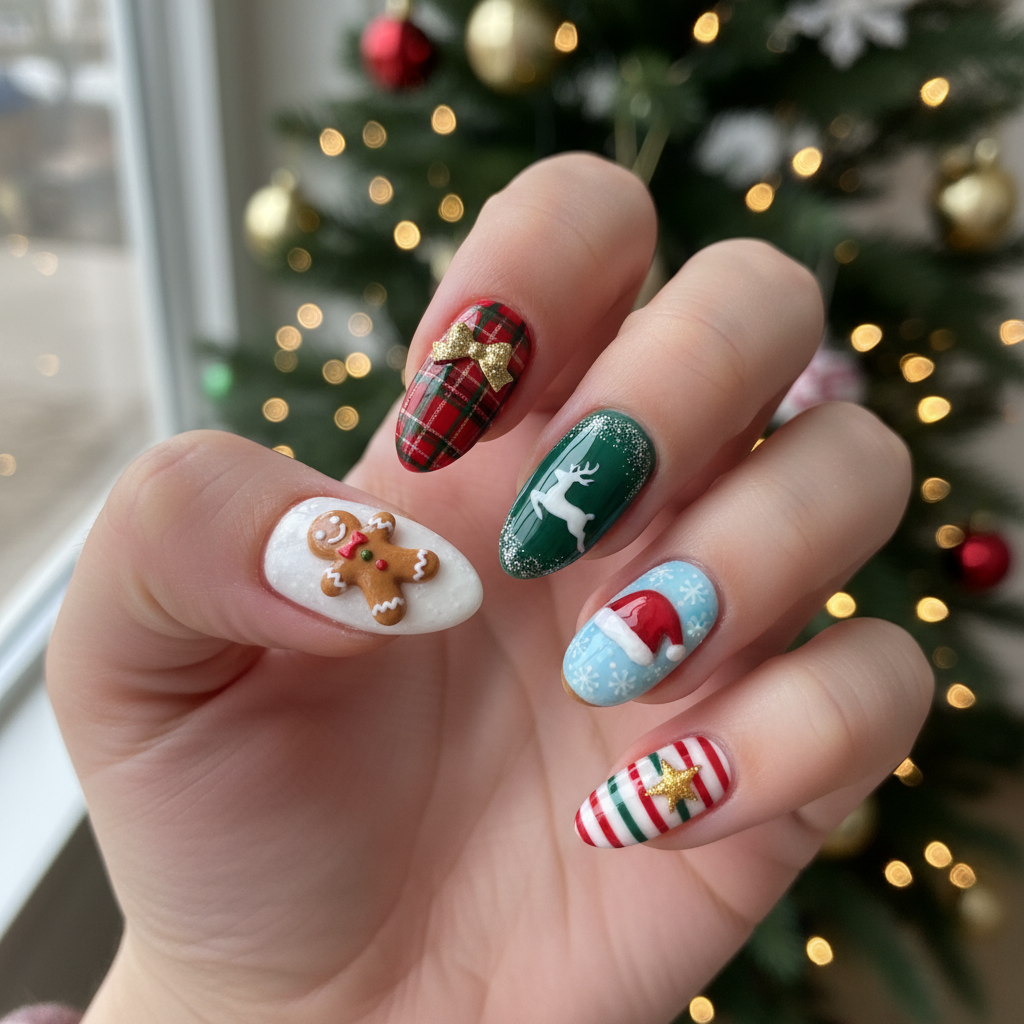
Photo-Real Christmas Day Nail Art: Salon Quality Finish
Embrace the holiday spirit with these stunning photo-real Christmas Day nails. This salon-quality design features intricate details and vibrant colors that capture the magic of Christmas, offering a festive touch to your holiday look.
Photo-Real Christmas Day Nail Art: Salon Quality Finish
Embrace the holiday spirit with these stunning photo-real Christmas Day nails. This salon-quality design features intricate details and vibrant colors that capture the magic of Christmas, offering a festive touch to your holiday look.
- Base Coat
- High-Quality Nail Polishes (Red, Green, White, Gold, Silver)
- Fine Detail Brush
- Top Coat
- Nail Art Decals (optional)
- Nail Art Airbrush (optional)
- Apply a base coat to protect your nails.
- Paint each nail with a base color suitable for the photo-real design (e.g., white or light gray).
- Use a fine detail brush to paint intricate Christmas Day-themed designs, such as Santa, reindeer, or ornaments, ensuring a photo-realistic look.
- Alternatively, apply high-quality nail art decals if hand-painting is too difficult.
- Add glitter or shimmer for extra holiday sparkle.
- Seal the design with a glossy top coat.
Perfect For
Expert Tip
Use a very fine brush and practice your designs on paper before applying them to your nails. Building up thin layers of polish will prevent smudging and create a smoother finish for photo-real details.
Similar Styles


Explore Similar Designs
Techniques Used
Nail Shapes
Frequently Asked Questions
How long does it take to create this nail art?
Creating this photo-real Christmas Day nail art can take between 1 to 1.5 hours, depending on the complexity of the design.
Is it necessary to use decals?
No, decals are optional. You can hand-paint the design using a fine detail brush if you have the skills and patience.
What's the best way to prevent smudging?
Allow each layer of polish to dry completely before applying the next. Use thin layers and avoid rushing the process.
How can I make the photo-real design last longer?
Apply a generous top coat every 2-3 days and avoid harsh chemicals. Also, consider wearing gloves when doing chores.
Can I adapt this design for short nails?
Yes, but you may need to simplify the photo-real elements to fit the smaller surface area. Focus on key details.
Where can I find high-quality nail art decals?
Online retailers like Etsy and Amazon, as well as professional beauty supply stores, offer a wide selection of high-quality nail art decals.
Aftercare Tips
- ✓Moisturize hands and cuticles after removing nail art.
- ✓Consider a nail strengthening treatment to keep nails healthy.
- ✓Give your nails a break between intricate designs to prevent damage.
Safe Removal
- 1.Soak cotton pads in acetone-based nail polish remover.
- 2.Place the pads on your nails and wrap them in foil for 10-15 minutes.
- 3.Gently remove the polish, and moisturize your hands and nails.