
Sophisticated Photo-real Salon Chevron Nails - Chevron nail art - featuring nail art, red - nail art inspiration and design ideas
Sophisticated Photo-real Salon Chevron Nails
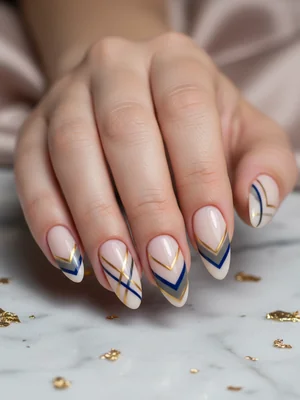
Sophisticated Photo-Real Chevron Nails: Salon Quality Design
Unveil the pinnacle of nail artistry with our Sophisticated Photo-Real Chevron design. This look combines the timeless elegance of the chevron pattern with a stunning, almost three-dimensional finish, meticulously crafted to achieve professional salon quality. Prepare to turn heads with this intricate and polished manicure.
- Gel Polish (Base, Black, White, Metallic Accent, Top Coat)
- Fine Detail Brush (000 or liner brush)
- Striping Tape (optional, for crisp lines)
- LED/UV Curing Lamp
- Nail Cleanser/Wipe
- Cuticle Pusher and Nipper
- Prep nails: Clean, shape, buff, and apply a base coat, curing under LED/UV lamp.
- Apply two coats of primary base color (e.g., White or Black) and cure each layer thoroughly.
- Using striping tape or a steady hand with a fine detail brush, create the initial chevron outline with the contrasting color (e.g., Black over White). Ensure lines are perfectly straight and cured.
- Carefully add a thin line of the metallic accent color parallel to one side of each chevron segment, or use a slightly lighter/darker shade of the main chevron color to create the 'photo-real' shadow/highlight effect, then cure.
- Build up additional chevron layers or refine existing lines with contrasting colors and metallic accents, curing after each layer to achieve the desired depth and precision.
- Finish with a high-gloss, no-wipe top coat, ensuring full coverage to encapsulate the design, and cure for a long-lasting, salon-quality shine.
Expert Tip
Achieving the 'photo-real' effect relies on meticulous layering and precise line work. Think about how light and shadow create dimension. Use a very thin brush and work in small, controlled sections, curing frequently to prevent smudging and ensure crisp edges for a truly salon-quality finish.
Similar Styles

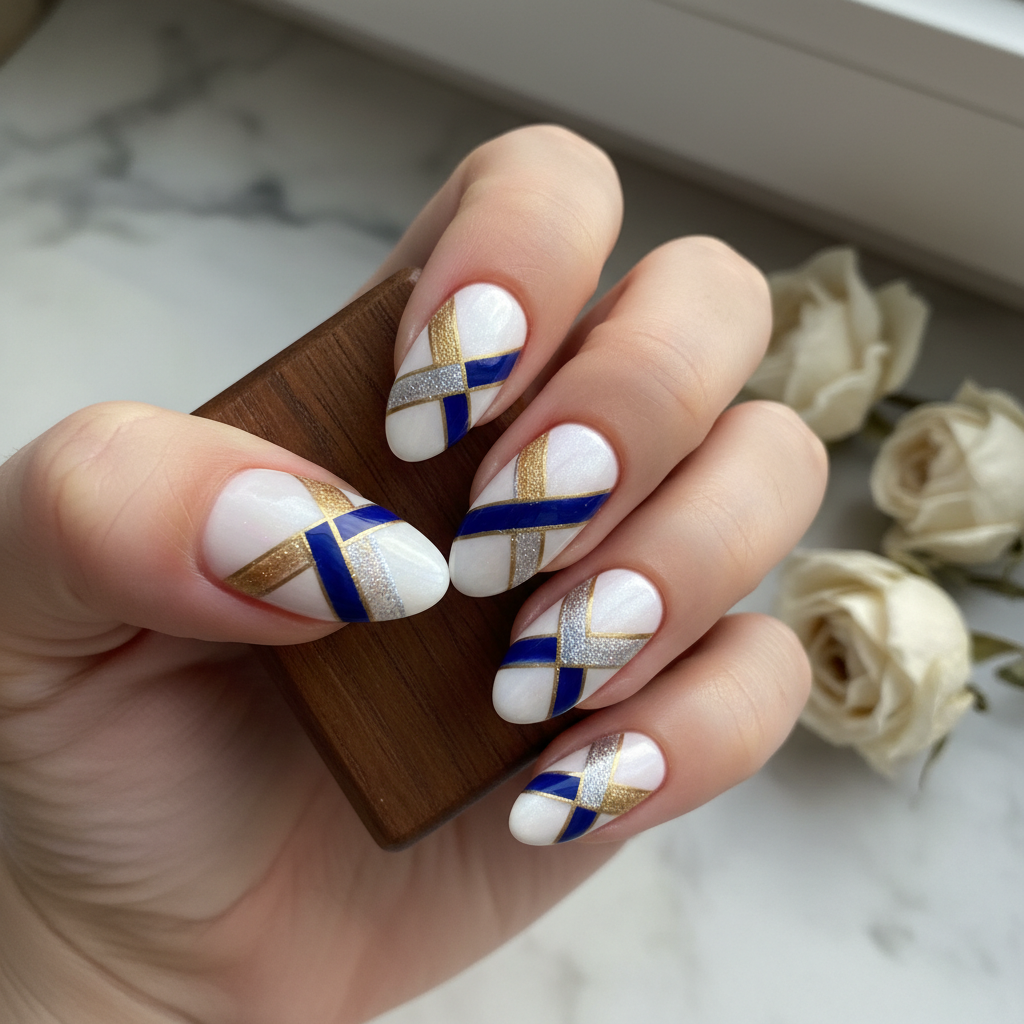
Beautiful Photo-real Salon Chevron Nails
Chevron inspired nail art with beautiful, photo-real finish and professional salon quality

Gorgeous Photo-real Salon Chevron Nails
Chevron inspired nail art with gorgeous, photo-real finish and professional salon quality

Beautiful Photo-real Salon Chevron Nails
Chevron inspired nail art with beautiful, photo-real finish and professional salon quality

Beautiful Photo-real Salon Chevron Nails
Chevron inspired nail art with beautiful, photo-real finish and professional salon quality

Stunning Photo-real Salon Chevron Nails
Chevron inspired nail art with stunning, photo-real finish and professional salon quality

Gorgeous Photo-real Salon Chevron Nails
Chevron inspired nail art with gorgeous, photo-real finish and professional salon quality
Sophisticated Photo-real Salon Chevron Nails
Chevron inspired nail art with sophisticated, photo-real finish and professional salon quality
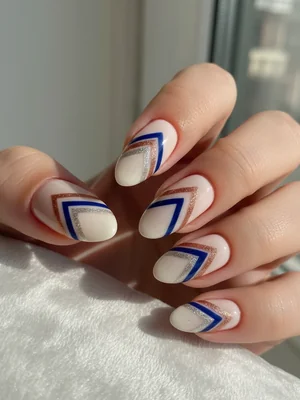
Gorgeous Photo-real Salon Chevron Nails
Chevron inspired nail art with gorgeous, photo-real finish and professional salon quality

Stunning Photo-real Salon Chevron Nails
Chevron inspired nail art with stunning, photo-real finish and professional salon quality

Photo-real Salon Chevron Nails
Chevron inspired nail art with elegant, photo-real finish and professional salon quality

Stunning Photo-real Salon Chevron Nails
Chevron inspired nail art with stunning, photo-real finish and professional salon quality

Sophisticated Photo-real Salon Chevron Nails
Chevron inspired nail art with sophisticated, photo-real finish and professional salon quality
Explore Similar Designs
Colors in this Design
Techniques Used
Perfect For
Nail Shapes
Frequently Asked Questions
How is the 'photo-real' effect achieved in this chevron design?
The 'photo-real' effect is created through meticulous layering of colors, often incorporating a subtle metallic or a slightly varied shade parallel to the main chevron lines to simulate light and shadow, giving the illusion of depth and dimension.
Can I get this sophisticated chevron design on short nails?
While possible on shorter nails, the intricate detailing and 'photo-real' effect are best showcased on medium to long nail lengths, allowing ample space for the precision of the sophisticated chevron pattern.
What's the best way to ensure the chevron lines are perfectly straight?
Achieving perfectly straight chevron lines requires either an extremely steady hand with a fine detail brush or the strategic use of high-quality striping tape applied before each color layer, ensuring crisp edges.
How long does this salon-quality design typically last?
When done with professional gel products and proper application techniques, this sophisticated photo-real chevron design can last 2-3 weeks without chipping or lifting, maintaining its salon quality.
Is this design suitable for DIY at home?
Due to its 'Advanced' difficulty, precision requirements, and the desire for a true 'salon quality' photo-real finish, this sophisticated design is best left to experienced nail artists or professionals, rather than a beginner DIY project.
What if my metallic accent isn't as shiny as I'd like?
Ensure your metallic polish is fully cured and consider applying a thin, clear builder gel over just the metallic lines before your final top coat for an extra pop and protection, enhancing the photo-real glimmer.
Aftercare Tips
- ✓Avoid harsh chemicals and excessive water exposure for the first 24 hours.
- ✓Moisturize hands and cuticles regularly to prolong manicure life.
- ✓Do not pick or peel the gel; this can damage your natural nails.
Safe Removal
- 1.Gently file off the top coat to break the seal.
- 2.Soak nails in acetone for 10-15 minutes (gel polish) or have a professional remove (builder gel/acrylic).
- 3.Carefully push off softened product; do not force.